I get so excited about budget-friendly garden ideas because they prove that you don’t need to spend a fortune to create a beautiful outdoor space. With a little creativity and some smart planning, you can completely refresh your garden while keeping costs low.
What I love about budget garden projects is how personal and meaningful they feel. Each DIY planter, recycled material, or clever design choice carries a sense of pride because you’ve made it your own. It’s not just about saving money, it’s about creating a space that reflects your personality and feels welcoming every time you step outside.
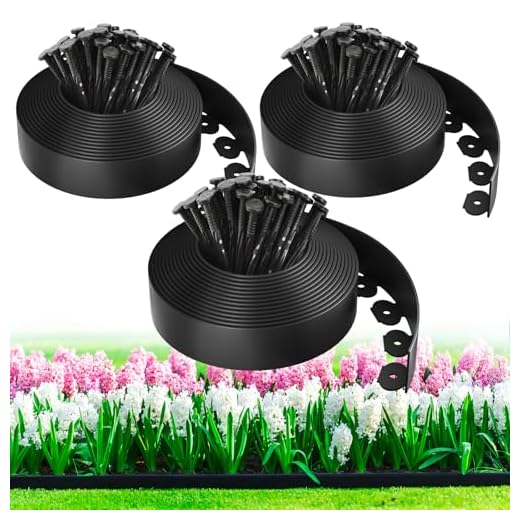
To make these transformations easier, there are a few affordable essentials that can stretch your budget while still giving you stylish results. From versatile planters to solar lights and multipurpose garden tools, these small investments can have a big impact on your garden makeover.



Picture stepping into your backyard where thrifted planters are overflowing with flowers, string lights twinkle above a cozy seating nook, and a DIY stone pathway guides you through vibrant greenery. Everything feels warm and inviting, yet you know it was put together with creativity and care rather than a huge budget.
In the next section, I’ll share some inspiring and affordable ideas to help you transform your outdoor space without breaking the bank.
DIY Container Gardens Using Old Buckets
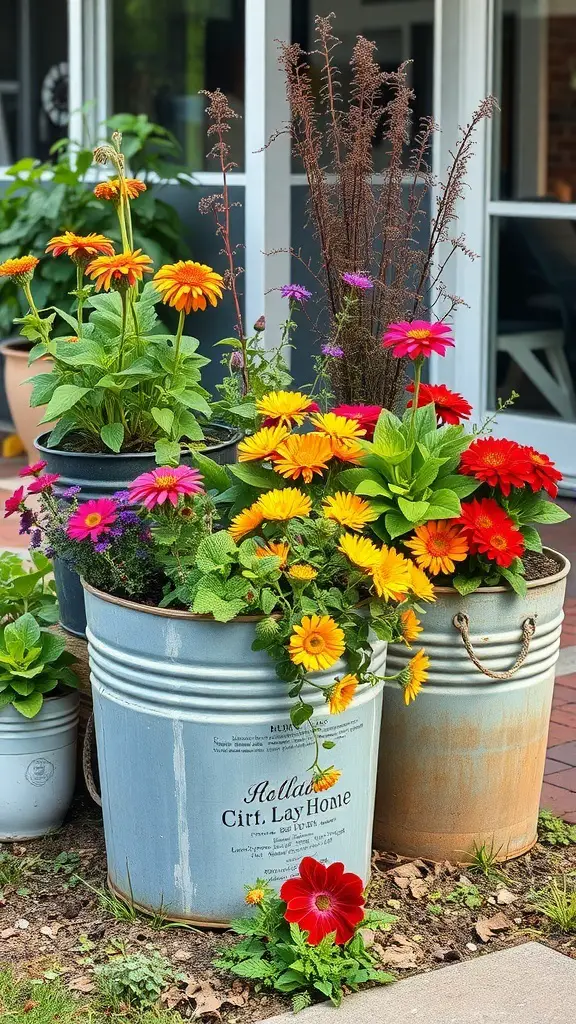
Using old buckets for container gardening is a fun and creative way to add color to your outdoor space. The image shows vibrant flowers bursting from weathered buckets, creating a cheerful display. This approach not only recycles materials but also allows for unique garden designs.
Start by gathering some old buckets. You can find them at home or at local thrift stores. Make sure to clean them out and drill a few holes in the bottom for drainage. This is key to keeping your plants healthy.
Next, choose your favorite flowers or herbs. Bright blooms like gerbera daisies and zinnias, as seen in the image, bring life to any garden. Mix different colors and heights for an eye-catching arrangement.
Fill the buckets with potting soil, plant your flowers, and give them a good watering. Position your buckets in areas where they can get plenty of sunlight. This DIY project is not just budget-friendly; it also adds a personal touch to your garden.
Herb Spiral for Small Spaces
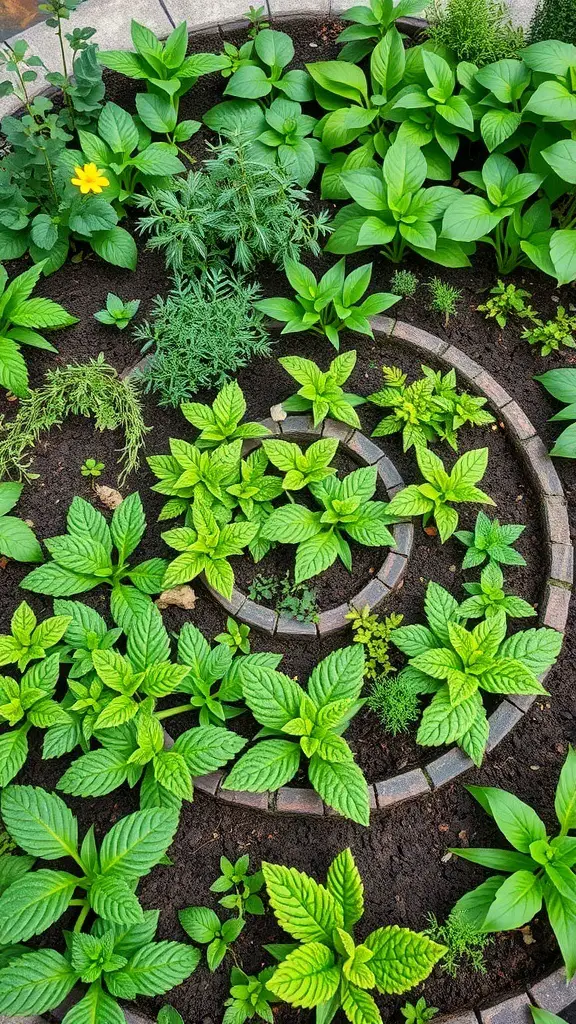
An herb spiral is a clever way to maximize space while growing a variety of herbs. This design is perfect for small gardens or patios. The spiral shape allows for different microclimates, catering to the needs of various plants.
In the image, you can see a vibrant herb spiral filled with lush green plants. The spiral structure not only looks appealing but also makes it easy to access your herbs. You can grow everything from mint to rosemary in this compact design.
Building an herb spiral is simple. Start by creating a circular base with stones or bricks. Then, stack soil and compost as you spiral upward. This setup encourages drainage and allows herbs to thrive. Plus, it adds a unique touch to your garden.
With an herb spiral, you can enjoy fresh herbs right at your fingertips. It’s a fun and practical solution for anyone looking to garden in limited space. Give it a try and watch your small garden flourish!
Creating a Rock Garden on a Budget
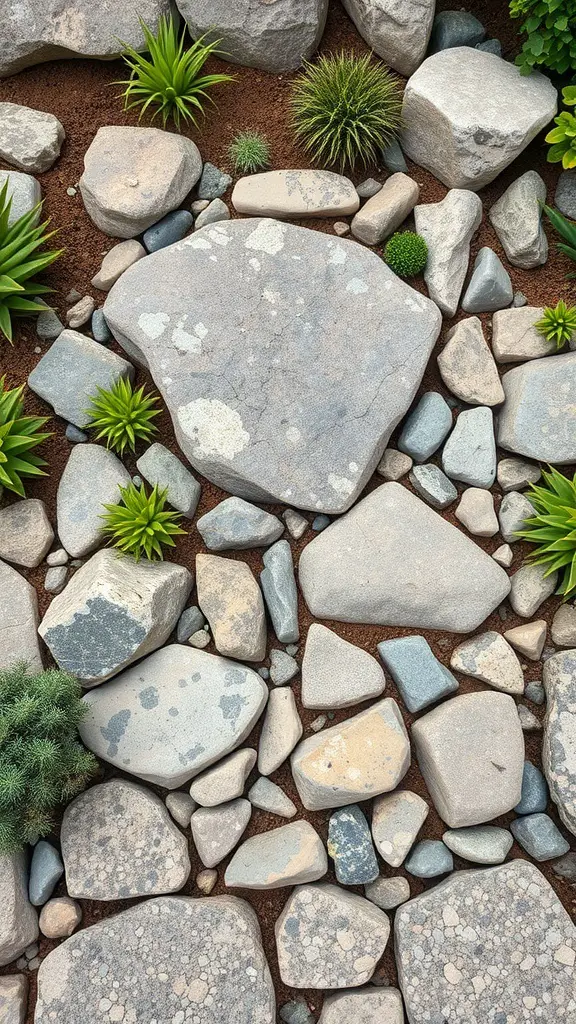
Rock gardens are a fantastic way to add charm to your outdoor space without breaking the bank. This image shows a beautiful arrangement of stones and plants, perfect for inspiration. The mix of different rock sizes and shapes creates a natural look that feels inviting.
To start your own rock garden, look for stones in your yard or local area. You can often find free or low-cost options. Arrange them in a way that feels organic, allowing for gaps where you can plant small succulents or ground cover.
Consider using drought-resistant plants, as they thrive in rocky environments and require less maintenance. This not only saves you money but also makes your garden more eco-friendly.
Adding mulch or gravel around the stones can enhance the overall look while helping to retain moisture. This simple touch can make your rock garden feel complete.
Using Cinder Blocks for Raised Beds
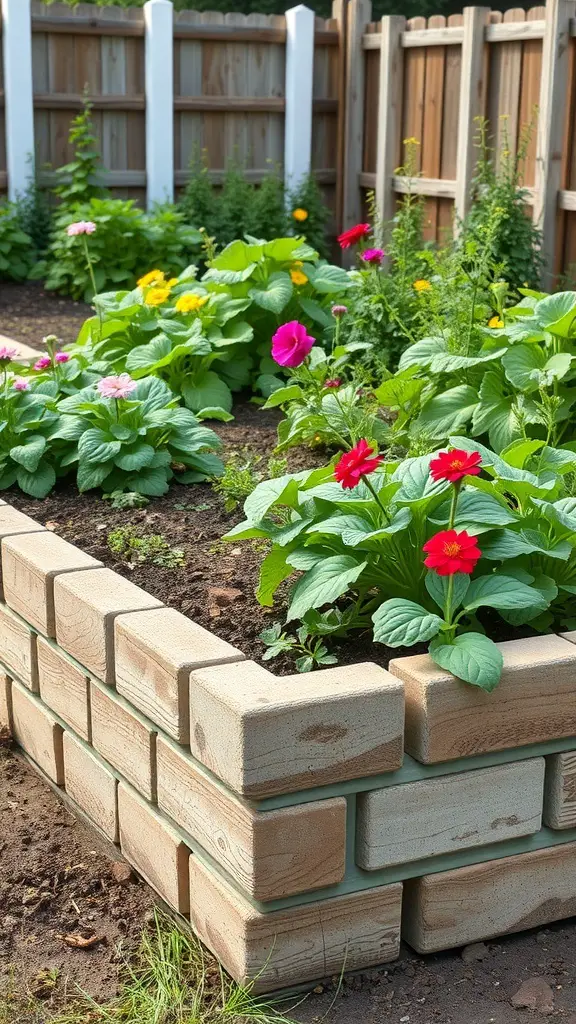
Cinder blocks are a fantastic option for creating raised garden beds. They are sturdy and can be arranged in various shapes to fit your garden space. The image shows a neat arrangement of cinder blocks forming a raised bed, filled with vibrant flowers and lush greenery.
This setup not only looks great but also makes gardening easier. The height of the raised bed allows for better drainage and easier access for planting and maintenance. You can even use the holes in the cinder blocks to plant herbs or small flowers, adding more greenery to your garden.
Another benefit is that cinder blocks can be found at a low cost, making them a budget-friendly choice for gardeners. You can paint or decorate them to match your style, adding a personal touch to your garden.
Overall, using cinder blocks for raised beds is a simple and effective way to enhance your gardening experience. Plus, they can help keep weeds at bay and improve soil quality over time.
Vertical Gardening with Recycled Pallets
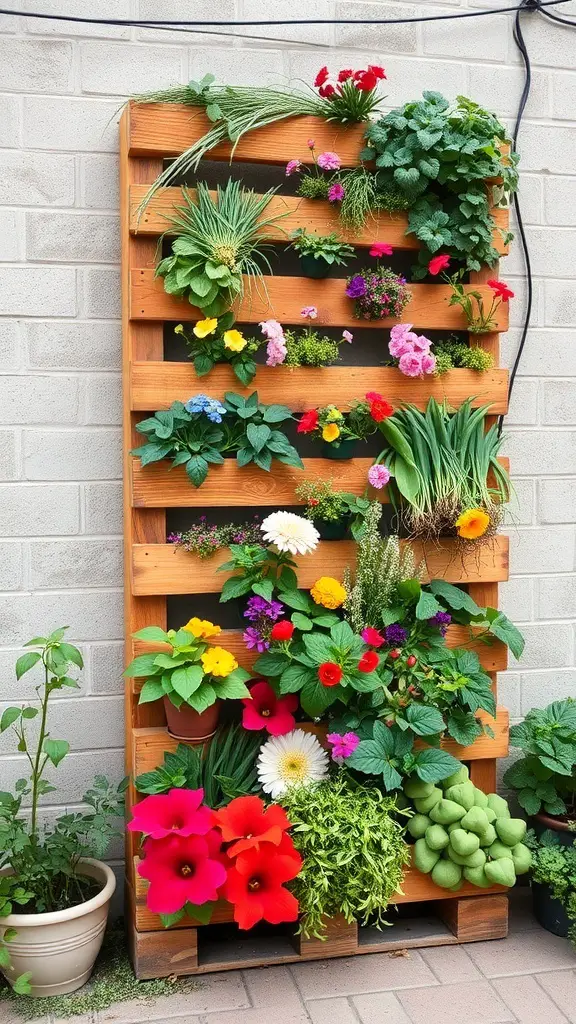
Vertical gardening is a fun and creative way to make the most of limited space. Using recycled pallets is an eco-friendly option that adds charm to any garden. The image shows a beautifully arranged pallet garden filled with vibrant flowers and lush greenery.
Each section of the pallet is filled with various plants, showcasing a mix of colors and textures. This not only makes for an eye-catching display but also maximizes your planting area. You can grow herbs, flowers, or even small vegetables, making it versatile for any gardener.
Setting up a pallet garden is simple. Start by securing the pallet to a wall or fence for stability. Then, fill the slats with potting soil and choose your plants. Make sure to consider sunlight and water needs for each type of plant. This way, your garden will thrive and look stunning!
Vertical gardening with pallets is not just practical; it’s also a great way to recycle materials. It encourages creativity and can be a fun project for families or friends. So grab a pallet, some soil, and your favorite plants, and get started on your vertical garden!
Repurposed Tires as Plant Holders
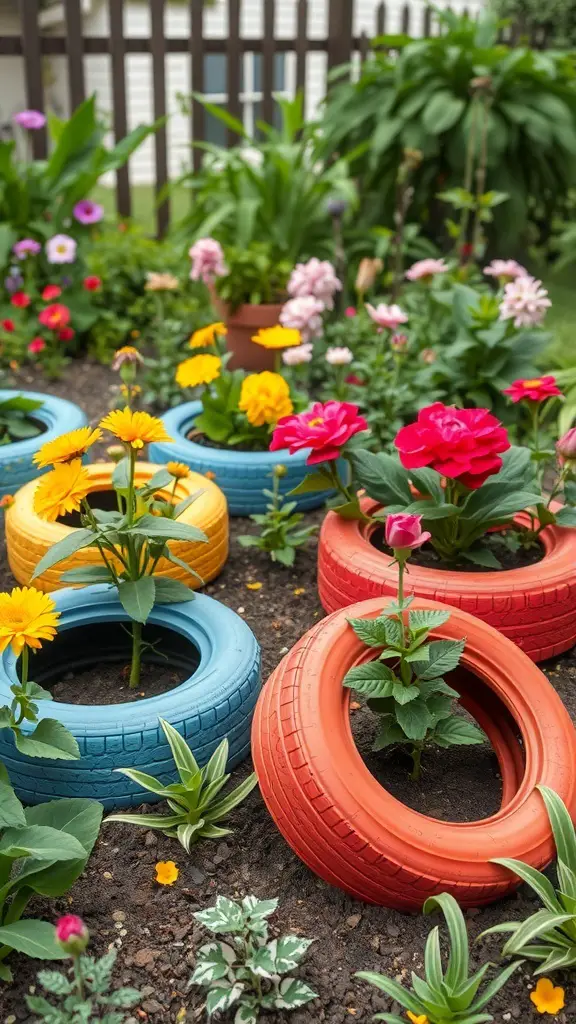
Using old tires as plant holders is a fun and creative way to add color and texture to your garden. The image shows vibrant blue, red, and yellow tires, each cradling beautiful flowers. This not only gives your garden a unique look but also helps recycle materials that would otherwise end up in a landfill.
To get started, gather some old tires. You can often find them for free or at a low cost from local tire shops. Clean them thoroughly to remove any dirt or debris. Once they’re ready, you can paint them in bright colors to match your garden theme.
Next, fill the tires with soil and choose your favorite plants. Flowers like petunias, marigolds, and zinnias thrive in this setup. You can even mix in some herbs or small vegetables for a functional garden.
Arrange the tires in your garden to create interesting shapes and patterns. This not only enhances the visual appeal but also provides a great conversation starter for visitors. Plus, it’s a budget-friendly way to make your outdoor space more inviting!
Budget-Friendly Compost Bin from Pallets
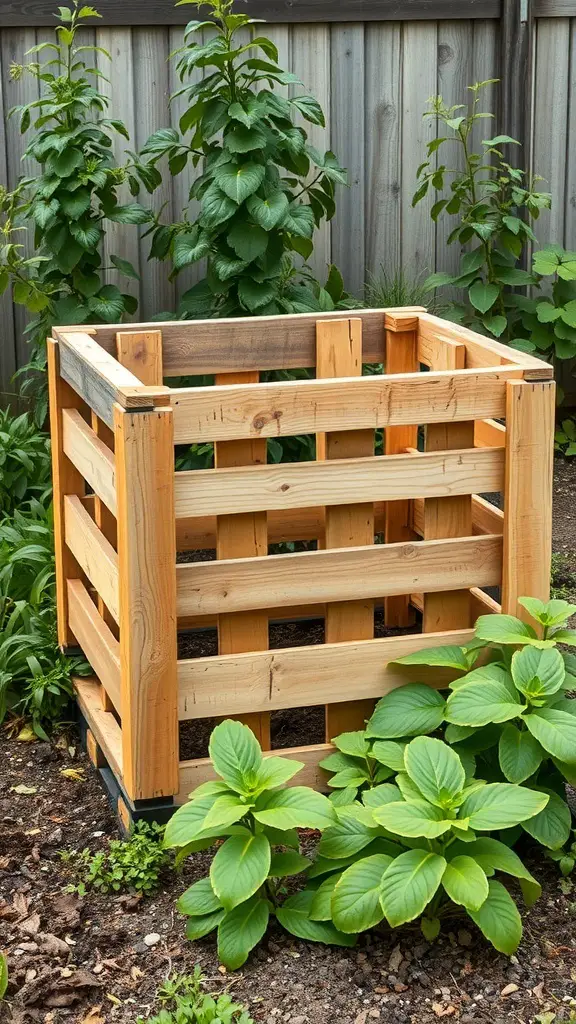
Creating a compost bin from pallets is a smart way to recycle materials while benefiting your garden. This simple design is not only functional but also adds a rustic charm to your outdoor space.
The image shows a sturdy compost bin made from wooden pallets. The open slats allow for good airflow, which is essential for the composting process. You can easily access your compost from the top or sides, making it convenient to add kitchen scraps and yard waste.
Building this compost bin is an affordable project. You can often find used pallets for free or at a low cost. Just make sure they are in good condition and not treated with harmful chemicals. With a little effort, you can create a space to turn your organic waste into nutrient-rich compost.
Consider placing your compost bin in a sunny spot to speed up decomposition. Surrounding it with plants can help blend it into your garden, making it a functional yet attractive feature.
Upcycled Glass Bottles as Garden Decor
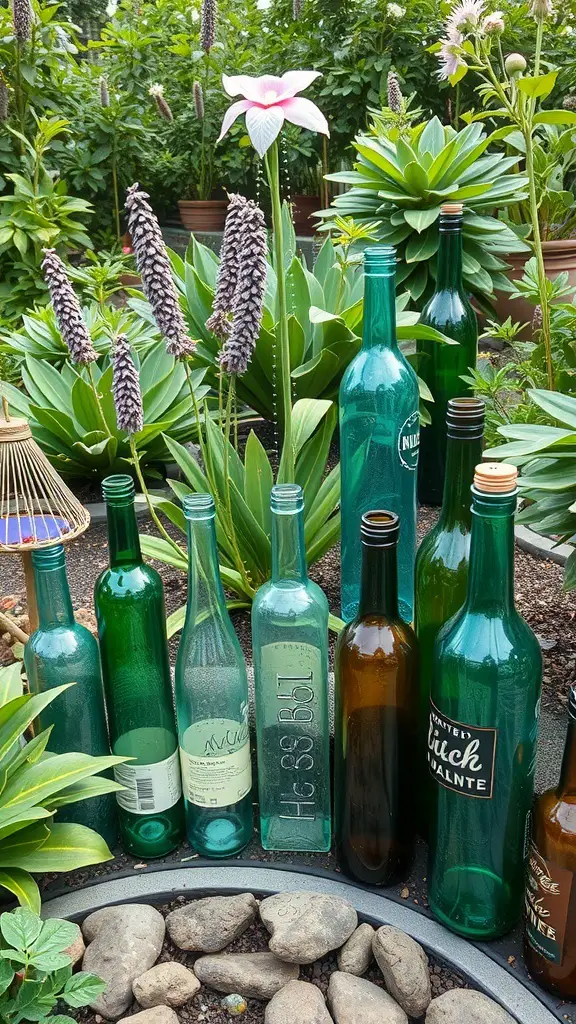
Using upcycled glass bottles in your garden is a fun and creative way to add some personality to your outdoor space. The image shows a variety of glass bottles, in different shapes and colors, nestled among lush greenery and vibrant flowers. This setup not only looks charming but also promotes recycling.
These bottles can serve multiple purposes. You can use them as plant markers by writing the names of your plants on them. They can also be turned into unique flower vases or even bird feeders. Just a little creativity can transform these everyday items into eye-catching decor.
Another idea is to group bottles of similar colors together for a cohesive look. You might choose blues and greens for a calming effect or mix in some amber bottles for warmth. The contrast between the glass and the plants creates a beautiful visual appeal.
Don’t forget about lighting! Placing fairy lights inside clear bottles can create a magical glow in the evening. This adds a cozy atmosphere to your garden, making it a perfect spot for relaxation.
So, next time you finish a drink, think twice before tossing that bottle. With a bit of imagination, you can give it a new life in your garden!
Using Cardboard for Weed Suppression
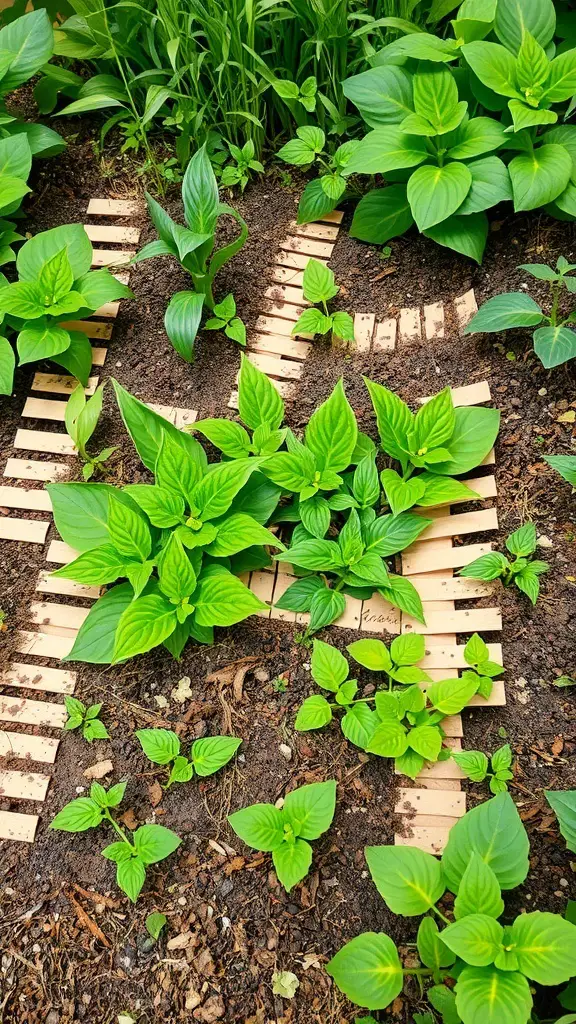
Cardboard is a simple and effective way to keep weeds at bay in your garden. In the image, you can see a garden bed where cardboard pieces are laid down between the plants. This method not only suppresses weeds but also helps retain moisture in the soil.
To use cardboard, start by collecting clean, unprinted cardboard. Cut it into manageable pieces and lay them flat on the soil. Overlap the edges to create a barrier that weeds can’t penetrate. You can even cover the cardboard with mulch for added benefits.
This technique is budget-friendly and eco-friendly, making it a great choice for any gardener looking to save money while keeping their garden healthy. Plus, as the cardboard breaks down, it adds organic matter to the soil.
Planting a Wildflower Meadow
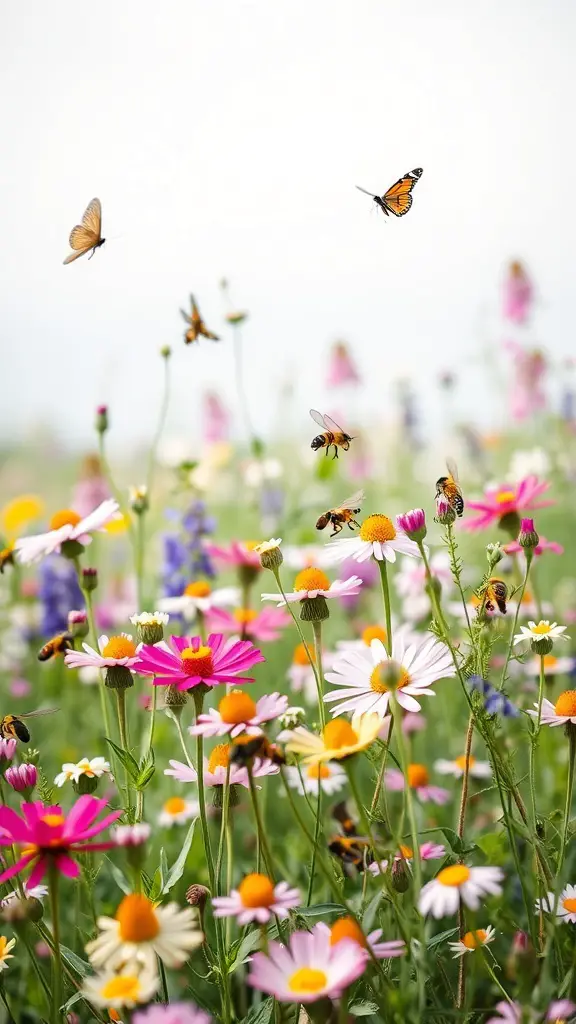
Creating a wildflower meadow is a fun and budget-friendly way to add beauty to your garden. Imagine a space filled with colorful blooms swaying in the breeze, attracting butterflies and bees. It’s a simple project that can bring a lot of joy.
Start by choosing a sunny spot in your yard. Wildflowers love sunlight! You can either prepare the soil by removing weeds or simply scatter seeds over existing grass. Mixing different types of wildflower seeds will give you a vibrant display.
Water the area lightly after planting. Keep the soil moist until the seeds germinate. Once the flowers start to grow, they’ll require less water. This makes wildflower meadows low-maintenance and perfect for busy gardeners.
As the flowers bloom, you’ll notice not just the beauty but also the wildlife they attract. Bees and butterflies will visit, helping to pollinate your garden. Plus, a wildflower meadow can provide a habitat for various insects and small animals.
Enjoy the changing colors throughout the seasons. A wildflower meadow can be a delightful addition to your outdoor space, bringing nature right to your doorstep.
Budget-Friendly Garden Pathways with Gravel
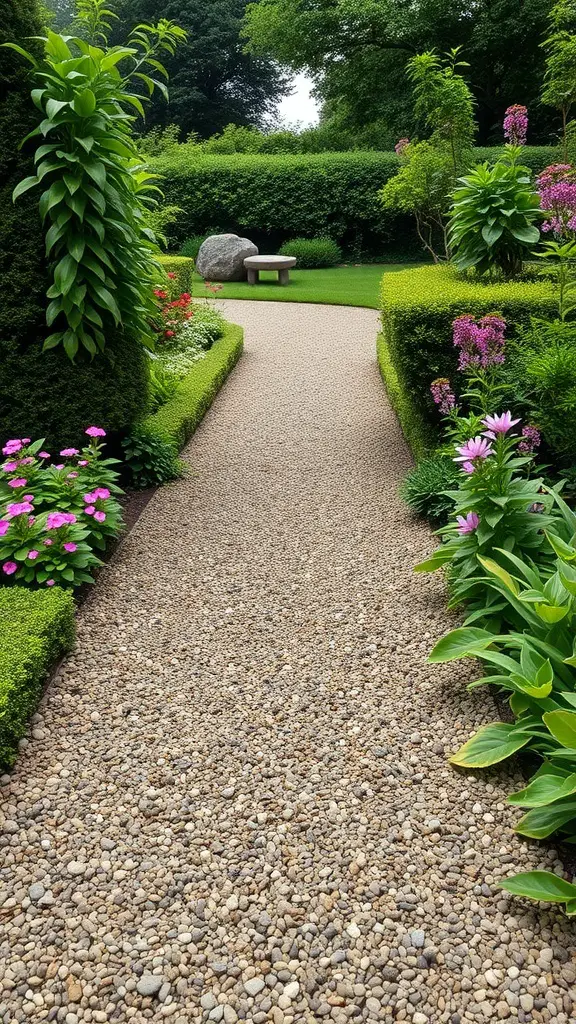
Creating a garden pathway with gravel is a smart choice for anyone looking to save money while enhancing their outdoor space. Gravel is affordable, easy to work with, and offers a natural look that blends well with plants and flowers.
The image showcases a lovely gravel path flanked by vibrant flowers and neatly trimmed hedges. This setup not only guides visitors through the garden but also adds a touch of charm. The earthy tones of the gravel contrast beautifully with the lush greenery, making the pathway inviting.
One of the best parts about gravel paths is their versatility. You can choose different sizes and colors of gravel to match your garden’s theme. Plus, they allow for good drainage, which helps keep your garden healthy.
Consider adding stepping stones or edging to define the path further. This can create a more polished look while still being budget-friendly. With a little creativity, your gravel pathway can become a stunning feature in your garden.
Building a Simple Trellis from Bamboo
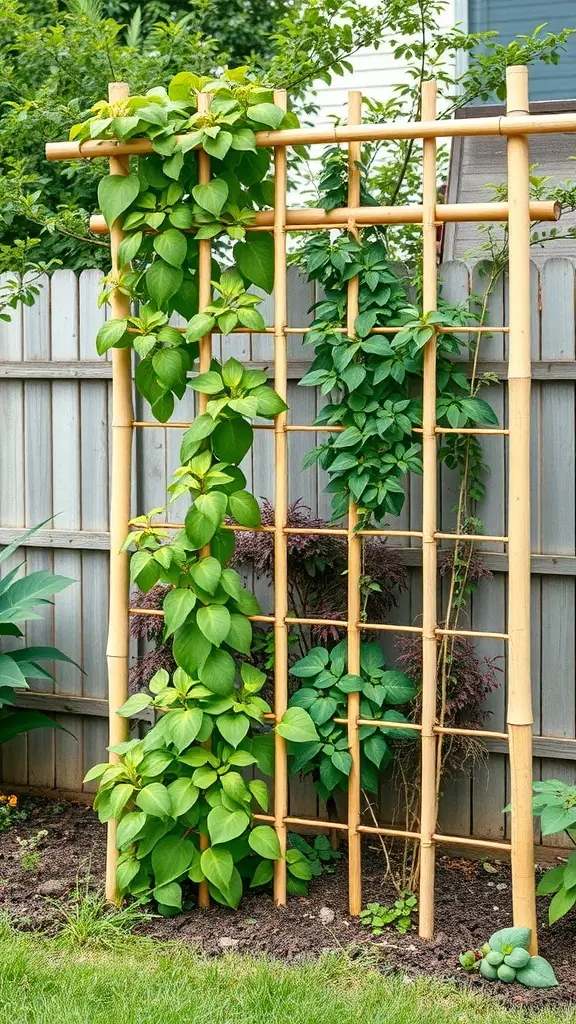
A bamboo trellis is a fantastic addition to any garden. It’s not only functional but also adds a touch of charm. The image shows a sturdy trellis made from bamboo, supporting lush green plants. This setup is perfect for climbing vines or even vegetables like peas and beans.
Creating a bamboo trellis is simple and budget-friendly. Start by gathering some bamboo poles, which you can often find at garden centers or even local home improvement stores. Cut them to your desired height and width. Then, use twine or wire to secure the poles together in a grid pattern.
Once your trellis is built, plant your climbing plants at the base. As they grow, they will naturally wrap around the bamboo, creating a beautiful green display. This not only saves space but also enhances the look of your garden.
Don’t forget to position your trellis in a spot that gets plenty of sunlight. This will help your plants thrive and make your garden a vibrant place to relax and enjoy.
Using Old Furniture as Garden Planters
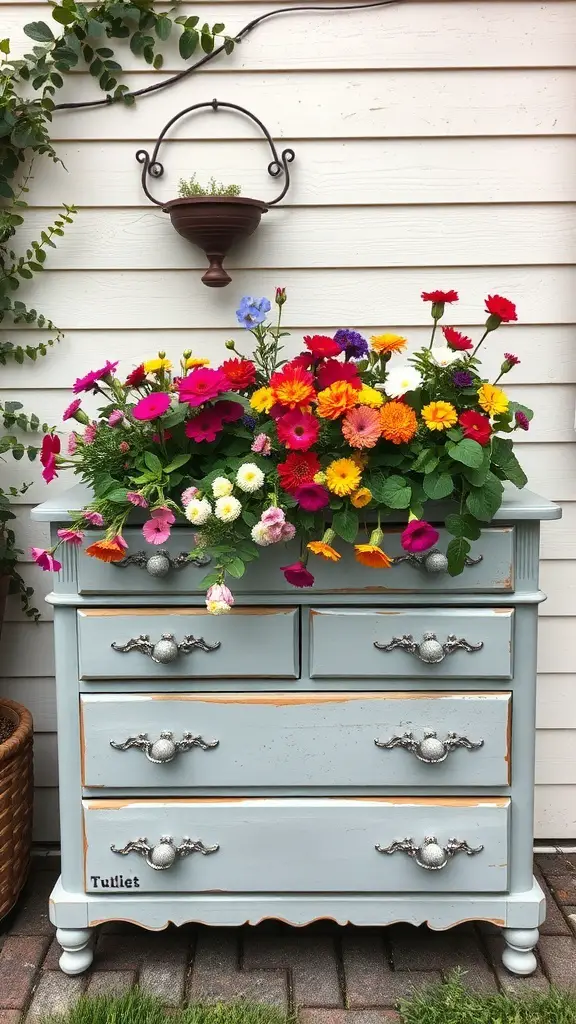
Transforming old furniture into garden planters is a fun and creative way to add charm to your outdoor space. Picture a vintage dresser, once used for clothes, now bursting with colorful flowers. This not only repurposes items that might otherwise go to waste but also gives your garden a unique flair.
Start by choosing a piece of furniture that has seen better days. A dresser, chair, or even a wooden crate can work wonders. Make sure to drill some drainage holes to keep your plants healthy. Fill it with soil and your favorite flowers or herbs. The result is a stunning display that draws the eye and adds character to your garden.
Don’t forget to paint or decorate the furniture if you want to give it a fresh look. Bright colors can make your garden pop, while a rustic finish can blend beautifully with nature. This approach not only saves money but also allows you to express your personality in your garden.
Creating a Shade Garden with Hostas
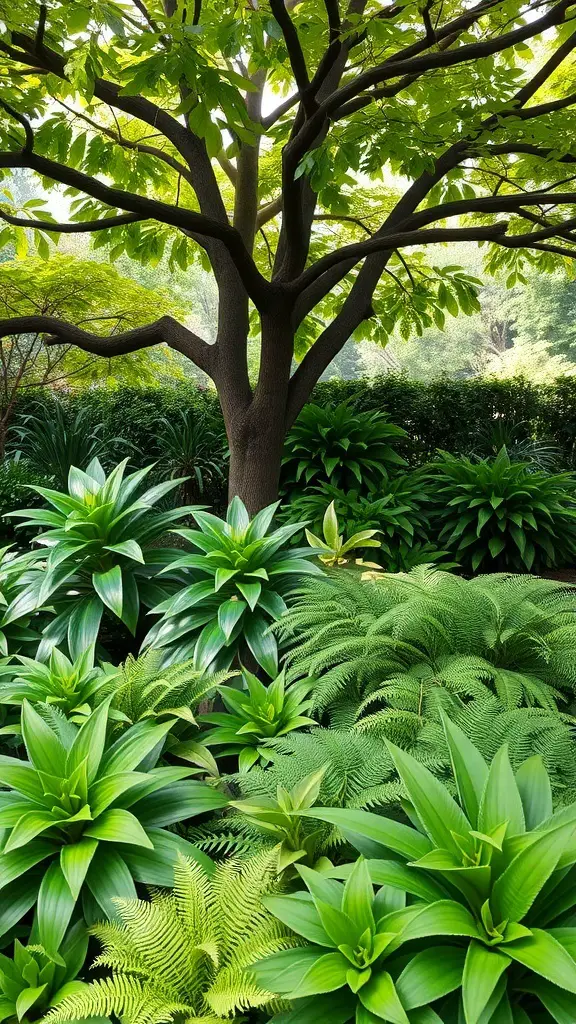
Creating a shade garden can be a delightful way to enhance your outdoor space. Hostas are a fantastic choice for this, as they thrive in low-light conditions. The image showcases a lush arrangement of hostas surrounded by ferns, all under the dappled shade of a tree.
Hostas come in various sizes and colors, making them versatile for different garden designs. Their broad leaves can add texture and depth to your garden. Pairing them with ferns, as seen in the image, creates a beautiful contrast and a layered look.
To start your shade garden, choose a spot that receives minimal sunlight. Prepare the soil by adding organic matter to ensure it’s rich and well-draining. Plant hostas in clusters for a fuller appearance, and mix in ferns for added greenery.
Water your plants regularly, especially during dry spells. Mulching around the base can help retain moisture and suppress weeds. With a little care, your shade garden will flourish, providing a serene retreat in your backyard.
Creating a Fairy Garden with Found Objects
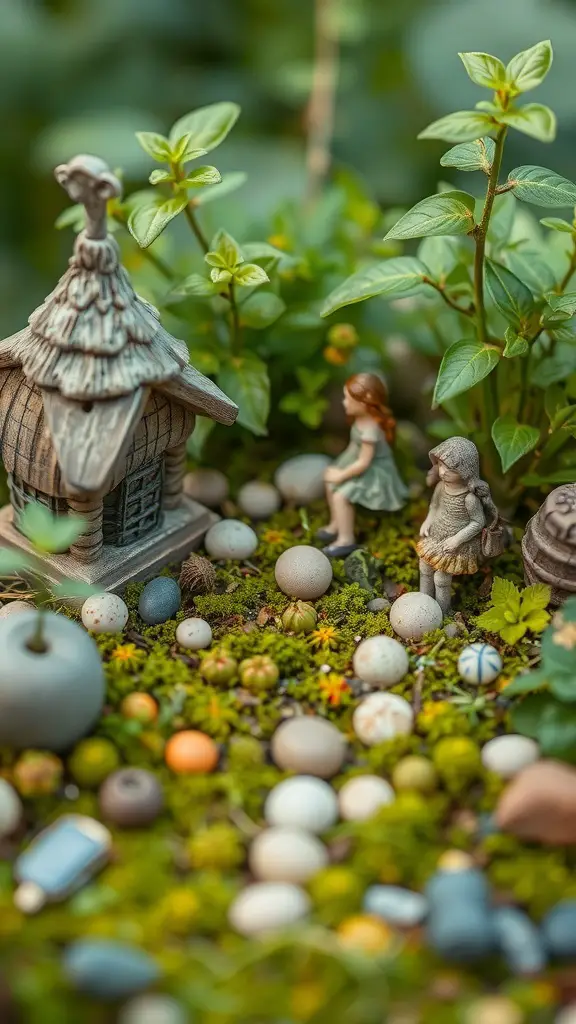
Fairy gardens are a delightful way to bring a touch of magic to your outdoor space. Using found objects makes this project both fun and budget-friendly. You can create a miniature world that sparks the imagination.
Start by gathering small items from around your home or yard. Look for stones, twigs, and even old toys. These can serve as the foundation for your garden. The image shows a charming setup with tiny figures and a whimsical house, surrounded by colorful stones and lush greenery.
Next, choose a container or a section of your garden to set up your fairy garden. Arrange your found objects creatively. Place the small house at the center, and scatter the stones around it to create pathways. Add some greenery to give it a natural feel.
Don’t forget to personalize your garden! You can paint stones or use small figurines to represent fairies or animals. The goal is to create a space that feels magical and inviting. This project is perfect for all ages and can be a great way to spend time outdoors.
