Ready to spruce up your garden? Here are 25 DIY garden ideas that add charm, personality, and a touch of creativity to your outdoor space. Whether you’re looking to enhance your backyard or create a cozy corner on your balcony, these simple projects will inspire you to get your hands dirty and enjoy the beauty of nature right at home!
Hanging Herb Garden
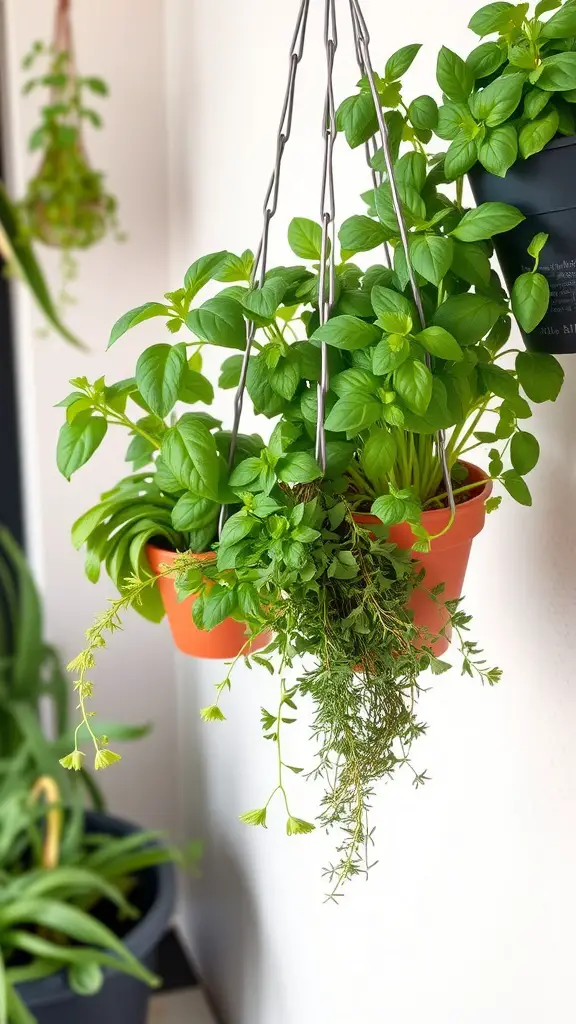
Creating a hanging herb garden is a delightful way to bring greenery into your home or balcony. It’s not just about aesthetics; having fresh herbs at your fingertips can elevate your cooking.
The image shows a vibrant display of herbs, with lush leaves spilling out of a terracotta pot. Plants like basil and thyme thrive in this setup, making it easy to snip what you need for your meals. Using a hanging planter saves space and adds a charming touch to any area.
To start your own hanging herb garden, choose herbs that you love to use in your recipes. Plant them in a pot with good drainage. Hang the pot in a location that receives plenty of sunlight. Keep the soil moist but not soggy, and soon you’ll have fresh herbs ready to use!
Upcycled Tire Planters
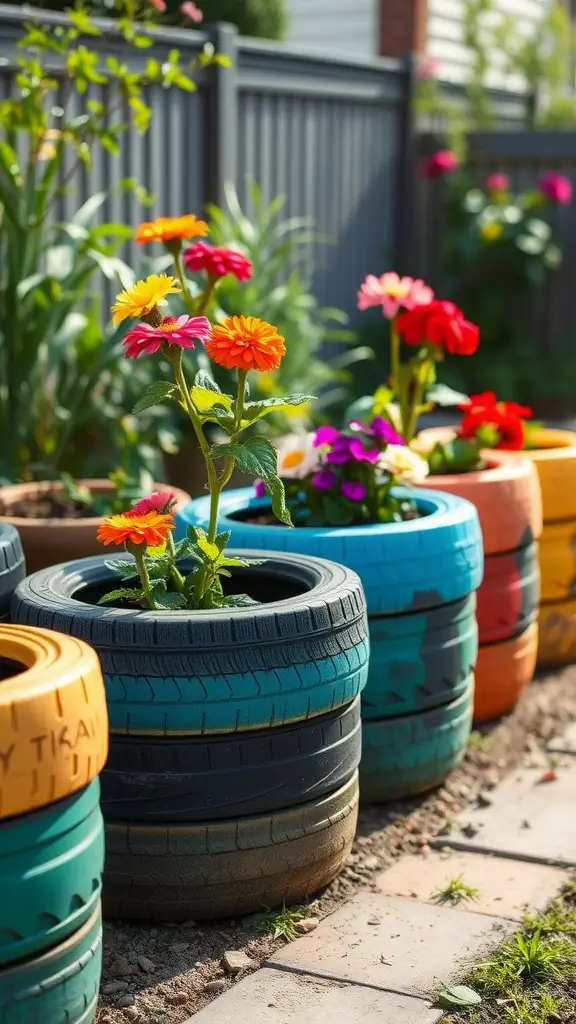
Upcycled tire planters are a fun and eco-friendly way to add some charm to your garden. Instead of tossing out old tires, why not transform them into colorful planters? This DIY project not only helps the environment but also allows you to express your creativity.
In the image, you can see a row of tires painted in vibrant colors, each brimming with cheerful flowers. The bright blooms, such as daisies and petunias, bring life to the tires and create an inviting atmosphere. Arranging these planters in a line adds structure to your garden, making it look organized and lively.
To create your own upcycled tire planters, start by gathering some old tires. Clean them thoroughly and apply a coat of outdoor paint to give them a fresh look. Once dry, stack or arrange them as you like, and fill each with potting soil. Choose your favorite flowers or even herbs to plant inside. Water them regularly, and soon you’ll have a unique garden feature that showcases your style while recycling materials.
Vertical Pallet Garden
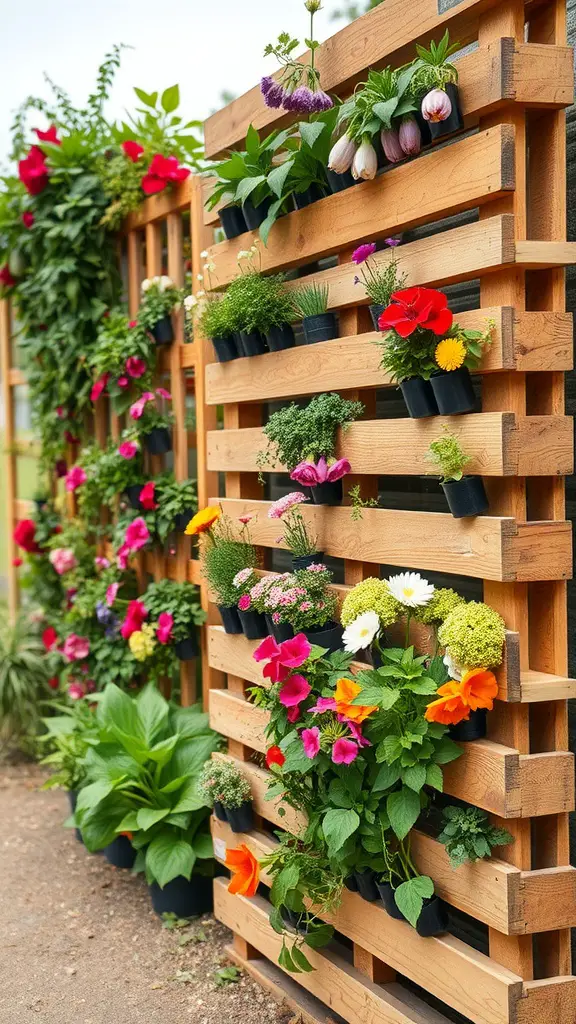
A vertical pallet garden is a creative way to bring greenery into your space, especially if you’re short on ground area. This DIY project utilizes wooden pallets as a structure to hold various plants, allowing you to create a stunning vertical display.
The image showcases a vibrant vertical garden, filled with an assortment of colorful flowers and greenery. Each plant is housed in small black pots that fit snugly into the slats of the pallet. This design not only adds visual interest but also makes maintenance easier.
Building your own vertical pallet garden is quite straightforward. First, find a sturdy wooden pallet and clean it. Then, attach landscape fabric to the back and fill the pockets with soil. Finally, plant your choice of flowers, herbs, or even small vegetables. Hang it on a wall or fence, and watch your garden thrive!
This kind of garden is perfect for small backyards, balconies, or even indoor spaces where you want to add a touch of nature. Plus, it can be a fun weekend project that adds personality to your home.
DIY Garden Trellis with Climbing Vines
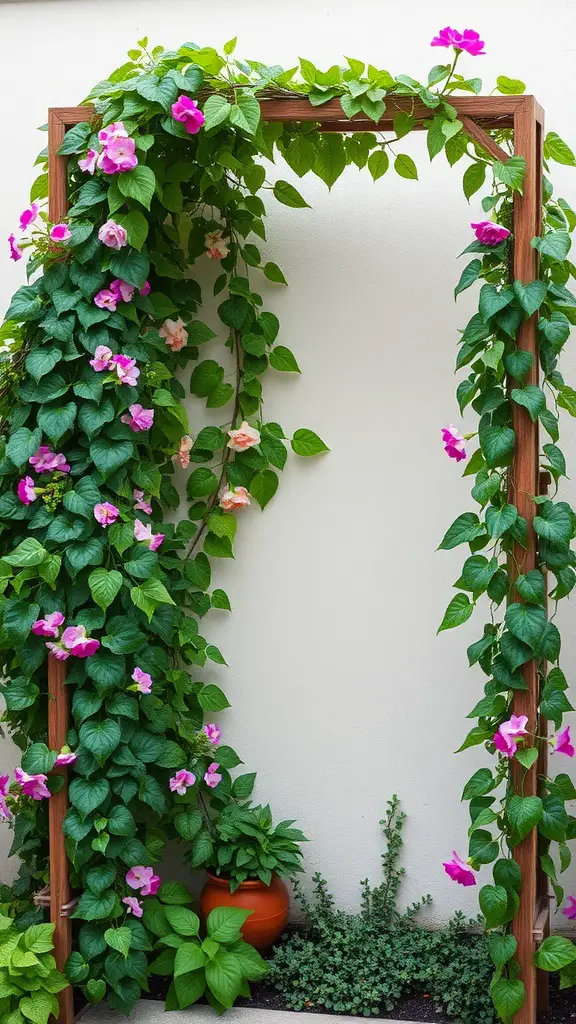
A DIY garden trellis can transform your outdoor space into a vibrant and inviting area. The image shows a beautifully crafted wooden trellis adorned with lush climbing vines and colorful flowers. This setup not only adds charm but also creates a lovely backdrop for your garden.
To create a similar trellis, you can start with simple materials such as wood for the frame. Choose a location in your garden that receives plenty of sunlight, as this will help your climbing plants thrive.
When selecting vines, consider options like morning glories or sweet peas. These plants grow quickly and will cover your trellis beautifully. Plant them at the base of the trellis and watch as they climb and flourish, filling your garden with color and life.
Adding a pot at the base, like the one in the image, can further enhance the look. You could fill it with herbs or smaller plants that complement the climbing vines. Overall, a DIY trellis is a fun project that can enrich your garden and bring a touch of nature’s beauty to your home.
Mason Jar Fairy Lights
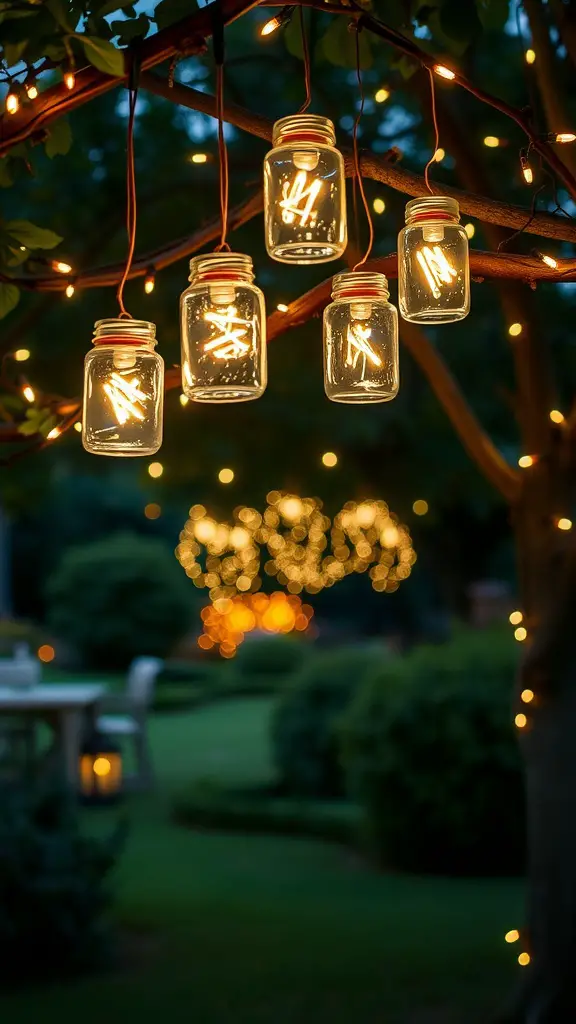
Mason jar fairy lights are a delightful way to add a warm and inviting glow to your garden. Imagine hanging several jars filled with twinkling lights from branches of trees, creating a magical atmosphere in your outdoor space.
To make your own mason jar fairy lights, start by gathering your materials. You’ll need mason jars, mini string lights, and some twine or wire for hanging. Simply place the string lights inside the jars and secure the lids. You can hang them from tree branches or hooks, ensuring they’re visible for everyone to enjoy.
As the sun sets, these jars will light up, casting a soft, enchanting glow. They not only beautify your garden but also create a cozy ambiance for evening gatherings. Whether it’s a special occasion or a casual get-together, mason jar fairy lights are a lovely touch.
Plus, they’re easy to customize! You can choose different colors of lights or even add decorative elements inside the jars like pebbles or flowers. Let your creativity shine and transform your garden into a dreamy escape.
Succulent Arrangement in a Wooden Box
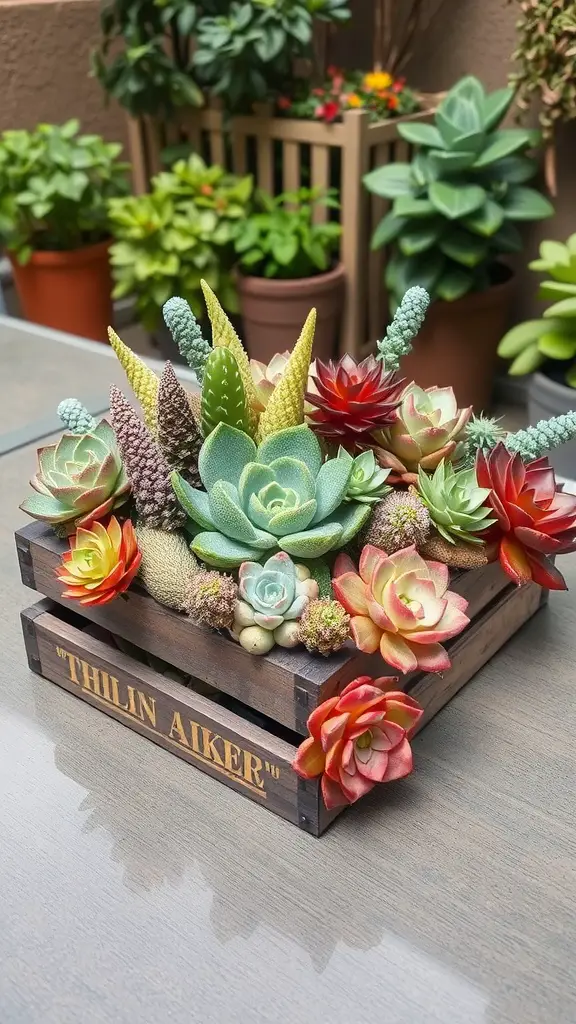
Creating a succulent arrangement in a wooden box is a delightful way to add a touch of nature to your home or garden. This project combines natural beauty with rustic charm, making it a fun DIY task even for beginners.
The wooden box serves as a unique planter that not only holds the succulents but also enhances their visual appeal. You can choose a box that fits your style, whether it’s a vintage-looking crate or a more modern design. The varied colors and textures of the succulents bring life to the arrangement, creating a small oasis.
To start, gather your materials. You will need a wooden box, potting soil, a selection of succulents, and decorative stones or moss for added flair. Arrange the succulents in the box before planting them to see which layout you like best. Once you’re happy with the design, fill the box with soil and place the succulents in their new home.
Finally, a little extra care goes a long way. Make sure to keep your succulents in a spot where they can get plenty of sunlight. Water them sparingly, as succulents prefer drier conditions. This arrangement not only looks lovely but also requires minimal maintenance, making it a great option for busy individuals.
Rustic Wooden Garden Bench
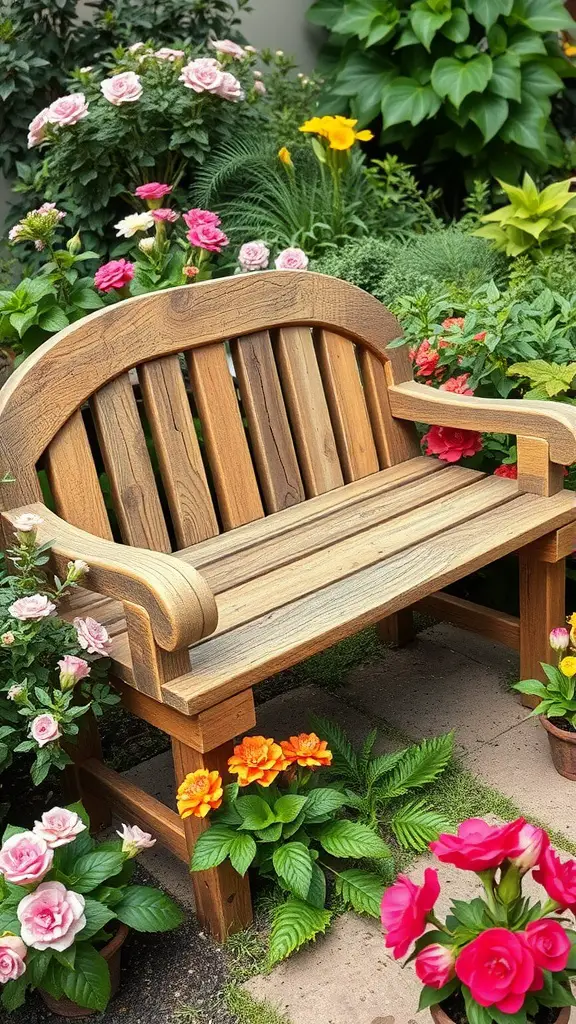
A rustic wooden garden bench can be the perfect addition to your outdoor space. Picture this: a sturdy bench made from natural wood, surrounded by vibrant flowers and greenery. It’s not just a seat; it’s a cozy corner where you can relax and enjoy the beauty of your garden.
The bench in the image showcases a warm, natural finish that complements the lush surroundings. The design is simple yet elegant, making it easy to blend in with various garden styles. With its smooth curves and slatted back, it invites you to take a break and soak in the scenery.
To create your own rustic bench, you can use reclaimed wood for a charming look. Start by gathering materials like wooden planks, screws, and sandpaper. Cut the wood to your desired lengths, then assemble the pieces into a bench shape. Don’t forget to sand the edges for a smooth finish. You can also add a weatherproof sealant to ensure it lasts through the seasons.
Position the bench in a sunny spot or under a tree for shade. Surround it with your favorite flowers, just like in the image, to enhance the inviting feel. This DIY project not only provides a functional seating area but also adds character and warmth to your garden.
Garden Pathway with Stepping Stones
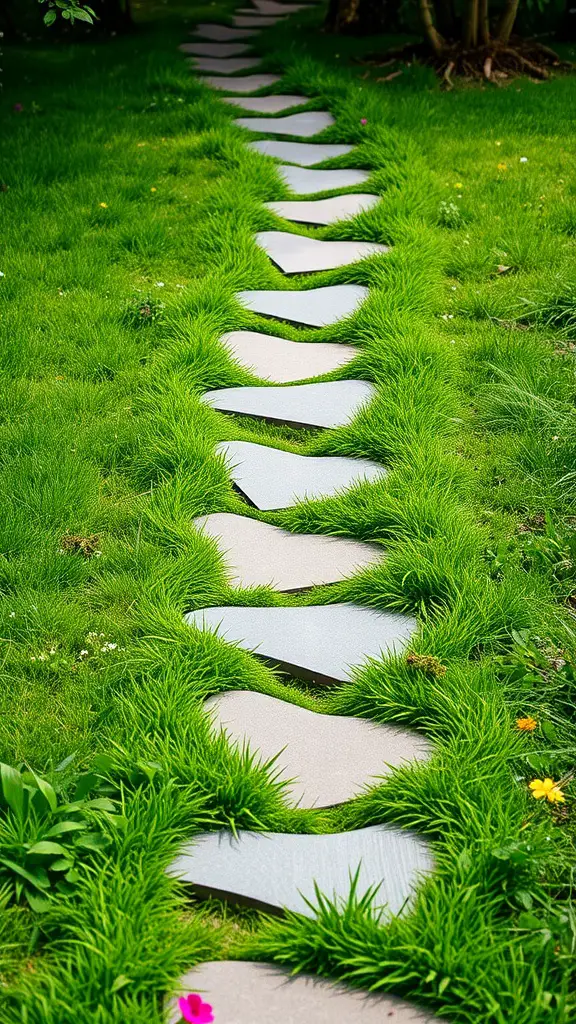
Creating a charming garden pathway can really enhance the beauty of your outdoor space. Imagine a serene walk through lush grass and stepping stones that guide you along the way. This simple design adds both functionality and style to your garden.
The stepping stones can be made from a variety of materials like concrete, stone, or even wood. They can be arranged in a straight line or in a playful, winding pattern. This particular pathway features a delightful mix of soft grass and smooth stones that leads you gently through the greenery.
To make your own pathway, start by selecting your stones and laying them out in your desired pattern. Then, fill in the gaps with grass or colorful flowers to bring life to the walkway. Not only does it look inviting, but it also keeps your feet clean as you wander through your garden.
Rain Barrel Water Collection System
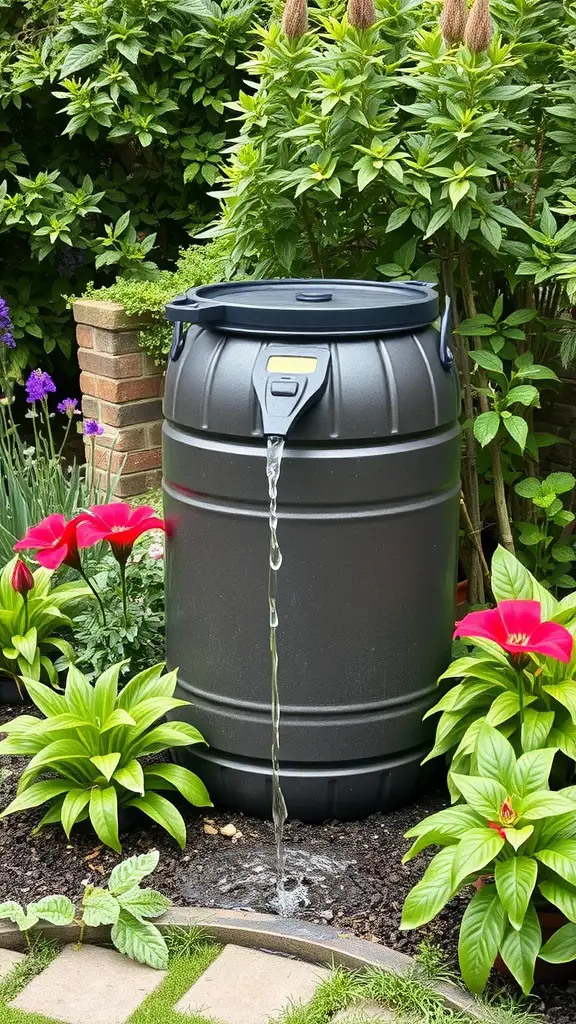
A rain barrel is a simple yet effective way to collect rainwater for your garden. The image shows a sleek black rain barrel positioned among vibrant flowers and lush greenery. It’s designed to catch rainwater from your roof, which can then be used for watering plants, reducing your water bill, and helping the environment.
This particular barrel features a spout at the bottom, making it easy to fill up watering cans or directly connect a hose. Having a rain barrel not only saves water but also creates a sustainable system for your gardening needs. You can place it strategically near your garden area to make access even simpler.
Setting up a rain barrel is quite straightforward. All you need is a barrel, a downspout diverter, and a few tools. Once installed, just watch it fill up during rainy days. Your plants will love the fresh rainwater, and you’ll feel good about using this natural resource efficiently.
Birdhouse Installation Among Trees
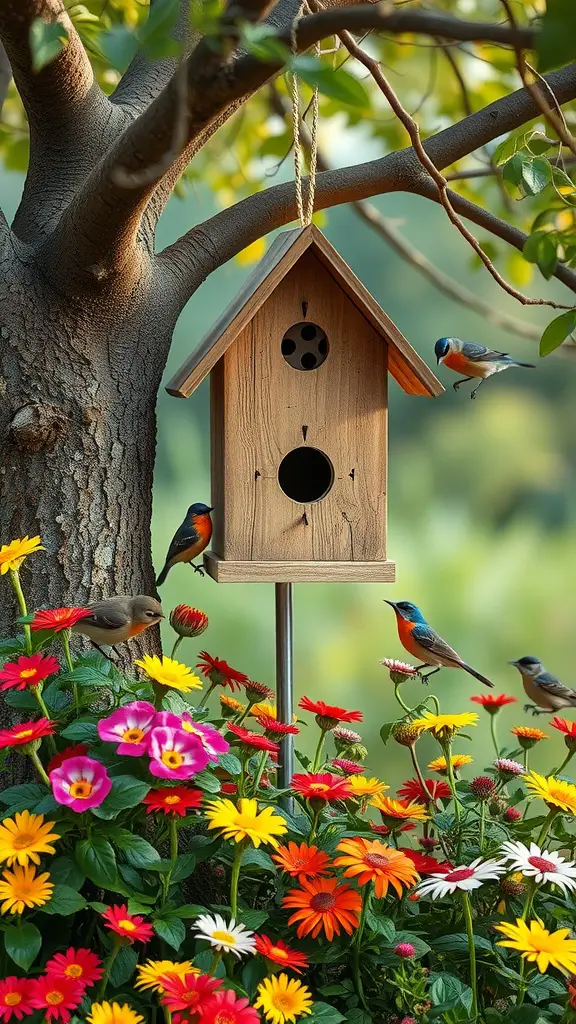
Installing a birdhouse among trees can transform your garden into a lively sanctuary. This simple DIY project draws birds to your space, adding both beauty and song to your garden.
A wooden birdhouse, like the one shown here, blends perfectly with the natural surroundings. It’s hung securely from a tree branch, making it easily accessible for feathered friends.
Choosing the right location is key. Aim for a spot that’s sheltered from harsh winds and direct sunlight, ideally near colorful flowers. This not only provides food sources but also creates a vibrant backdrop.
Birdhouses invite various species, enriching your garden’s ecosystem. As birds explore, they help with pollination and pest control, benefiting your plants.
Keep your birdhouse clean and well-maintained. Regular checks ensure it remains a safe home for birds year after year.
Garden Fire Pit Area
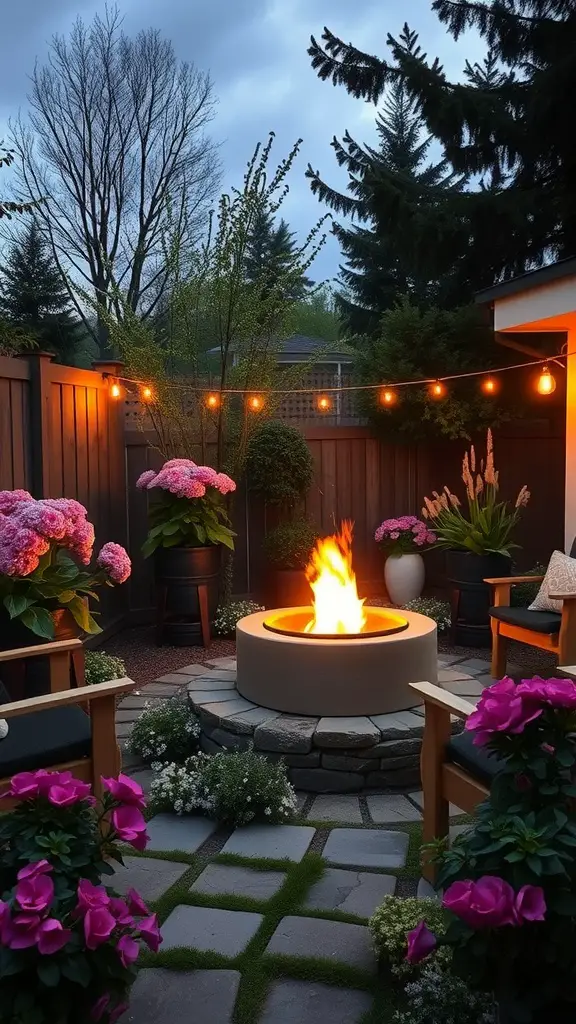
A garden fire pit area is a cozy retreat right in your backyard. Imagine a space where you can gather with friends and family, share stories, and enjoy the warmth of a crackling fire.
In the image, you can see a beautiful fire pit surrounded by comfortable chairs. The fire pit itself is circular, providing a perfect spot for warmth and light. The surrounding stones create a natural look, blending nicely with the garden.
The area is enhanced by vibrant flowers in pots, adding color and life to the scene. The string lights above provide a soft glow, making it inviting for evening gatherings. This setup is not just a spot for a fire; it’s a charming outdoor living space.
To create your own fire pit area, start by choosing a safe location away from any flammable materials. Consider using stones or bricks for the pit, and arrange seating around it for comfort. Adding plants and lights can transform the area into a magical place to unwind.
Compost Bin Made from Pallets
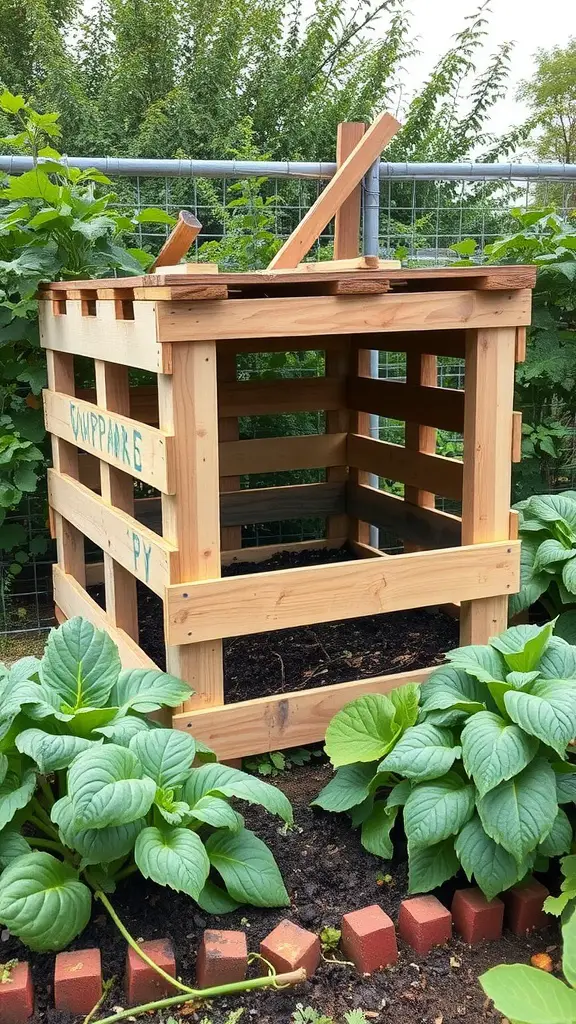
Creating a compost bin from wooden pallets is a simple and effective way to recycle organic waste while enriching your garden soil. The image shows a sturdy, open compost bin made from slatted pallets, allowing for airflow and easy access to the compost inside.
Using pallets is a great DIY project for gardeners looking to manage their kitchen scraps and yard waste. The open design means that air can circulate, which is essential for the composting process. You can throw in all sorts of organic materials, from vegetable peels to grass clippings.
Placing the compost bin in a sunny spot can speed up the decomposition process, so consider your garden layout when deciding where to put it. Surrounding it with some vibrant plants, as seen in the image, not only looks nice but also creates a beneficial environment for your compost.
Building this kind of compost bin is usually cost-effective, especially if you have access to free pallets. Just make sure to secure them properly so they hold their shape and function effectively for years to come.
Gnome Garden Decor
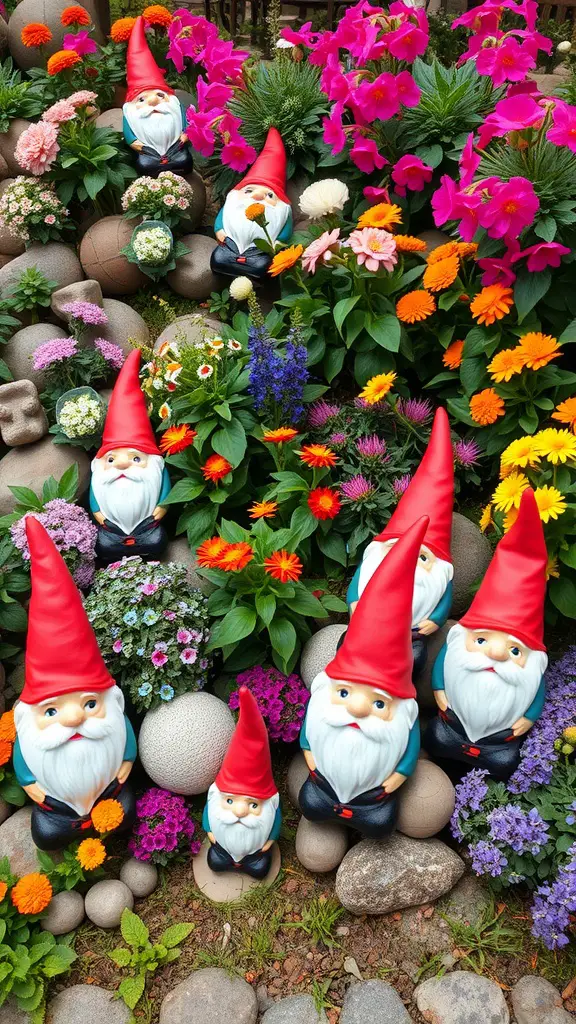
Gnome garden decor adds a playful and whimsical touch to any outdoor space. These charming little figures, often depicted with bright red hats and cheerful expressions, can bring life to your garden and create a welcoming atmosphere.
In the image, you can see a delightful arrangement of gnomes nestled among vibrant flowers. The mix of colors from the flowers, like pinks and yellows, provides a cheerful backdrop that complements the gnomes perfectly. This combination not only enhances the beauty of the garden but also makes it feel inviting.
Gnomes can be positioned in various spots throughout your garden. You might place them near flower beds or alongside pathways to give visitors a friendly greeting. They can also serve as fun focal points or conversation starters when friends and family come to visit.
Creating your own gnome garden decor is easy! Start by selecting a few gnomes that catch your eye. Then, choose colorful plants and flowers to surround them. Consider using stones or decorative pots to add more texture to the scene. With just a little creativity, you can have a charming gnome garden that reflects your personality and brighten up your outdoor space.
Repurposed Glass Bottle Edging
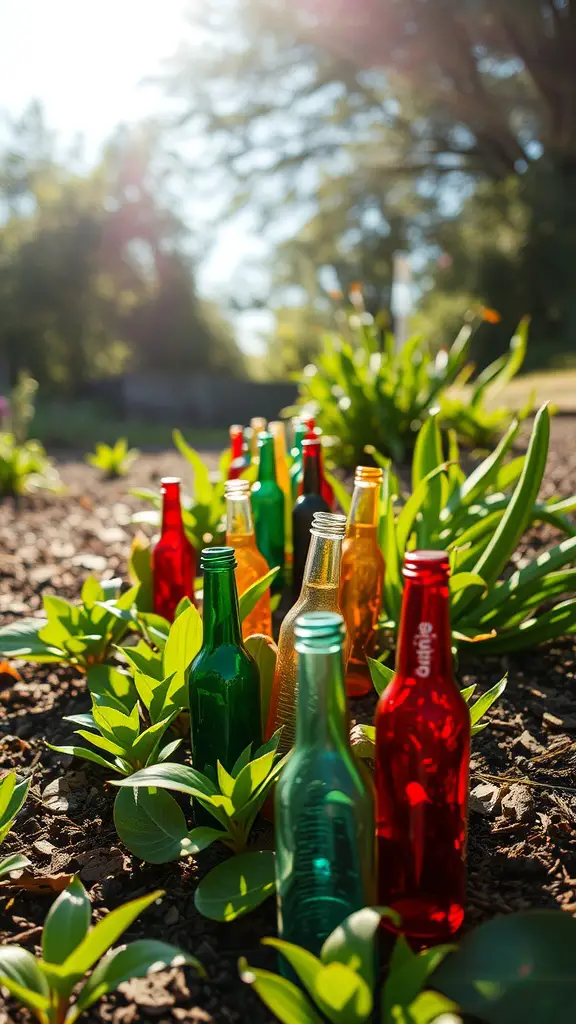
Using repurposed glass bottles for garden edging is a fun and creative way to enhance your outdoor space. In the image, you can see an array of colorful bottles nestled among vibrant green plants. This not only adds a splash of color but also creates a unique boundary for your garden beds.
To get started, gather some empty glass bottles in various colors. You can use soda bottles, wine bottles, or any glass bottle that catches your eye. Clean them out thoroughly and remove any labels.
Next, dig a shallow trench along the area you want to edge. Place the bottles into the trench with the necks facing upward. You can alternate colors for a playful look or stick to a specific palette for a more cohesive design. Make sure to pack the soil around the bottles to keep them stable.
This DIY project not only recycles materials but also brings character to your garden. Plus, it’s a great conversation starter when friends visit. Enjoy watching how the sunlight reflects off the glass, creating a warm and inviting atmosphere.
Flower Bed Edging with Logs
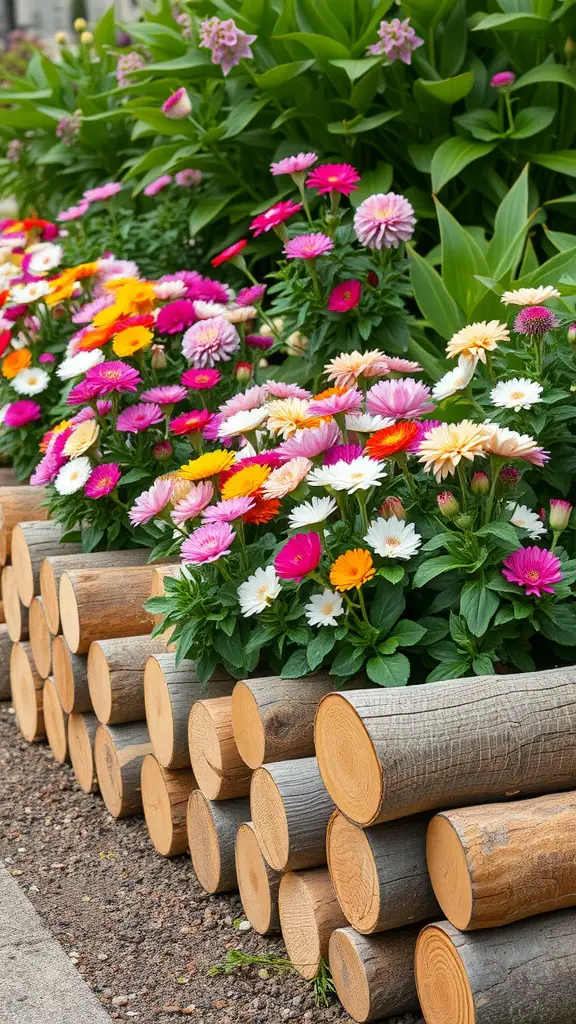
Using logs as flower bed edging is a charming way to define your garden space. The natural look of wood pairs beautifully with vibrant flowers, creating a warm and inviting atmosphere.
The image shows a colorful array of flowers blooming in a neat row, beautifully bordered by logs. This not only keeps the soil in place but also adds a rustic touch to your garden. The combination of earthy textures and bright petals can make any garden feel more alive.
To create your own log edging, start by selecting logs of similar sizes. Lay them side by side, ensuring they are slightly buried in the soil to provide stability. This simple project can enhance the overall look of your flower beds while also keeping things tidy.
Consider mixing different types of flowers for a more dynamic visual. The contrast of the logs against the colorful blooms can really highlight the beauty of each flower. Plus, it’s a fun DIY project that adds personality to your outdoor space.

