Easy Christmas crafts for preschoolers that are fun, adorable, and budget-friendly! These simple holiday craft ideas are perfect for little hands, preschool classrooms, and cozy Christmas afternoons at home.
Keeping preschoolers entertained during the Christmas season isn’t always easy, especially when their excitement is through the roof!
Between decorating the Christmas tree, wrapping presents, planning holiday activities, AND keeping little ones busy…
…things can get a little chaotic before Christmas even arrives!
Busy parents and preschool teachers need simple Christmas activities that don’t require expensive supplies, complicated instructions, or hours of preparation.
So, let’s make Christmas crafting EASY and FUN!
I’ve rounded up 29+ Christmas crafts for preschoolers that are colorful, creative, and simple enough for little hands to enjoy with a bit of adult help.
These easy preschool Christmas crafts are worth trying because they:
- Use affordable, everyday craft supplies
- Include simple projects for ages 3 to 5
- Help little ones practice creativity and fine motor skills
- Make adorable homemade Christmas decorations and keepsakes
- Work well for preschool classrooms, daycare, and family craft time
- Keep kids happily occupied during the busy holiday season
From cute paper Santa crafts and handprint Christmas trees to popsicle stick ornaments, reindeer decorations, snowmen, and colorful holiday art projects, there’s something for every little crafter here.
Some projects take just a few minutes, while others make lovely handmade gifts for grandparents, teachers, and family members.
And the best part? You don’t need to be a crafty parent or teacher to help kids make something they’ll be proud to show off!
Ready for some festive fun? Let’s check out these adorable Christmas crafts for preschoolers!
Sponge Painted Paper Christmas Tree Cards
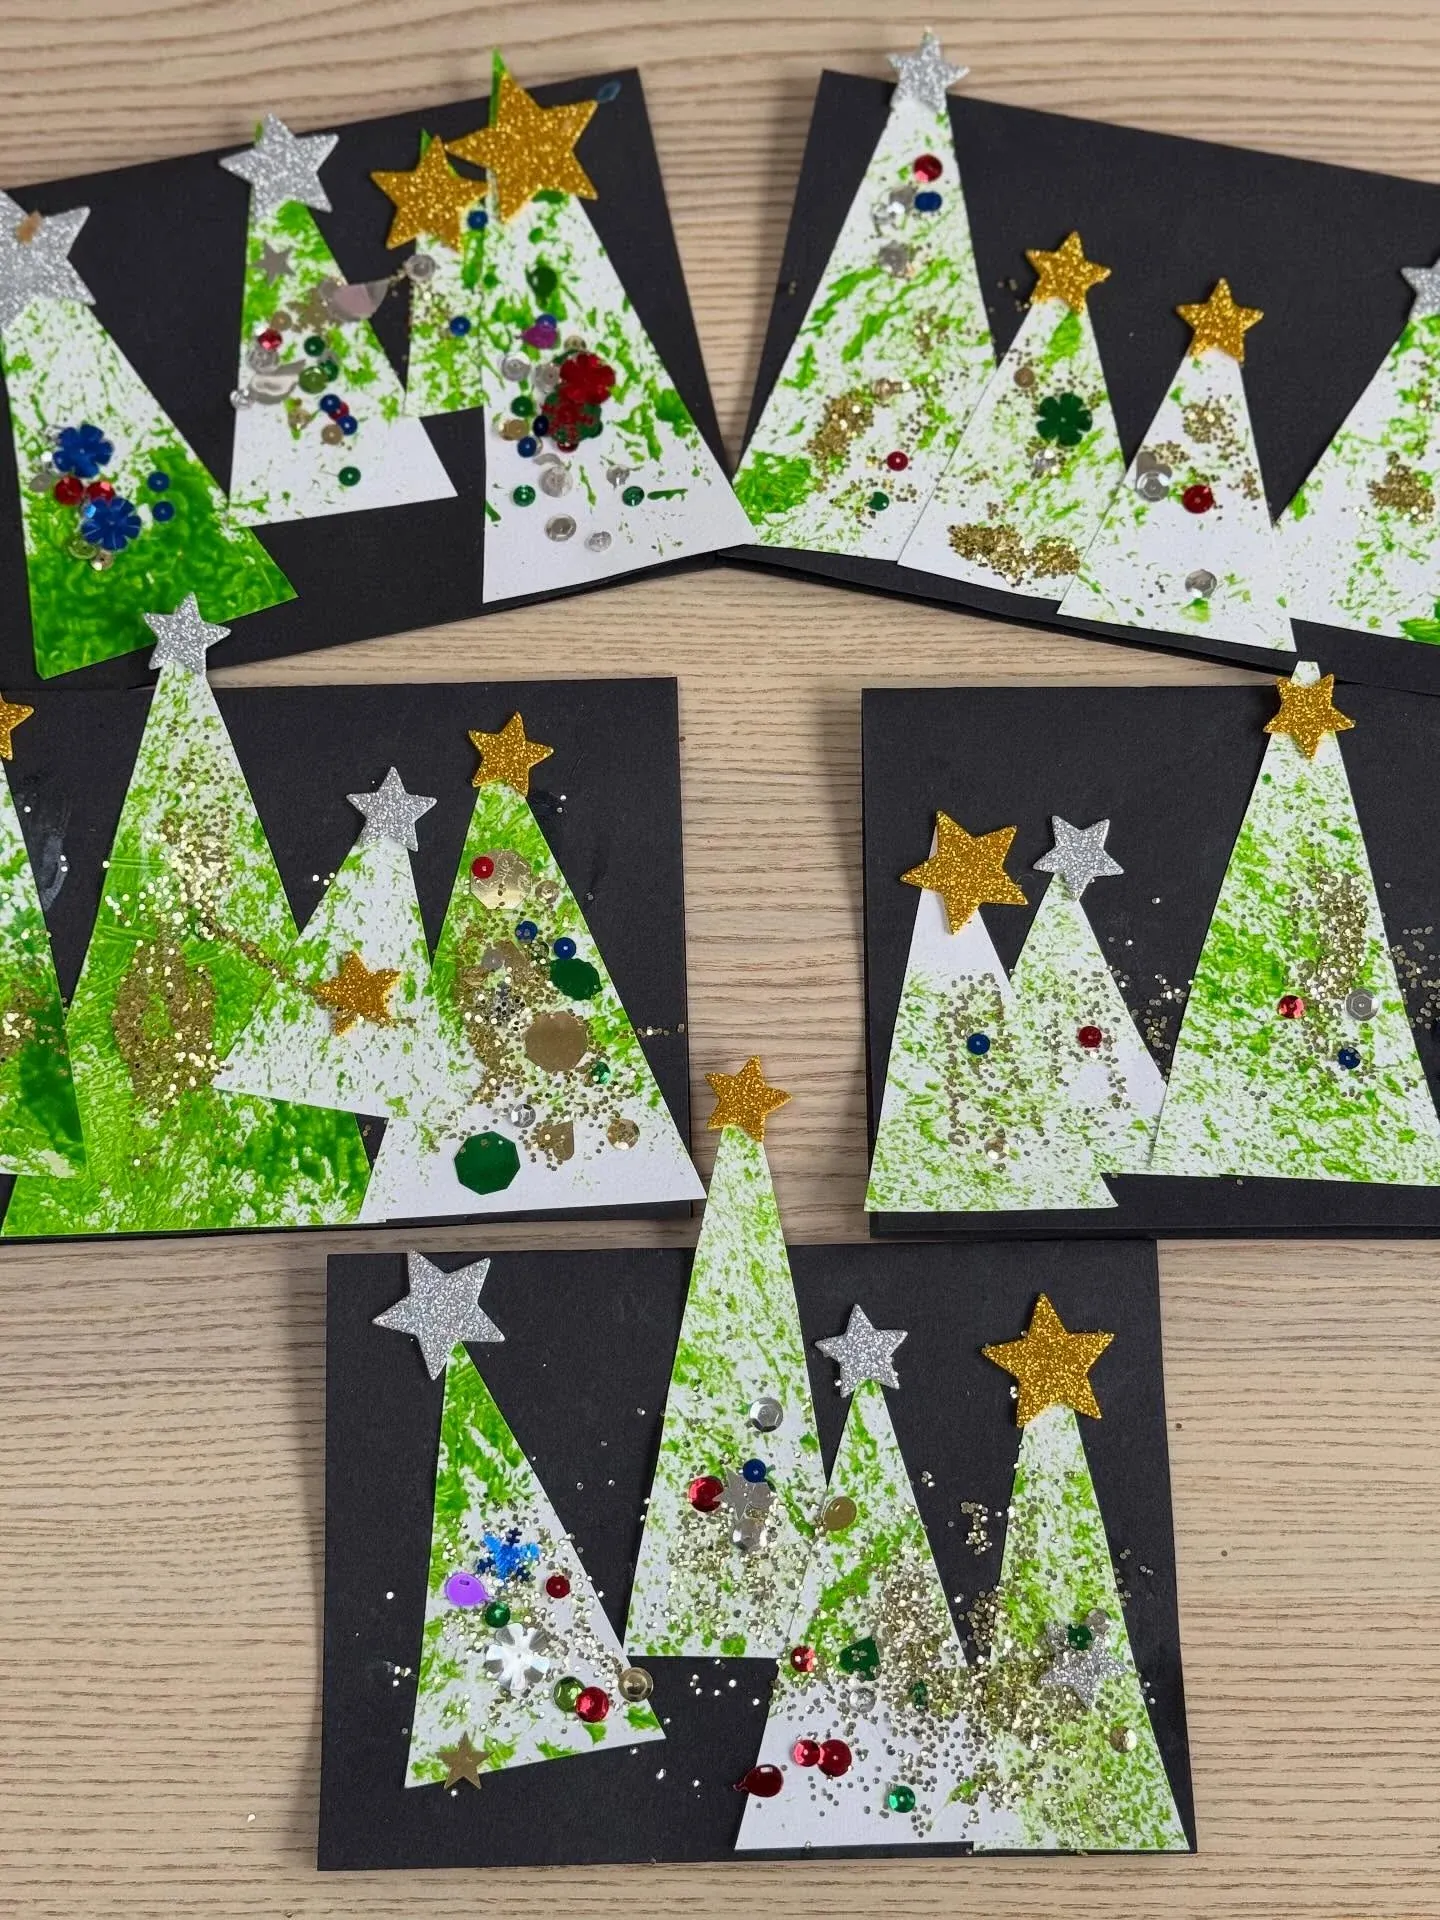
White paper triangles covered in textured green paint, shiny sequins, and loose glitter sit arranged against a dark black cardstock background with sparkling gold and silver foam stars on top.
Preschoolers enjoy stamping green paint onto paper triangles to create snowy pine textures for these festive holiday cards. Every card shines brightly with colorful sequins and metallic stars that make wonderful keepsakes for family members.
Supplies
- 1 sheet of black cardstock
- 1 sheet of white construction paper
- Green washable tempera paint
- 1 small painting sponge
- Gold and silver glitter foam stars
- Assorted colorful sequins and loose glitter
- White school glue
- Kid safe scissors
Instructions
- Cut three or four tall triangles out of white construction paper to serve as trees.
- Dab green washable paint onto the white paper triangles using a small sponge for texture.
- Sprinkle loose glitter and glue colorful sequins across the painted trees while the glue is wet.
- Arrange the decorated triangles onto the black cardstock and glue them down securely.
- Stick one gold or silver glitter foam star onto the top point of each tree.
- Leave your finished holiday card flat on the table until all the paint and glue dry completely.
Paper Plate Snowman Faces With Fuzzy Earmuffs
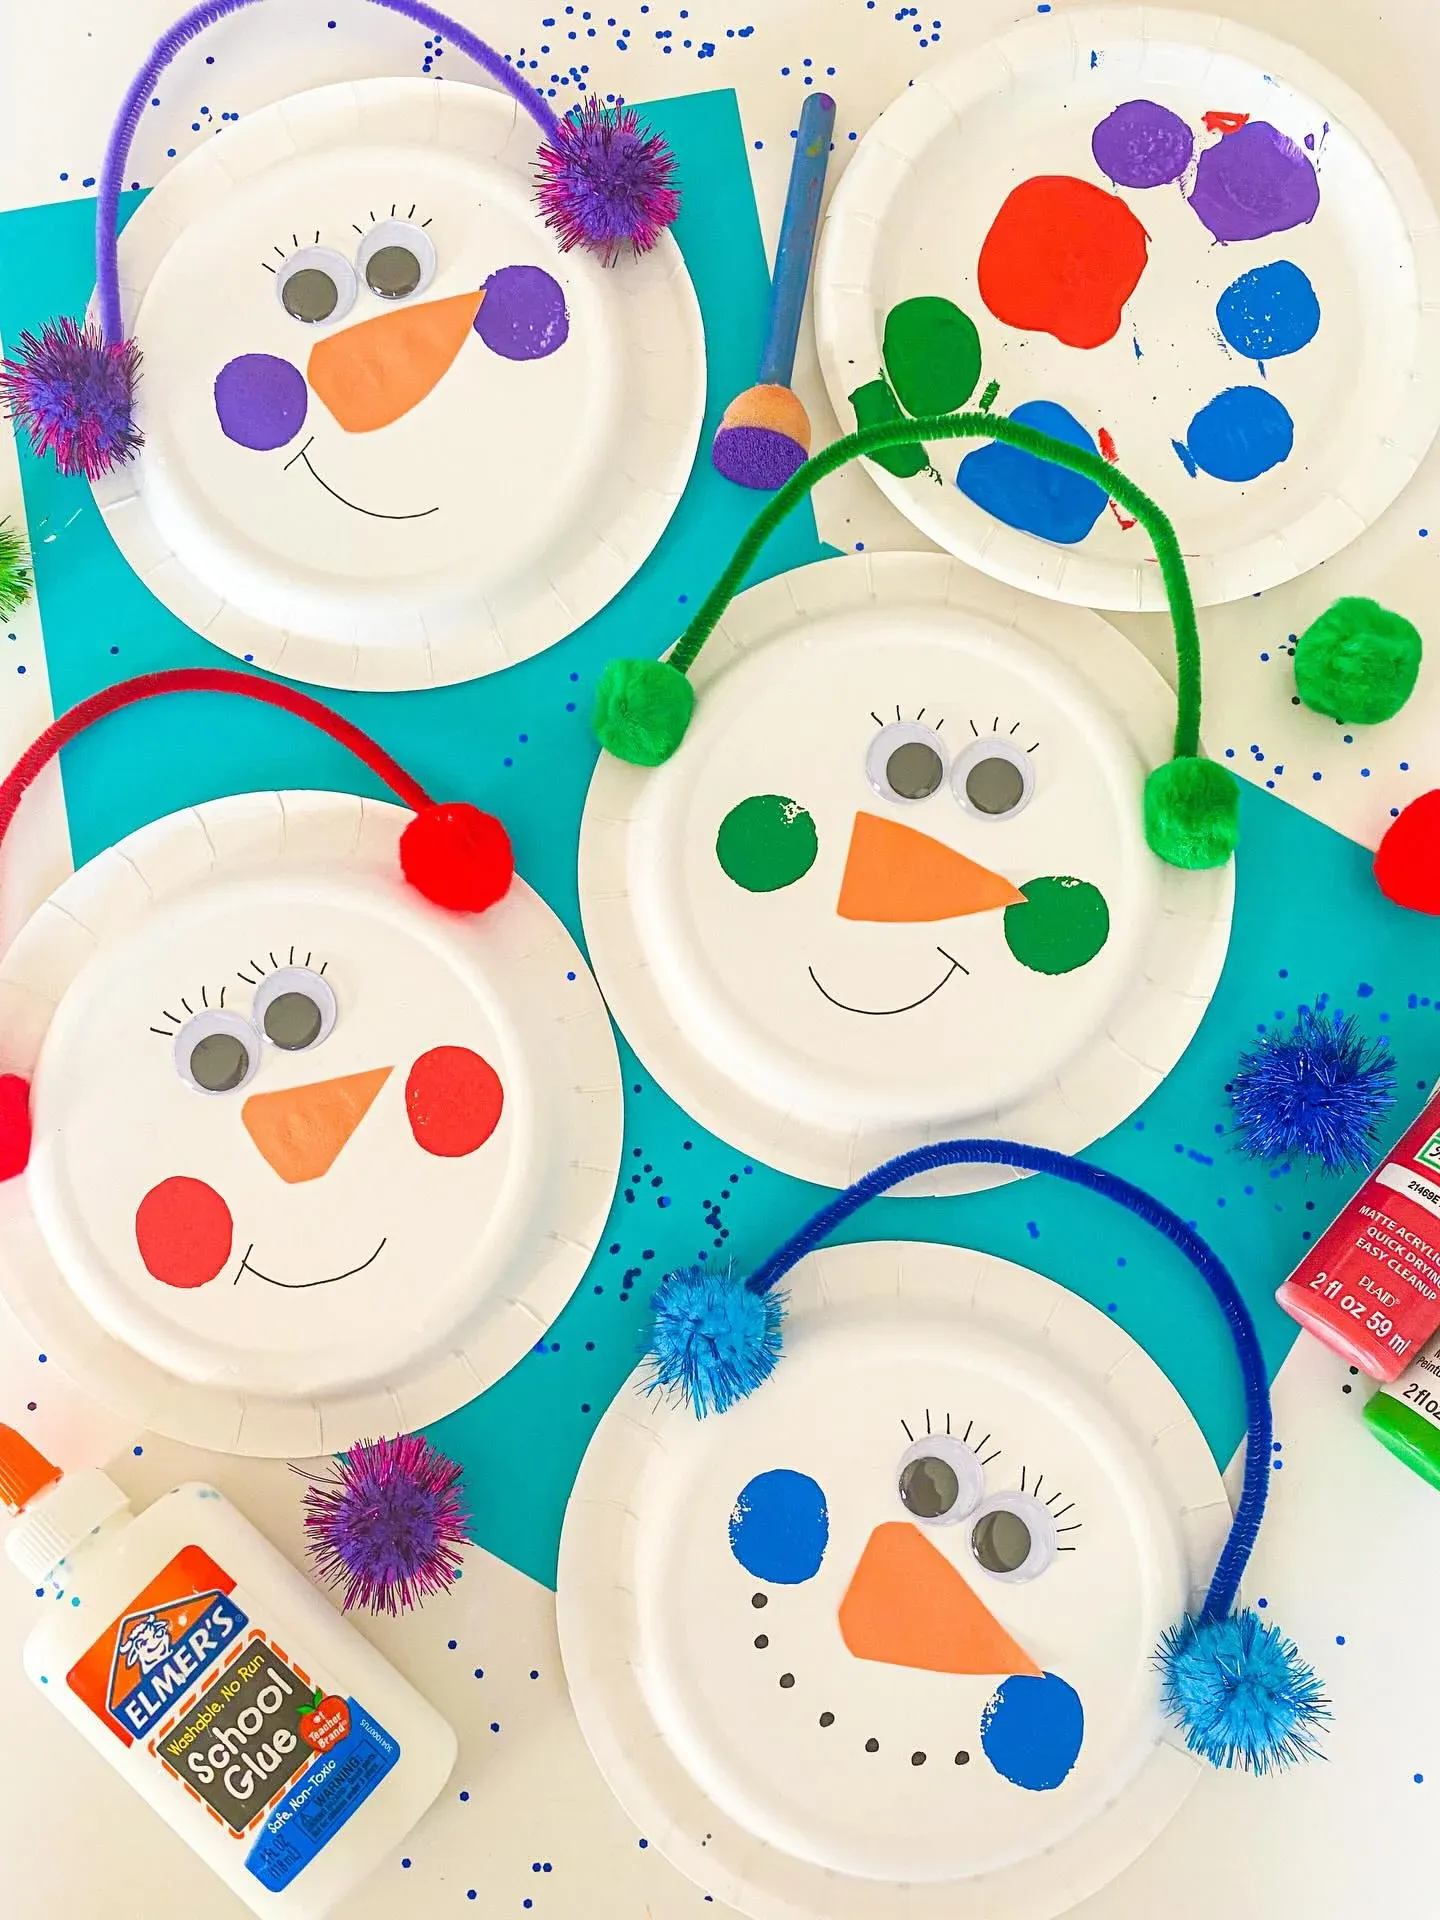
White paper plates feature painted orange carrot noses, googly eyes, and bright pipe cleaners bent over the top with fuzzy pom poms.
Kids love turning simple round plates into smiling winter characters. Each funny snowman brings a playful touch to seasonal bulletin boards or classroom walls.
Supplies
- 4 white paper plates
- Pipe cleaners in assorted colors
- Small fuzzy pom poms
- Googly eyes
- Orange construction paper
- Black permanent marker
- Washable paints
- School glue
Instructions
- Draw a smiling mouth and fine eyelashes on each paper plate using a black marker.
- Cut small carrot nose shapes out of orange construction paper and glue them near the center.
- Attach googly eyes above the nose using liquid school glue.
- Bend a colorful pipe cleaner into an arch over the top of the plate.
- Glue matching fuzzy pom poms onto both ends of the pipe cleaner to make earmuffs.
- Let the glue dry completely before hanging your cheerful snowmen up.
Handprint Christmas Tree Cards With Fairy Lights
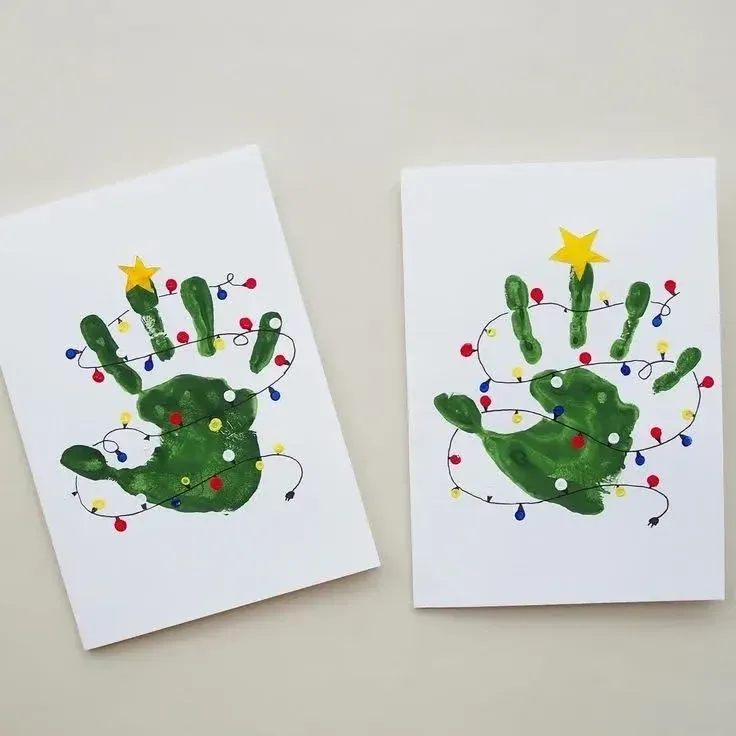
Green handprints stamped onto white cards hold painted string lights and a small yellow star cutout glued securely at the top.
Little hands press into bright green paint to form the base of a glowing holiday tree. Families love receiving these cute fingerprint lights made by young learners during winter art sessions.
Supplies
- White cardstock folded in half
- Green washable paint
- Black fine tip marker
- Yellow construction paper
- Assorted colorful paints for lights
- Paintbrushes
- Paper plate for paint mixing
Instructions
- Coat a child’s hand evenly with green washable paint using a soft brush.
- Press the painted hand firmly onto the front of the white cardstock.
- Draw a thin black line looped across the green fingers like string lights.
- Dip fingertips into colorful paints to stamp small holiday bulbs along the black wire.
- Cut a tiny star shape from yellow construction paper and glue it above the handprint tree.
- Set the finished card aside until all the colorful paint dries completely.
Round Wooden Box Lid Shaker Ornaments
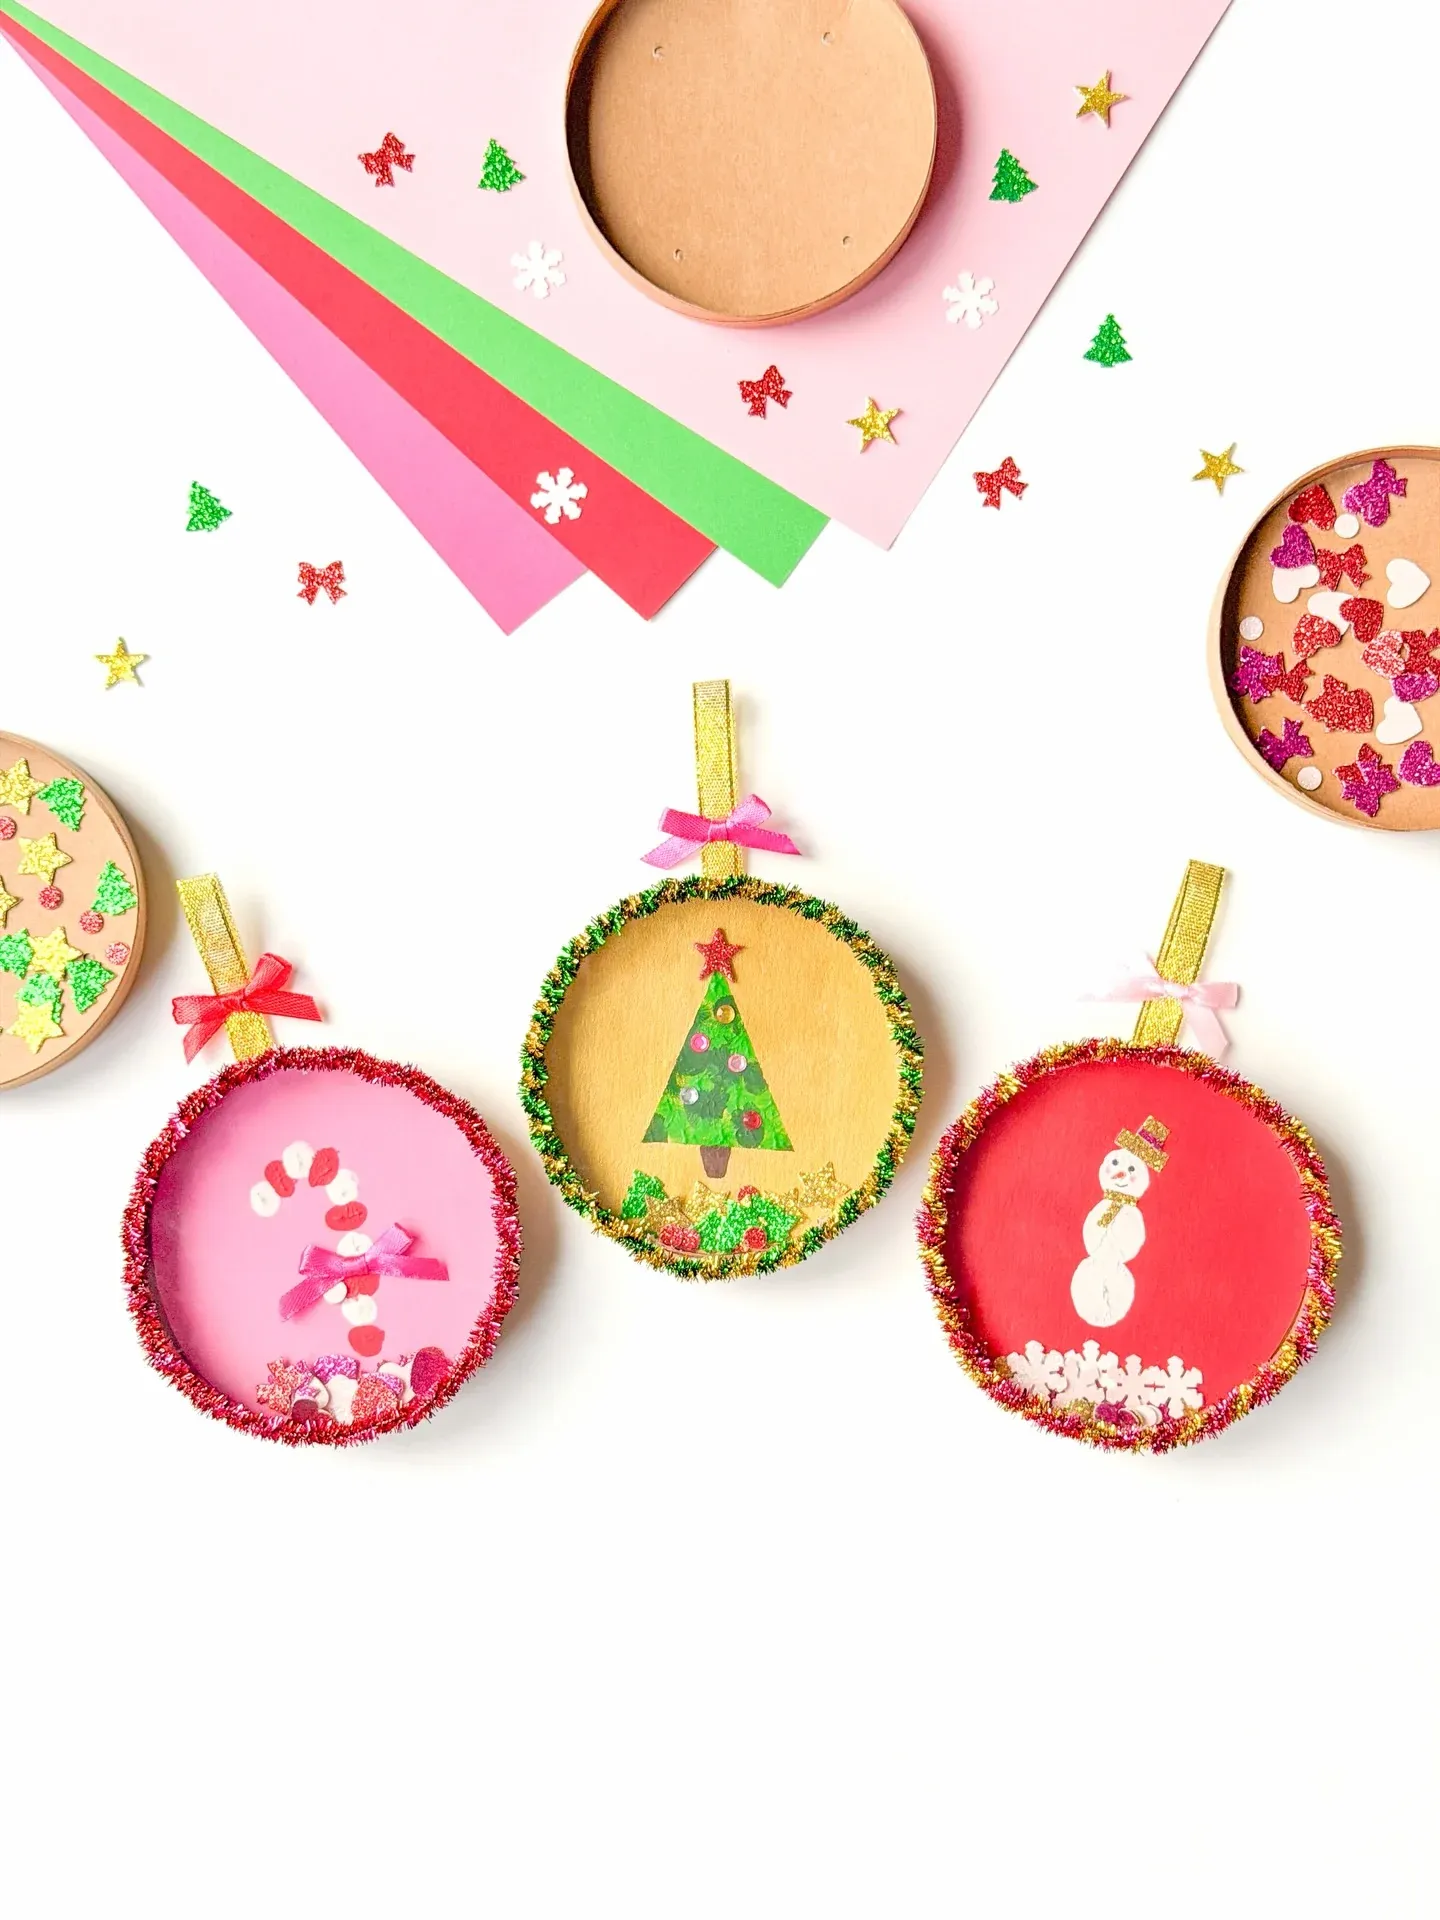
Shallow wooden box lids painted in bright shades hold miniature holiday trees, candy canes, and snowmen beneath protective clear trims.
Children shake these festive ornaments to watch tiny sequins swirl around handmade winter scenes. Every decorated lid adds a joyful sparkle to holiday tree branches.
Supplies
- Small round wooden box lids
- Acrylic paints in pink, red, and yellow
- Fine metallic tinsel trim
- Miniature holiday cutouts
- Glitter confetti and sequins
- Gold ribbon loops
- Clear craft glue
- Small paintbrushes
Instructions
- Paint the inside and outside of the wooden box lids in festive holiday colors.
- Glue a small tree, candy cane, or snowman cutout onto the center of each lid base.
- Sprinkle shiny glitter confetti and tiny sequins around the miniature winter scene.
- Wrap metallic tinsel trim tightly around the outer rim of the lid using strong glue.
- Attach a gold ribbon loop to the top edge for easy tree hanging.
- Allow the glue to dry fully before displaying your ornaments.
Sponge Painted Reindeer Face Holiday Cards
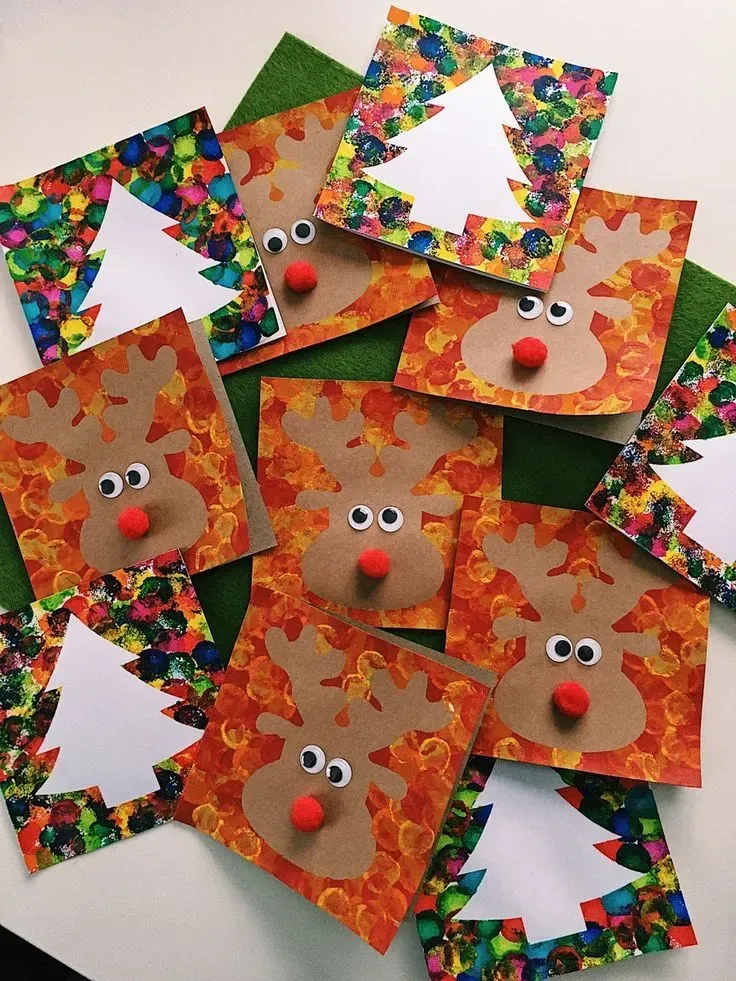
Brown cardboard reindeer faces featuring googly eyes and red pom pom noses sit centered on colorful cards covered in sponge painted textures.
Toddlers dab bright paint across cardstock to form snowy backgrounds for their friendly paper reindeer. These sweet holiday greetings bring big smiles to grandparents and friends.
Supplies
- Folded brown and white cardstock
- Brown construction paper
- Red pom poms
- Googly eyes
- Washable tempera paints in multiple colors
- Small round painting sponges
- White glue
- Child safe scissors
Instructions
- Stamp colorful tempera paint across the front of folded cards using round sponges.
- Cut reindeer head shapes with antlers out of brown construction paper.
- Glue two googly eyes onto the upper portion of each brown paper reindeer face.
- Attach a fluffy red pom pom below the eyes to form a shiny red nose.
- Glue the finished reindeer head onto the center of the painted card front.
- Keep the cards flat on your workspace until the glue sets firmly.
Marshmallow Outline Snowman Art on Blue Paper
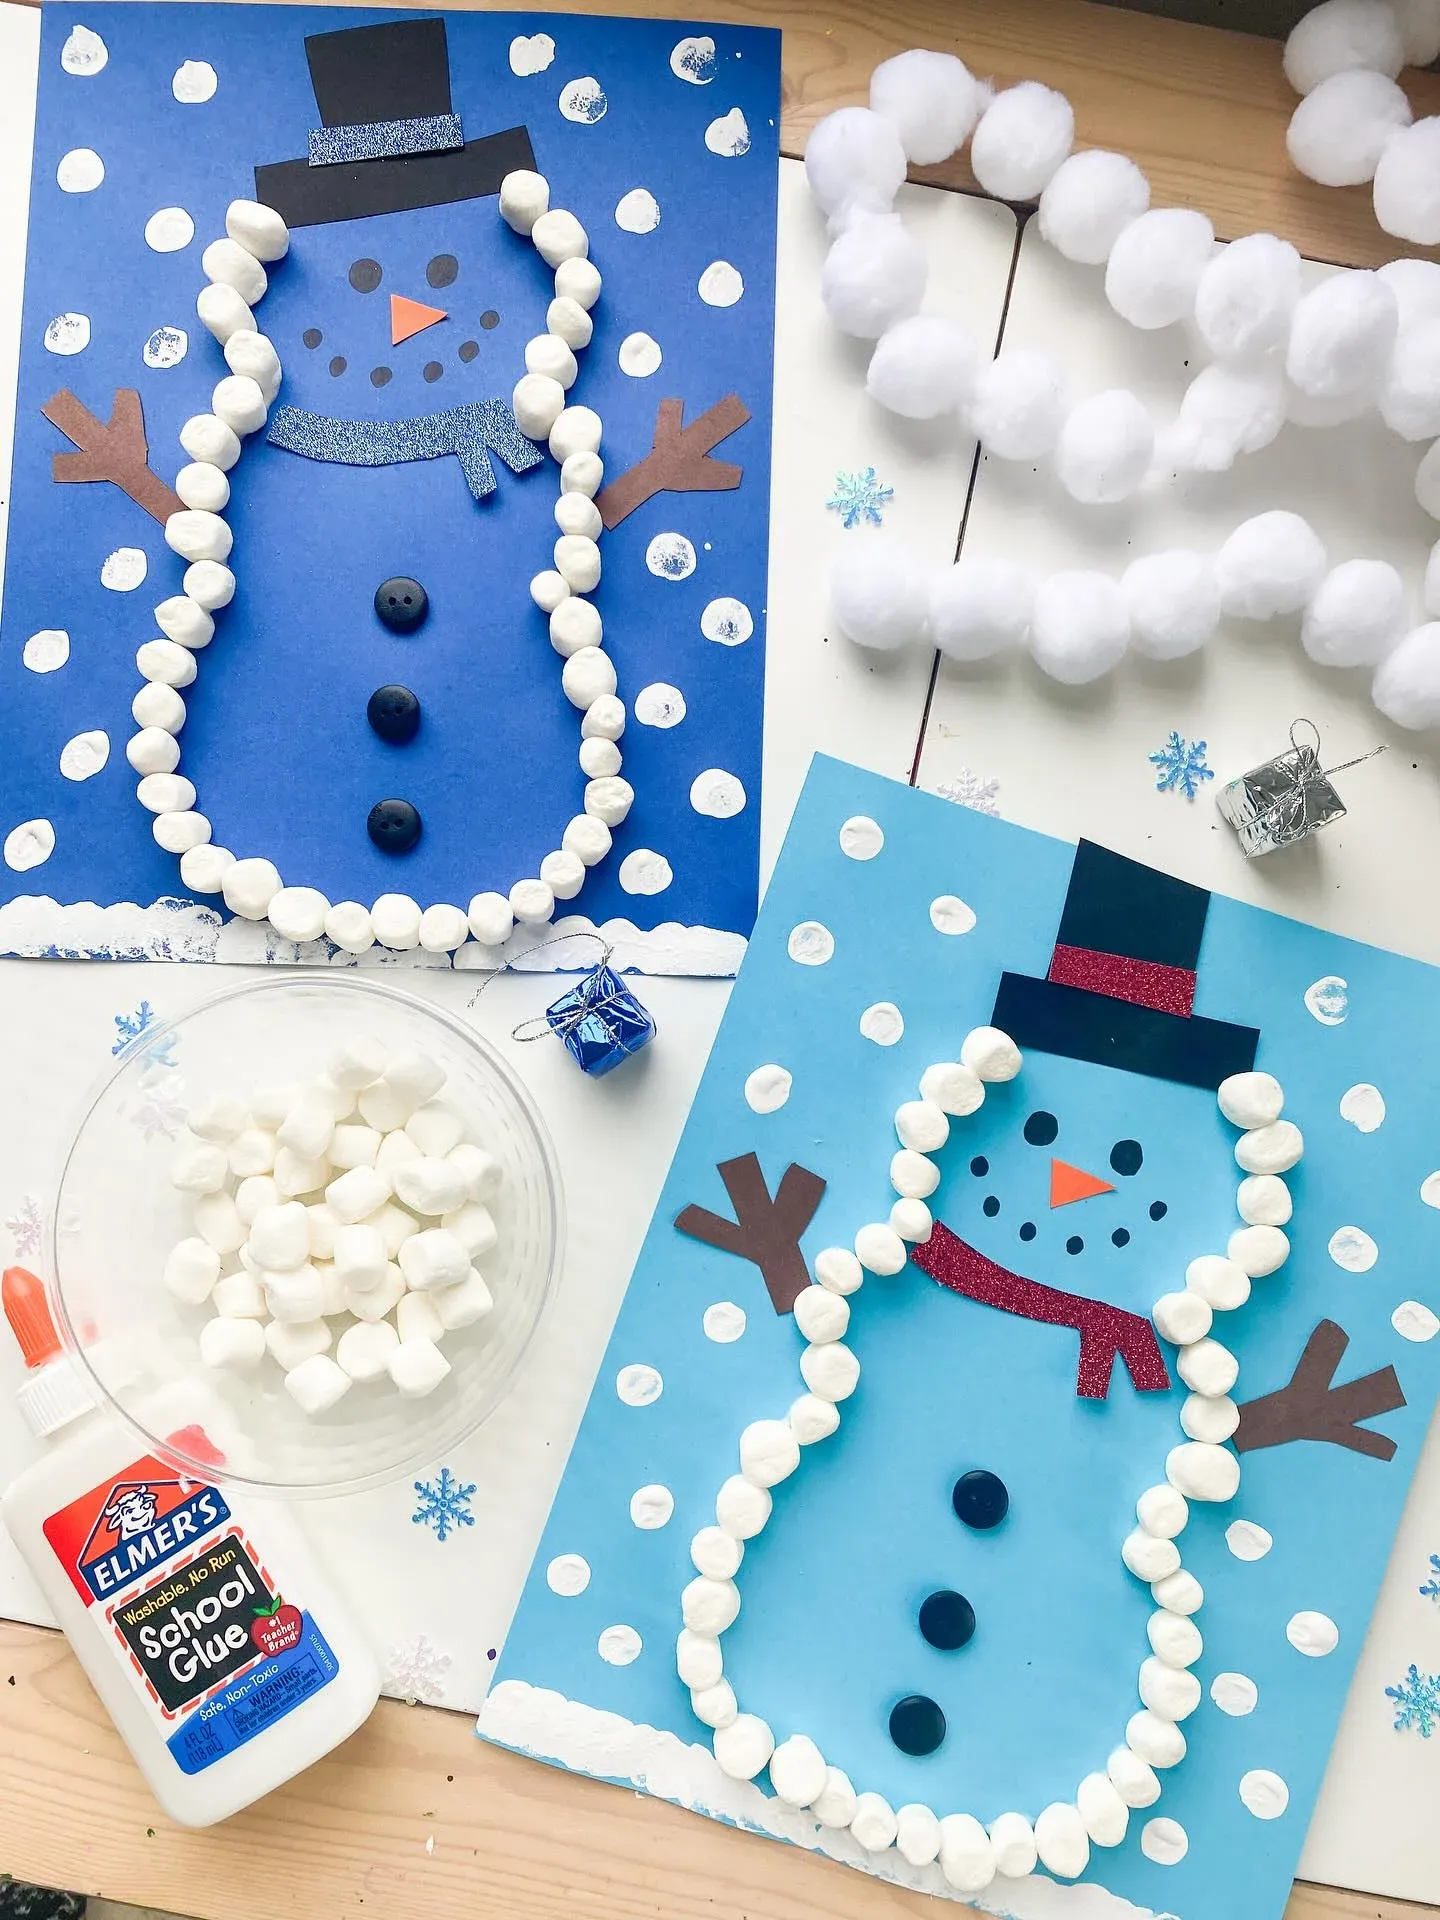
Mini white marshmallows line the shape of a happy snowman drawn on blue paper with black buttons and a textured hat.
Little fingers build fine motor coordination by placing sweet treats along the traced outlines of a winter friend. This creative project looks wonderful displayed on classroom walls throughout the snowy season.
Supplies
- Blue construction paper
- Mini marshmallows
- Black and orange construction paper
- Sparkly glitter paper
- Small black buttons
- White school glue
- Brown paper scraps
Instructions
- Draw a large snowman outline on the blue paper using a pencil.
- Squeeze a thin line of school glue along the traced snowman shape.
- Press mini marshmallows closely together along the glue line to form the body.
- Cut a top hat from black paper and add a sparkly band across the middle.
- Glue small black buttons down the center of the marshmallow body.
- Attach tiny brown twig shapes for arms and let the glue dry.
Rice Sprinkled Smiley Tree Ornaments
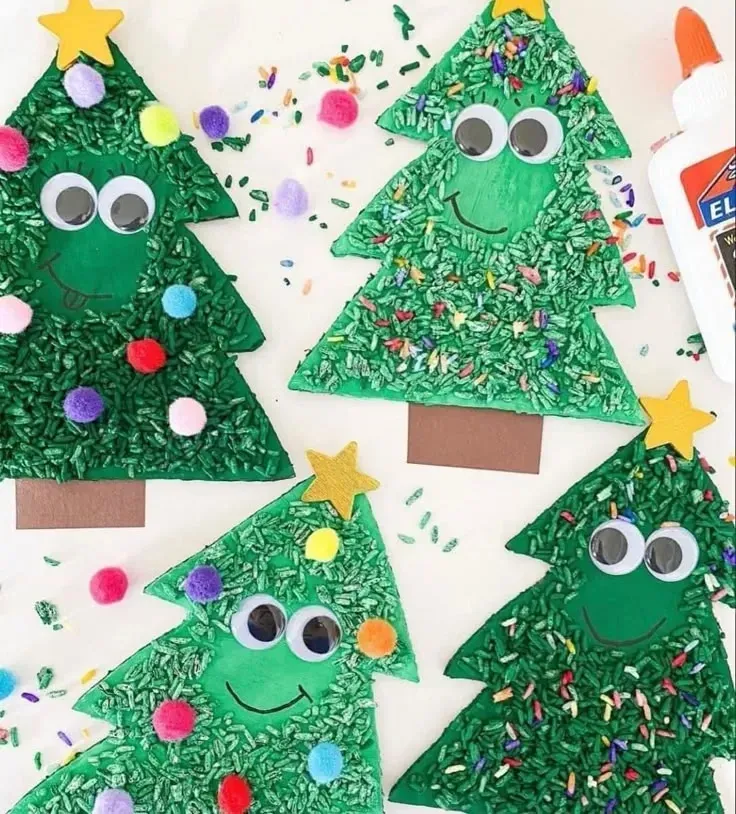
Green painted cardboard tree cutouts wear textured rice coatings, colorful pom poms, googly eyes, and smiling stitched mouths.
Preschoolers glue crunchy rice grains over painted tree shapes to create fun textured pine needles. Big googly eyes and fluffy pom poms turn simple cardboard cutouts into cheerful holiday characters.
Supplies
- Green cardstock trees
- Dyed green rice grains
- Googly eyes
- Small colorful pom poms
- Brown paper trunk cutouts
- Gold glitter stars
- Black marker
- School glue
Instructions
- Paint green cardstock tree cutouts and glue a brown paper trunk at the bottom.
- Cover the green tree surface generously with liquid school glue.
- Sprinkle dyed green rice grains all over the wet glue to form textured needles.
- Shake off excess rice and press googly eyes onto the upper tree section.
- Draw a happy smile beneath the eyes using a fine black marker.
- Glue colorful pom poms and a gold star on top before letting it dry.
Framed Miniature Portrait Christmas Crafts
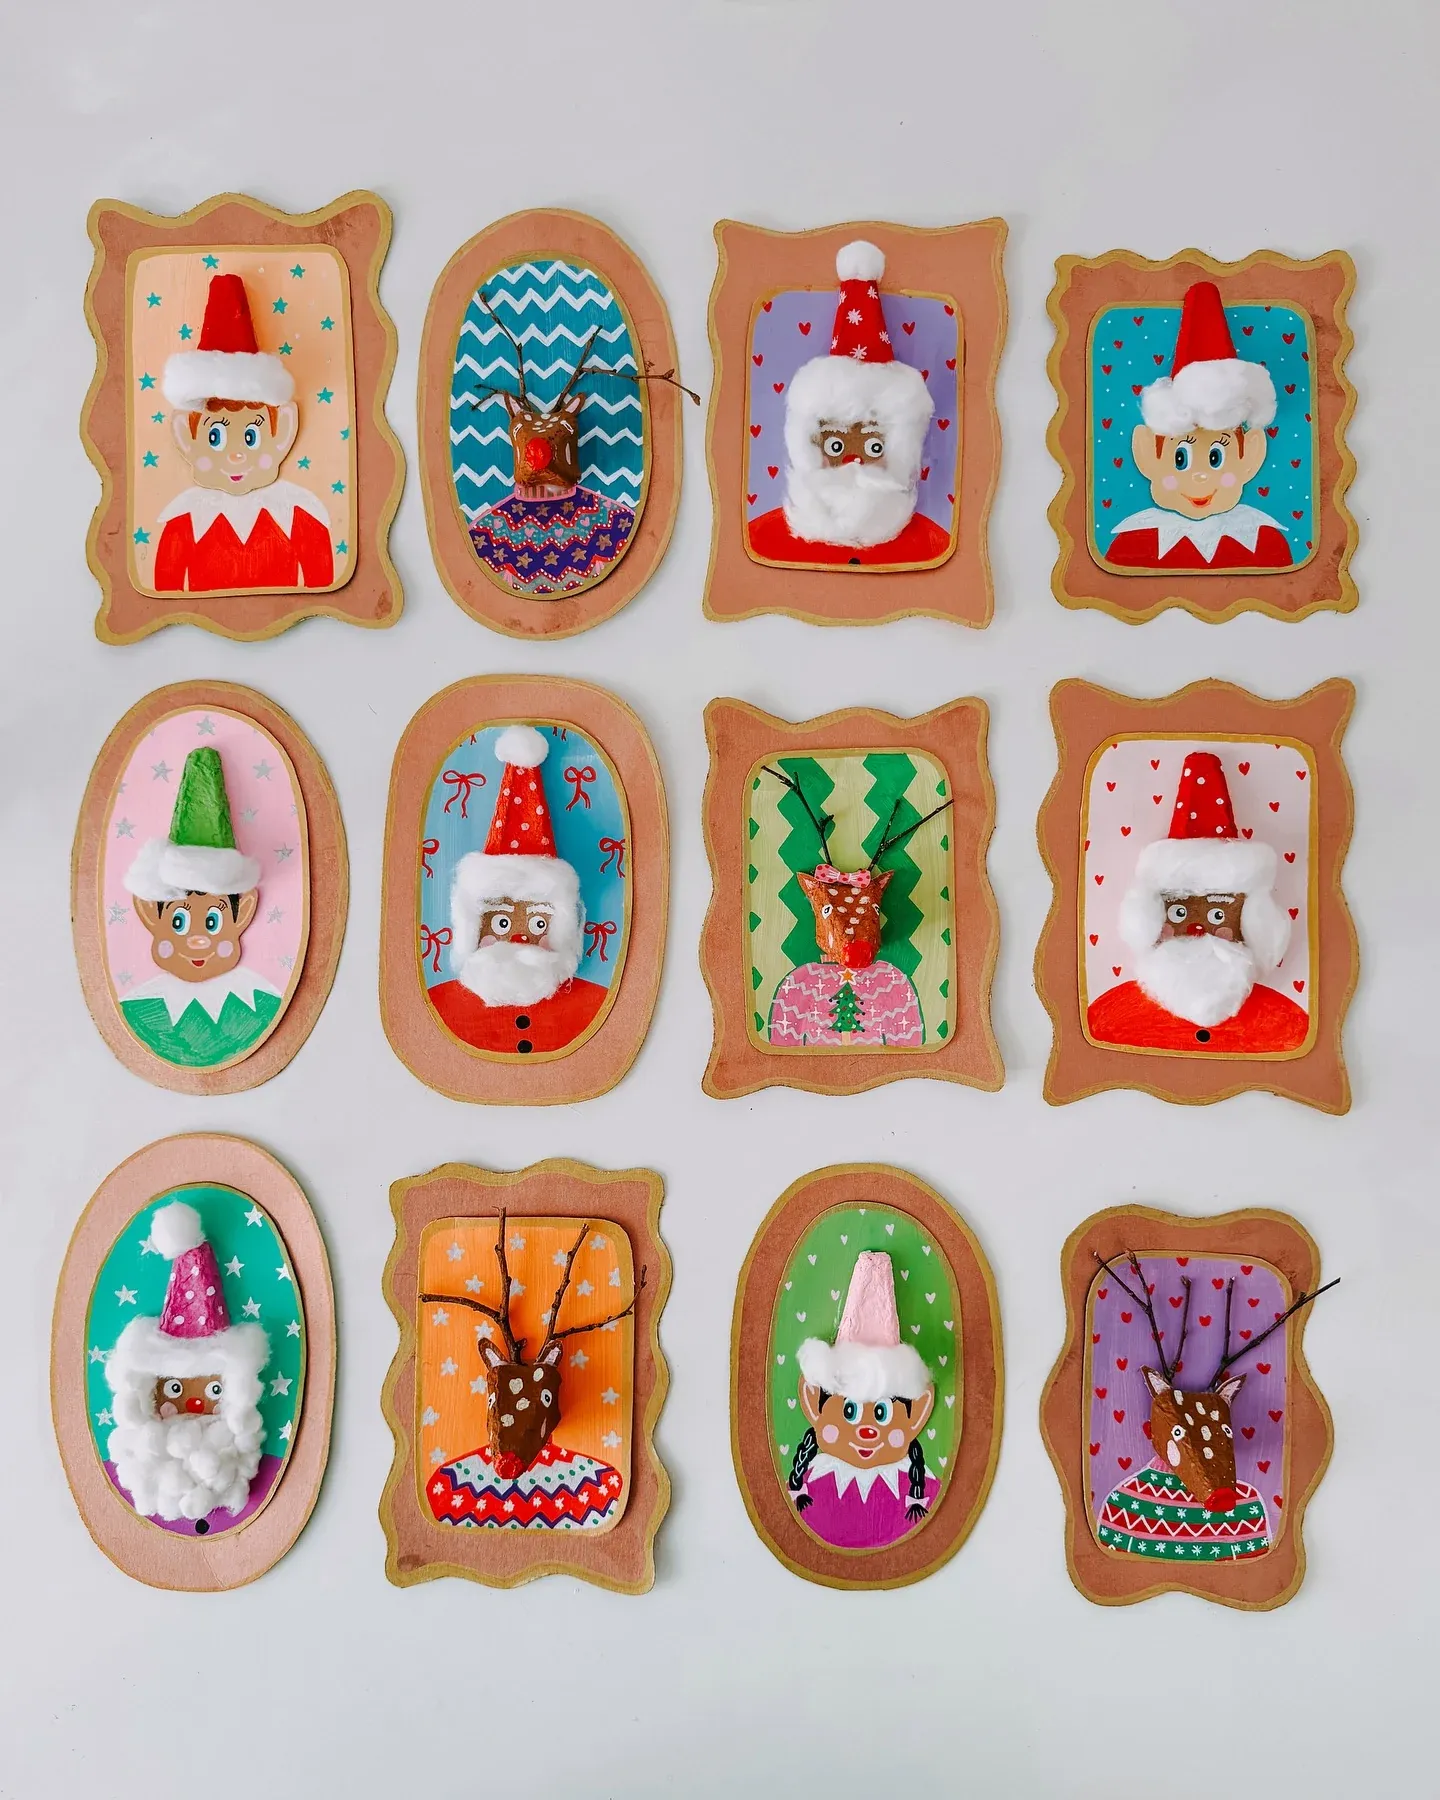
Miniature canvas frames hold handmade holiday portraits of Santa, reindeer, and elves created with textured fabrics and cotton trims.
Kids explore mixed media art by combining painted cardstock, twigs, and fluffy cotton to make vintage holiday characters. Each framed portrait looks like a tiny masterpiece ready for seasonal home displays.
Supplies
- Small cardboard frames
- Colorful patterned papers
- Cotton balls
- Tiny twigs
- Acrylic paints
- Miniature craft pom poms
- Felt scraps
- Craft glue
Instructions
- Paint the inner backing papers with bright colors or patterned holiday designs.
- Craft tiny Santa faces, elves, and reindeer using paper cutouts and paint.
- Pull cotton balls apart to form fluffy white beards and Santa hat trims.
- Glue small natural twigs onto the back of reindeer portraits for antlers.
- Mount the decorated backing boards securely inside the cardboard picture frames.
- Leave your portrait collection flat until all the decorative glue dries completely.
Colorful Popsicle Stick Tree Ornaments
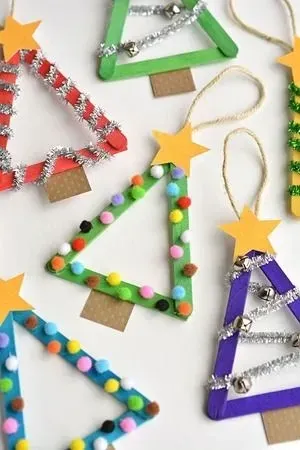
Brightly painted craft sticks form triangle tree frames decorated with colorful pom poms, shiny pipe cleaners, and paper stars.
Young children practice sorting colors while gluing tiny pom poms and bells onto wooden frame ornaments. These lightweight keepsakes look wonderful hanging from Christmas tree branches.
Supplies
- Wooden craft sticks
- Washable paints in various colors
- Mini pom poms or jingle bells
- Metallic pipe cleaners
- Yellow paper stars
- Twine loops
- School glue
- Scissors
Instructions
- Paint three wooden craft sticks in bright holiday colors and let them dry.
- Glue the sticks together into a triangle shape to make a tree frame.
- Cut a small square of brown paper and glue it to the bottom as a trunk.
- Wrap metallic pipe cleaners around the sticks or glue tiny pom poms along the edges.
- Attach a yellow paper star to the top point of the wooden tree.
- Tie a loop of twine to the top star for hanging on the tree.
Colorful Painted Winter Beanie Art
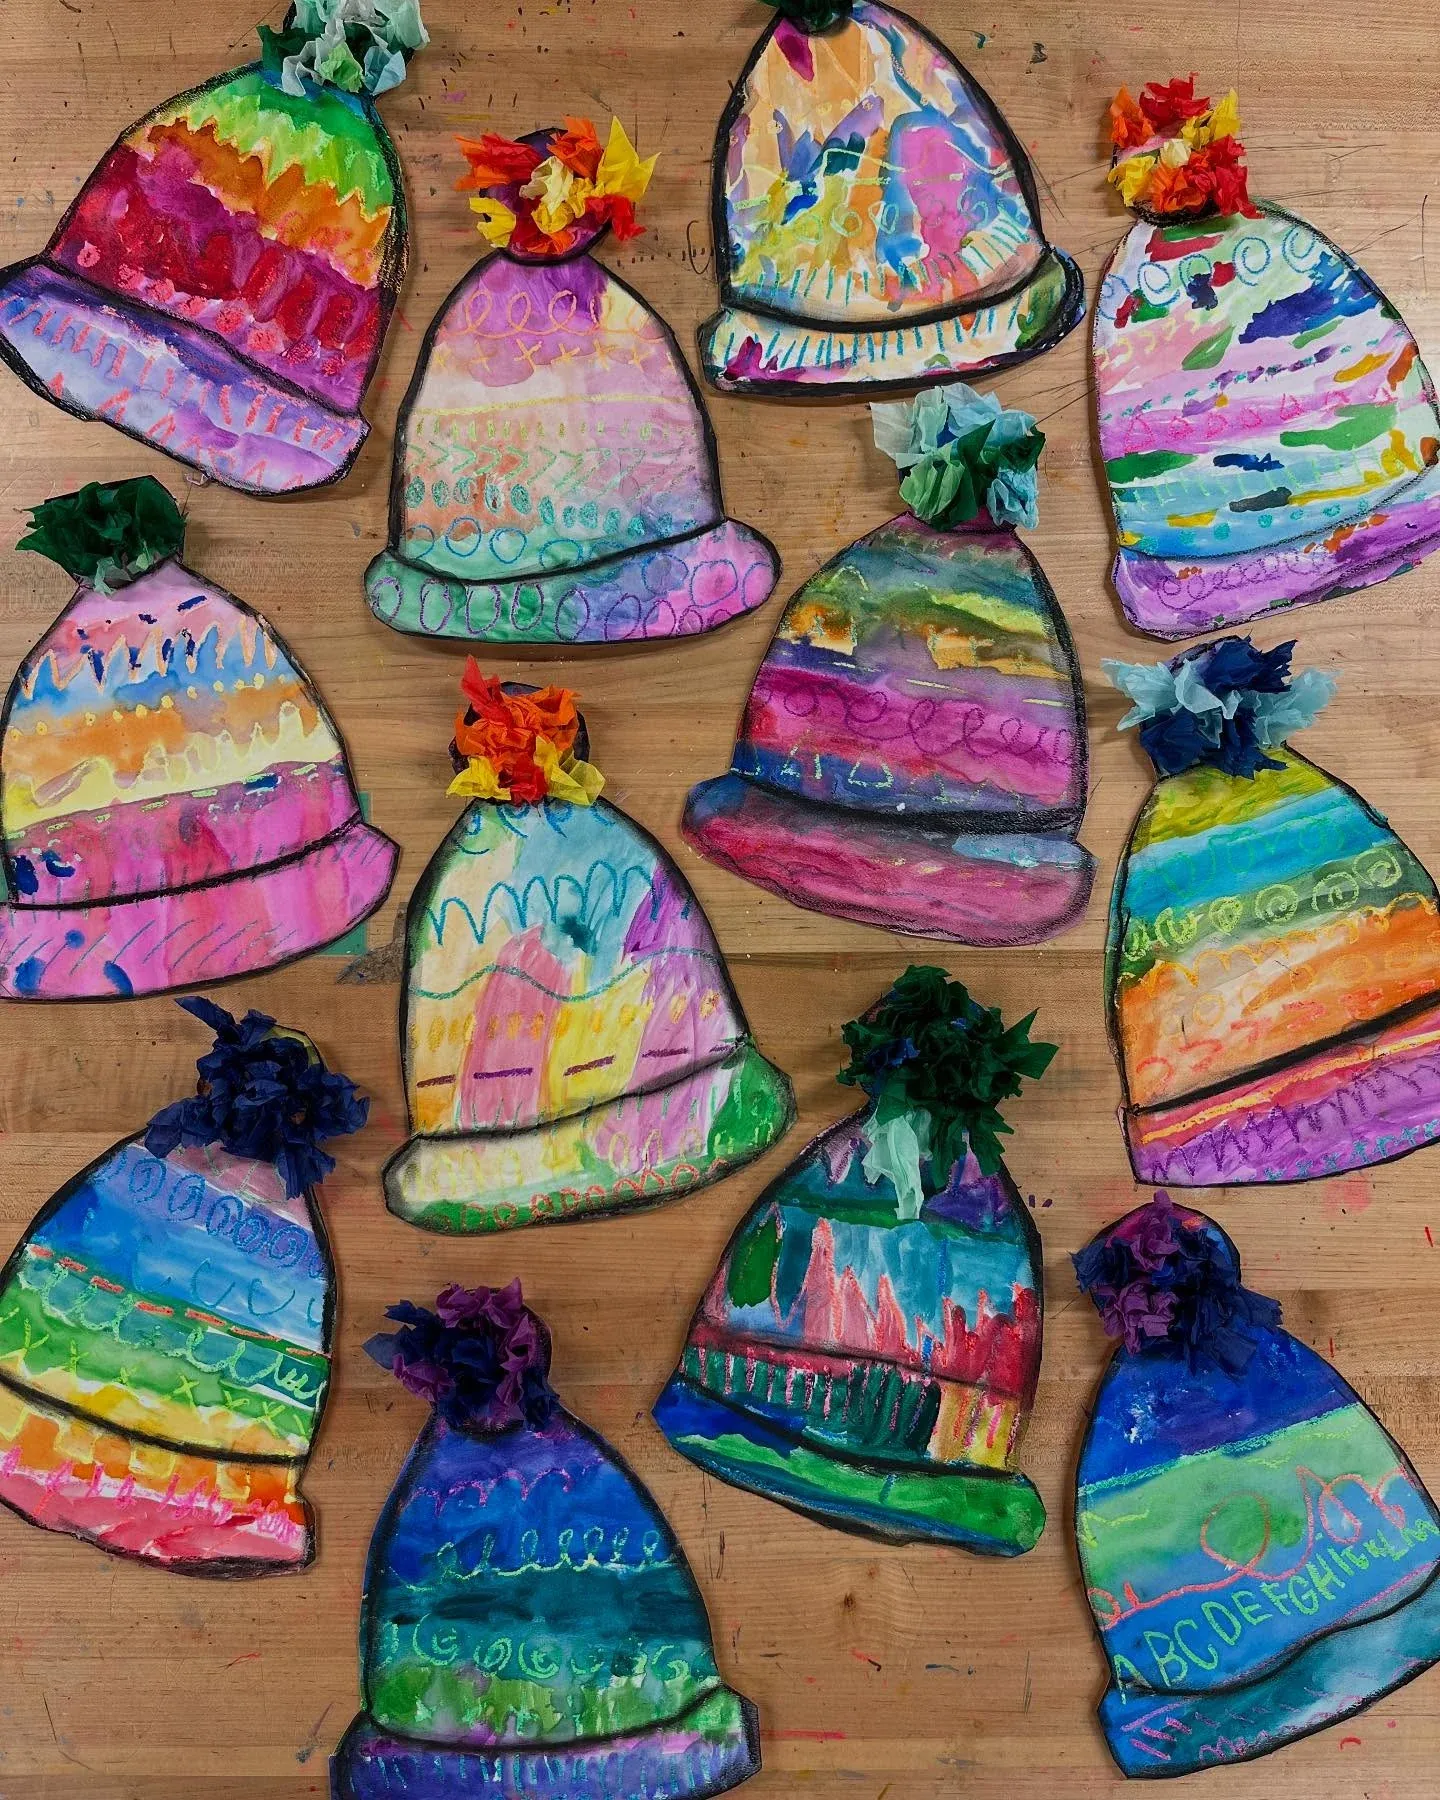
Paper winter hats decorated with bright watercolors, marker patterns, and tissue paper pom poms fill a shared workspace table.
Students use paintbrushes and markers to design unique winter beanies with bold stripes and playful textures. Fluffy tissue paper tufts add a wonderful finishing touch to the top of every hat.
Supplies
- Heavy white paper hat cutouts
- Liquid watercolors or tempera paints
- Markers and oil pastels
- Colorful tissue paper squares
- Child safe scissors
- Glue sticks
- Black permanent marker
Instructions
- Cut large winter beanie shapes out of heavy white paper sheets.
- Paint colorful stripes and zig-zag patterns across the hats using watercolors.
- Draw fine details like dots and swirls with black permanent markers.
- Crumple small tissue paper squares into tight balls to form hat poms.
- Glue the fuzzy tissue paper pom poms onto the top tip of each beanie.
- Display your colorful paper hats together on a large classroom bulletin board.
Finger Painted Pine Tree With Yellow Star
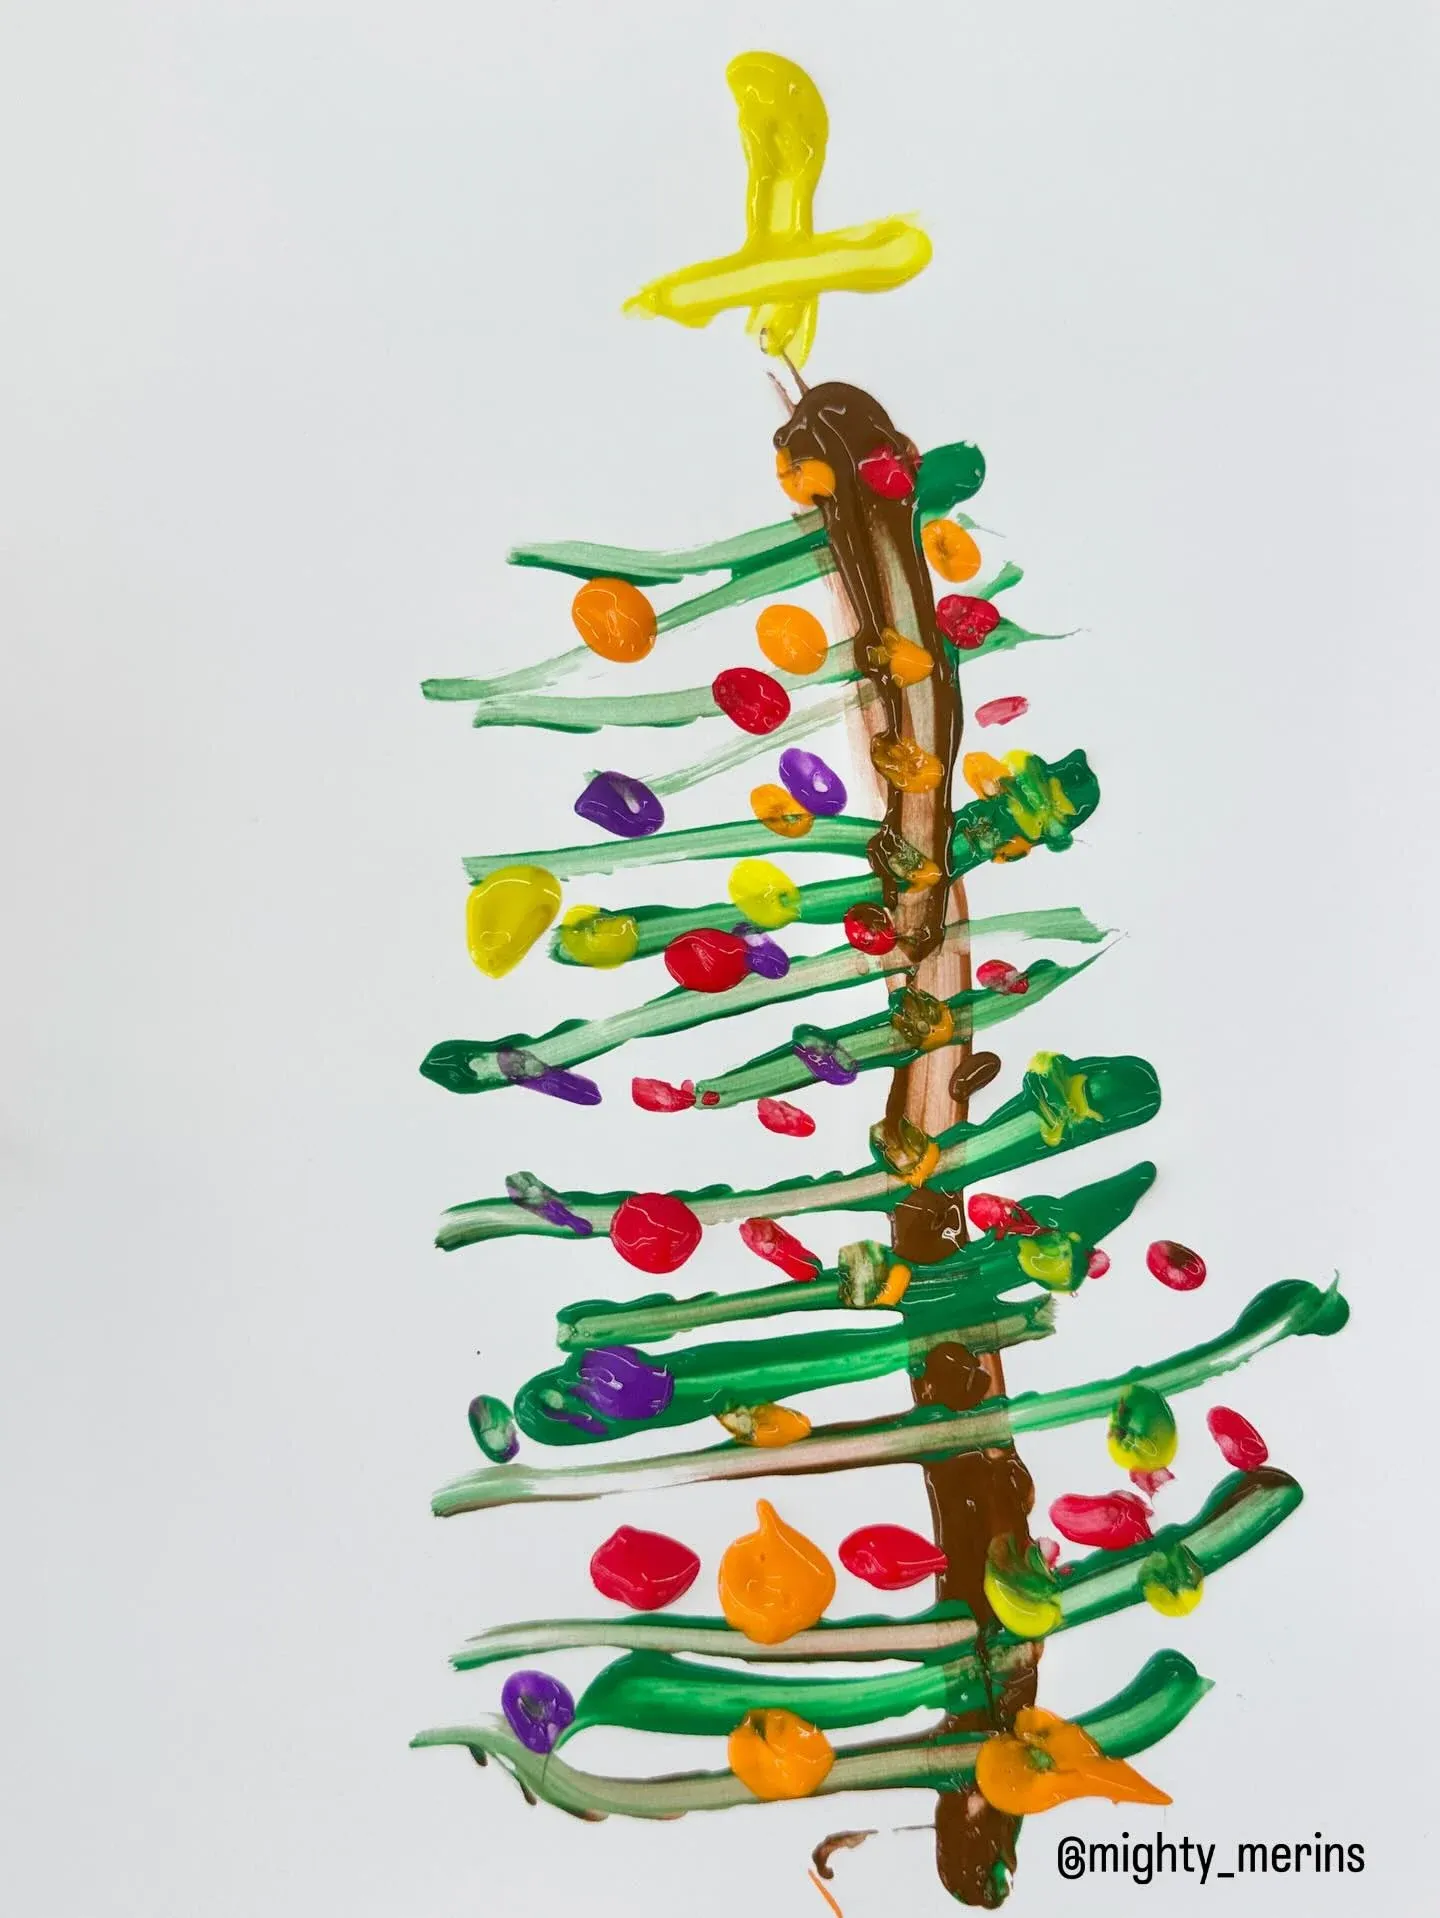
Green finger paint smudges form the layered branches of a simple Christmas tree topped with a bright yellow star cutout.
Little fingers glide across the page to create abstract pine boughs in this fun sensory painting activity. A cheerful yellow star crowns the top of the tree for a festive holiday finish.
Supplies
- Thick white art paper
- Green and brown washable paint
- Yellow paint or paper star
- Wet wipes for clean up
- Flat table surface
Instructions
- Dip a finger into brown paint to draw a straight tree trunk down the paper center.
- Swipe green paint horizontally across both sides of the trunk in decreasing widths.
- Layer additional green finger dabs to make the pine branches look full.
- Paint a bright yellow star shape right above the top of the tree trunk.
- Add colorful painted dots across the green branches to look like ornaments.
- Place the finished artwork on a flat surface until the paint dries completely.
Cardboard Santa Claus Ornaments
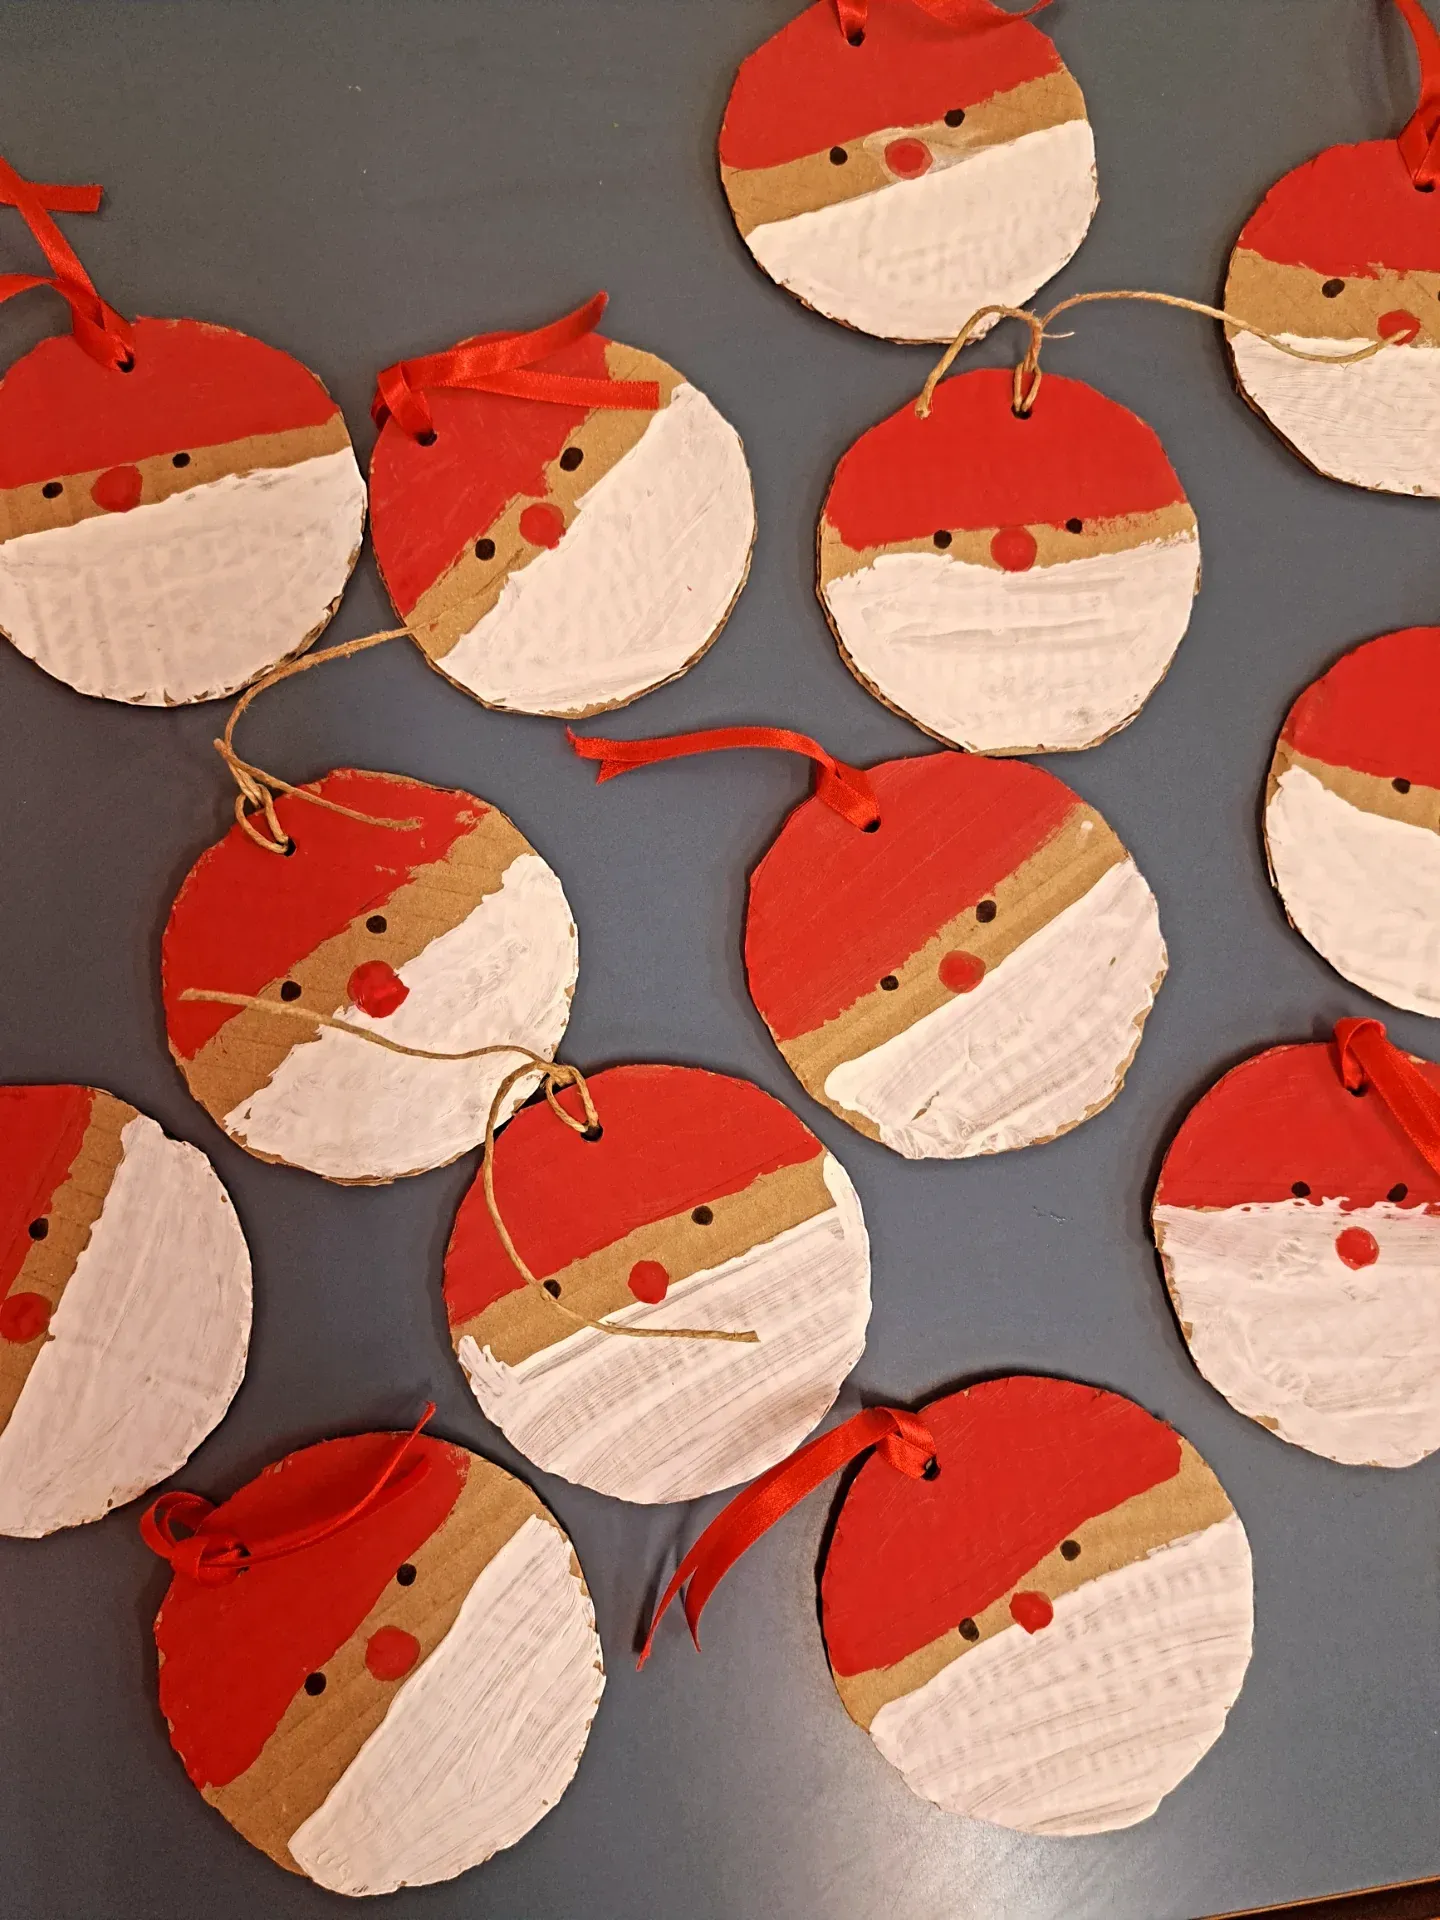
Round cardboard pieces featuring bright red painted hats, white textured beards, and small googly eyes hang from thin red ribbons.
Children love turning plain recycled cardboard into jolly holiday faces for the living room tree. Each smiling Santa brings a joyful handmade touch to seasonal decorations.
Supplies
- Thick corrugated cardboard circles
- Red and white acrylic paint
- Black permanent marker
- Small red pom poms or paint dots
- Red satin ribbon strips
- Hole punch tool
- Paintbrushes
Instructions
- Punch a small hole near the top edge of each cardboard circle.
- Paint the top section red to form Santa’s classic holiday hat.
- Apply thick white paint across the bottom portion to create a fluffy beard.
- Draw two small black eyes with a marker right beneath the red hat line.
- Glue a tiny red dot or pom pom in the middle for a button nose.
- Thread a red satin ribbon through the top hole and tie it securely for hanging.
Sparkling Pine Cone Christmas Trees
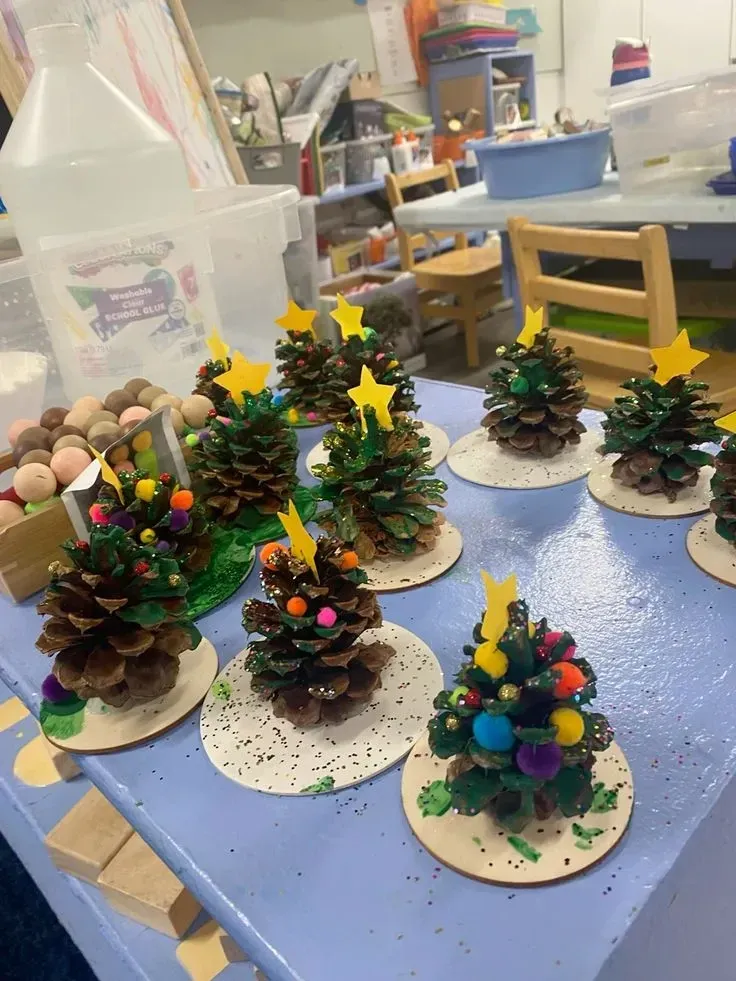
Natural pine cones painted deep green stand on round wooden bases topped with shiny yellow stars and colorful mini pom poms.
Little hands enjoy decorating rough pine cones with soft pom poms and glittering sprinkles. These rustic tabletop trees look charming on desk displays or holiday dining tables.
Supplies
- Large natural pine cones
- Green acrylic paint
- Small round wooden discs
- Yellow foam star cutouts
- Colorful mini pom poms
- Fine glitter confetti
- White school glue
- Paintbrushes
Instructions
- Paint the outer edges of the pine cone green and let it dry completely.
- Glue the bottom of the painted pine cone onto a round wooden disc base.
- Dab small dots of school glue onto the tips of the pine cone scales.
- Press colorful mini pom poms and glitter confetti onto the glue spots to look like ornaments.
- Attach a bright yellow foam star firmly to the very top tip of the tree.
- Keep the finished decoration on a flat table until the glue hardens.
Translucent Stained Glass Snowflake SunCatchers
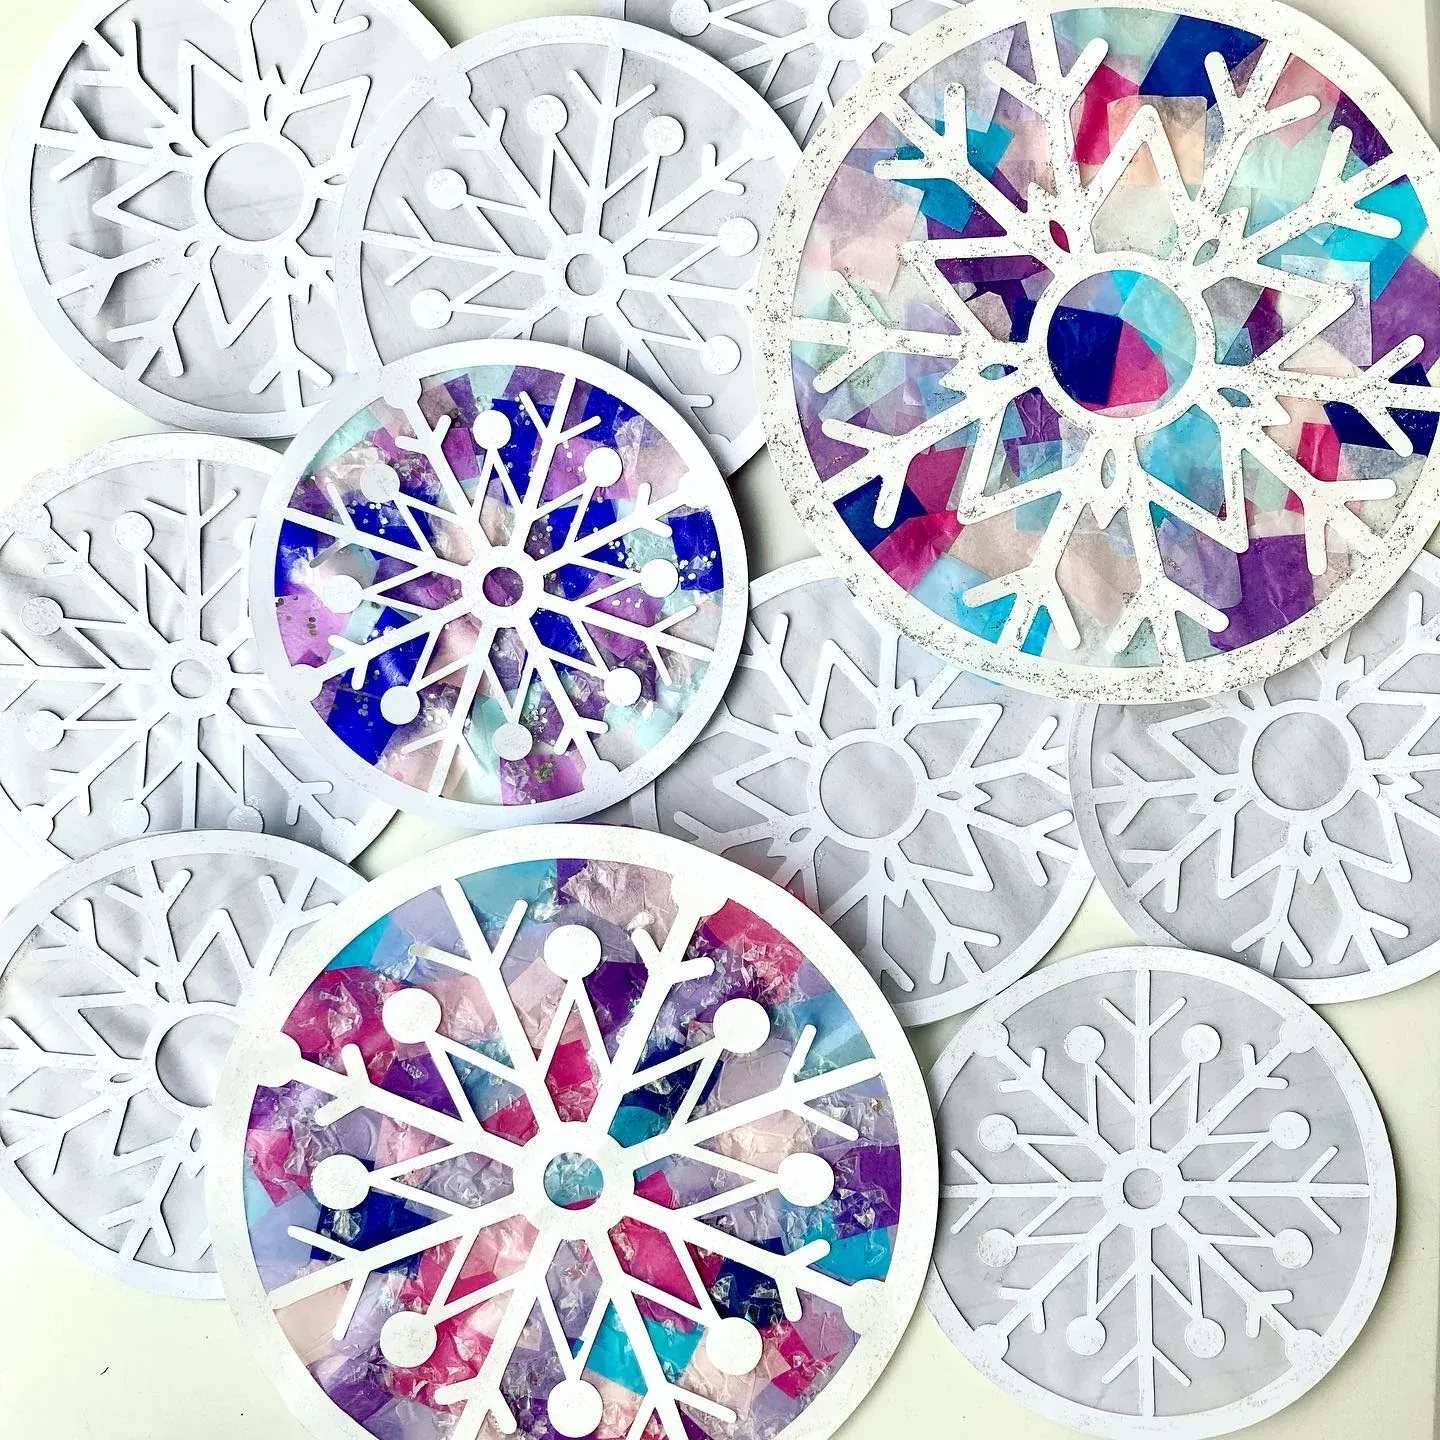
White laser cut snowflake frames feature vibrant colorful tissue paper squares trapped inside to catch the winter sunlight.
Students explore color mixing by pressing translucent pink, blue, and purple paper pieces behind delicate snowflake cutouts. These bright window decorations brighten up gray winter days effortlessly.
Supplies
- White paper snowflake frames
- Translucent tissue paper squares in blue, pink, and purple
- Clear contact paper sheets
- Kid safe scissors
- Flat workspace
Instructions
- Cut two matching sheets of clear contact paper and peel away the backing from one.
- Press colorful tissue paper squares all over the sticky side of the contact paper sheet.
- Place the white snowflake frame directly on top of the colorful tissue paper collage.
- Cover the front with the second sheet of contact paper to seal everything inside.
- Cut carefully around the outer edge of the white snowflake frame using scissors.
- Hang your finished suncatcher on a sunny windowpane to watch the colors glow.
Cotton Pad Triangle Christmas Trees
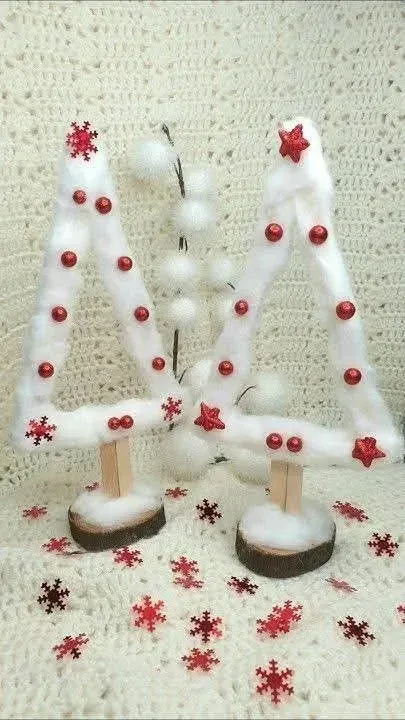
White cotton cosmetic pads line the edges of cardboard triangles standing on wooden blocks with red star toppers and sparkly snowflake confetti.
Toddlers build fine motor control by arranging soft cotton pads along simple wooden tree frames. Tiny red stars and sequins add a festive holiday pop to the snowy display.
Supplies
- Triangle cardboard tree frames
- Soft cotton cosmetic pads
- Wooden block bases with sticks
- Small red glitter stars
- Red bead garlands or sequins
- Snowflake confetti
- School glue
Instructions
- Glue the cardboard triangle securely onto the top of the wooden block stand.
- Cover the front edges of the triangle with liquid school glue.
- Press soft cotton pads closely together along the glued triangle frame.
- Attach small red beads or glitter stars down the center of the cotton tree.
- Glue a larger red star right onto the peak of the tree.
- Sprinkle shiny snowflake confetti around the base before letting the glue dry.
Sparkly Pipe Cleaner Christmas Trees
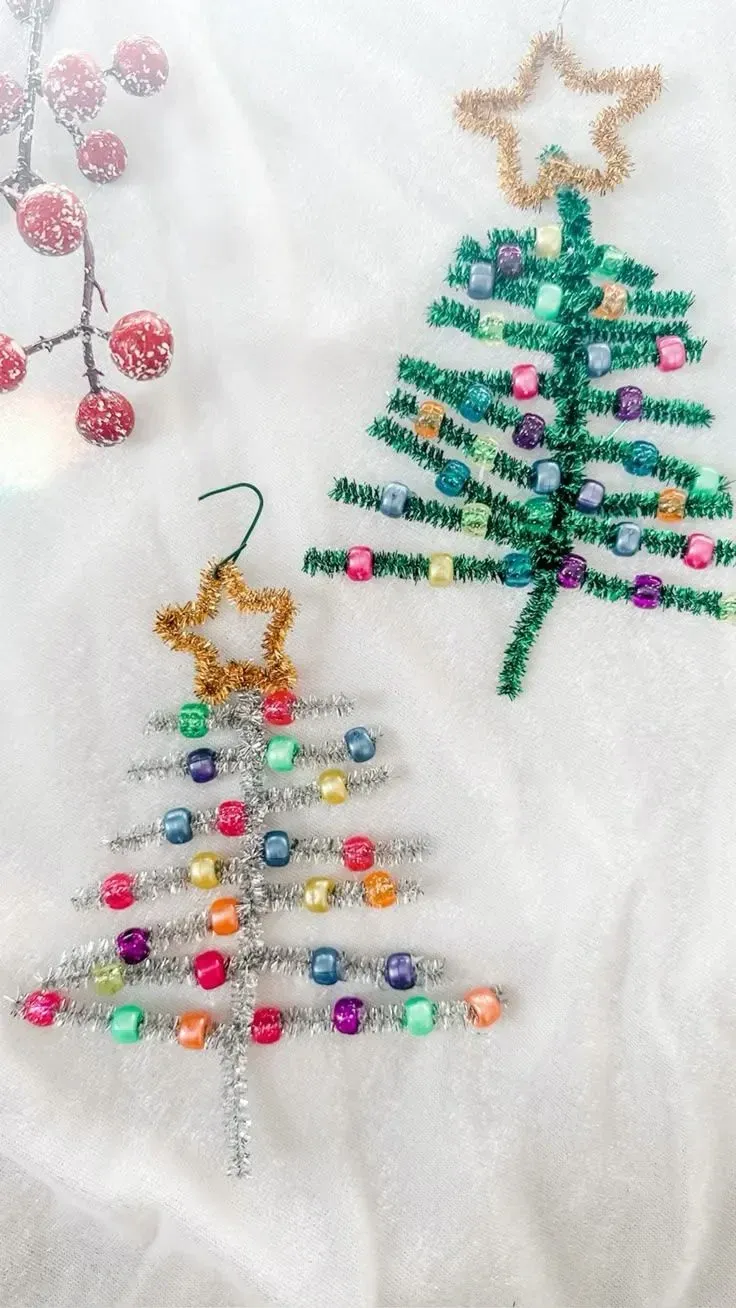
Silver and green metallic pipe cleaners twist into detailed triangular tree shapes decorated with colorful pony bead ornaments and star toppers.
Children strengthen hand muscles by threading bright plastic beads onto fuzzy metallic pipe cleaners before shaping them. Each sparkling tree makes a lovely handmade gift for family members.
Supplies
- Green and silver metallic pipe cleaners
- Gold glitter pipe cleaners
- Assorted colorful plastic pony beads
- Scissors
Instructions
- Twist a gold glitter pipe cleaner into a small star shape for the tree top.
- Wrap the base of the star securely around the top end of a straight silver pipe cleaner stem.
- Cut several shorter pieces of green pipe cleaner to serve as tree branches.
- Thread colorful pony beads onto each short green branch segment.
- Twist the beaded branches horizontally onto the central vertical stem in decreasing lengths.
- Bend the bottom tip into a short trunk and hang your ornament up proudly.
Popsicle Stick Gingerbread House Ornaments
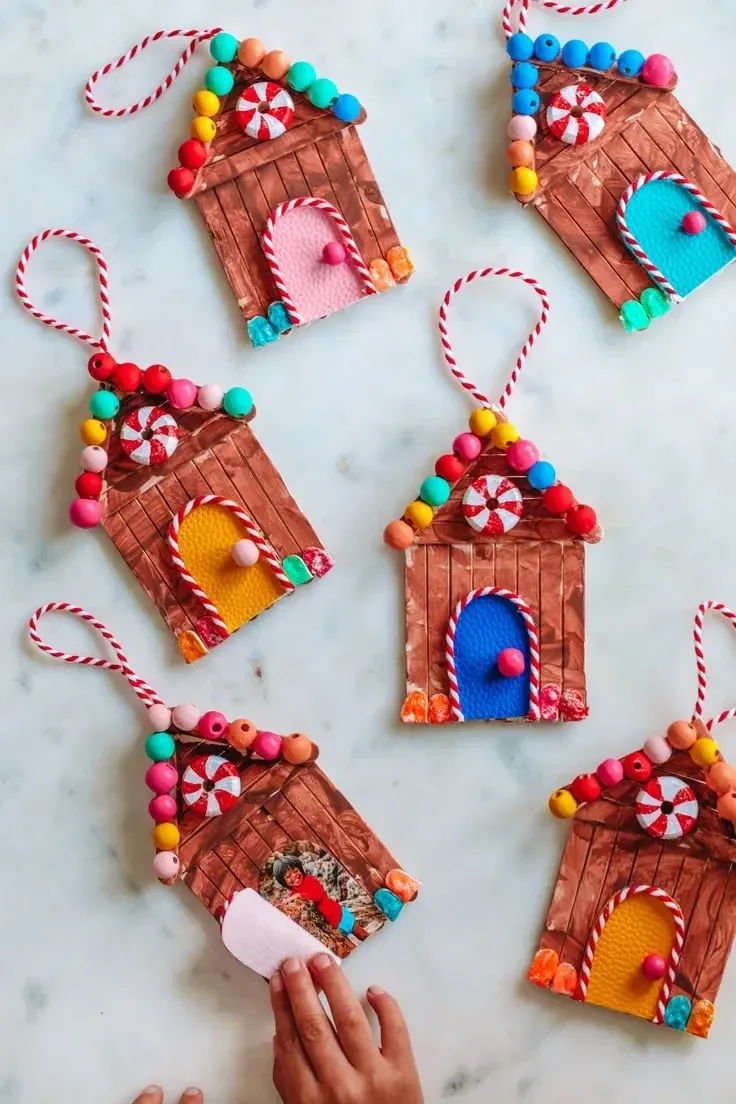
Brown painted craft stick houses feature colorful bead roofs, candy peppermint accents, and bright felt doors with hanging loops.
Preschoolers assemble rustic wooden houses and decorate them with sweet peppermint candies and colorful buttons. These adorable ornaments bring a cozy bakery feel to any seasonal tree.
Supplies
- Wooden craft sticks painted brown
- Red and white striped paper straws or felt
- Colorful wooden beads
- Small peppermint candy cutouts
- Felt door cutouts in various colors
- Red and white baker’s twine
- Craft glue
Instructions
- Glue several brown craft sticks side by side onto two horizontal backing sticks to form a house shape.
- Attach a triangular roof piece made from painted sticks or paper at the top.
- Glue a colorful felt door onto the lower center of the wooden house.
- Decorate the roofline with colorful wooden beads and a peppermint candy accent.
- Tie a loop of baker’s twine to the back of the roof for easy hanging.
- Let the glue set completely before displaying your sweet gingerbread cabin.
Paper Straw Christmas Tree Ornaments
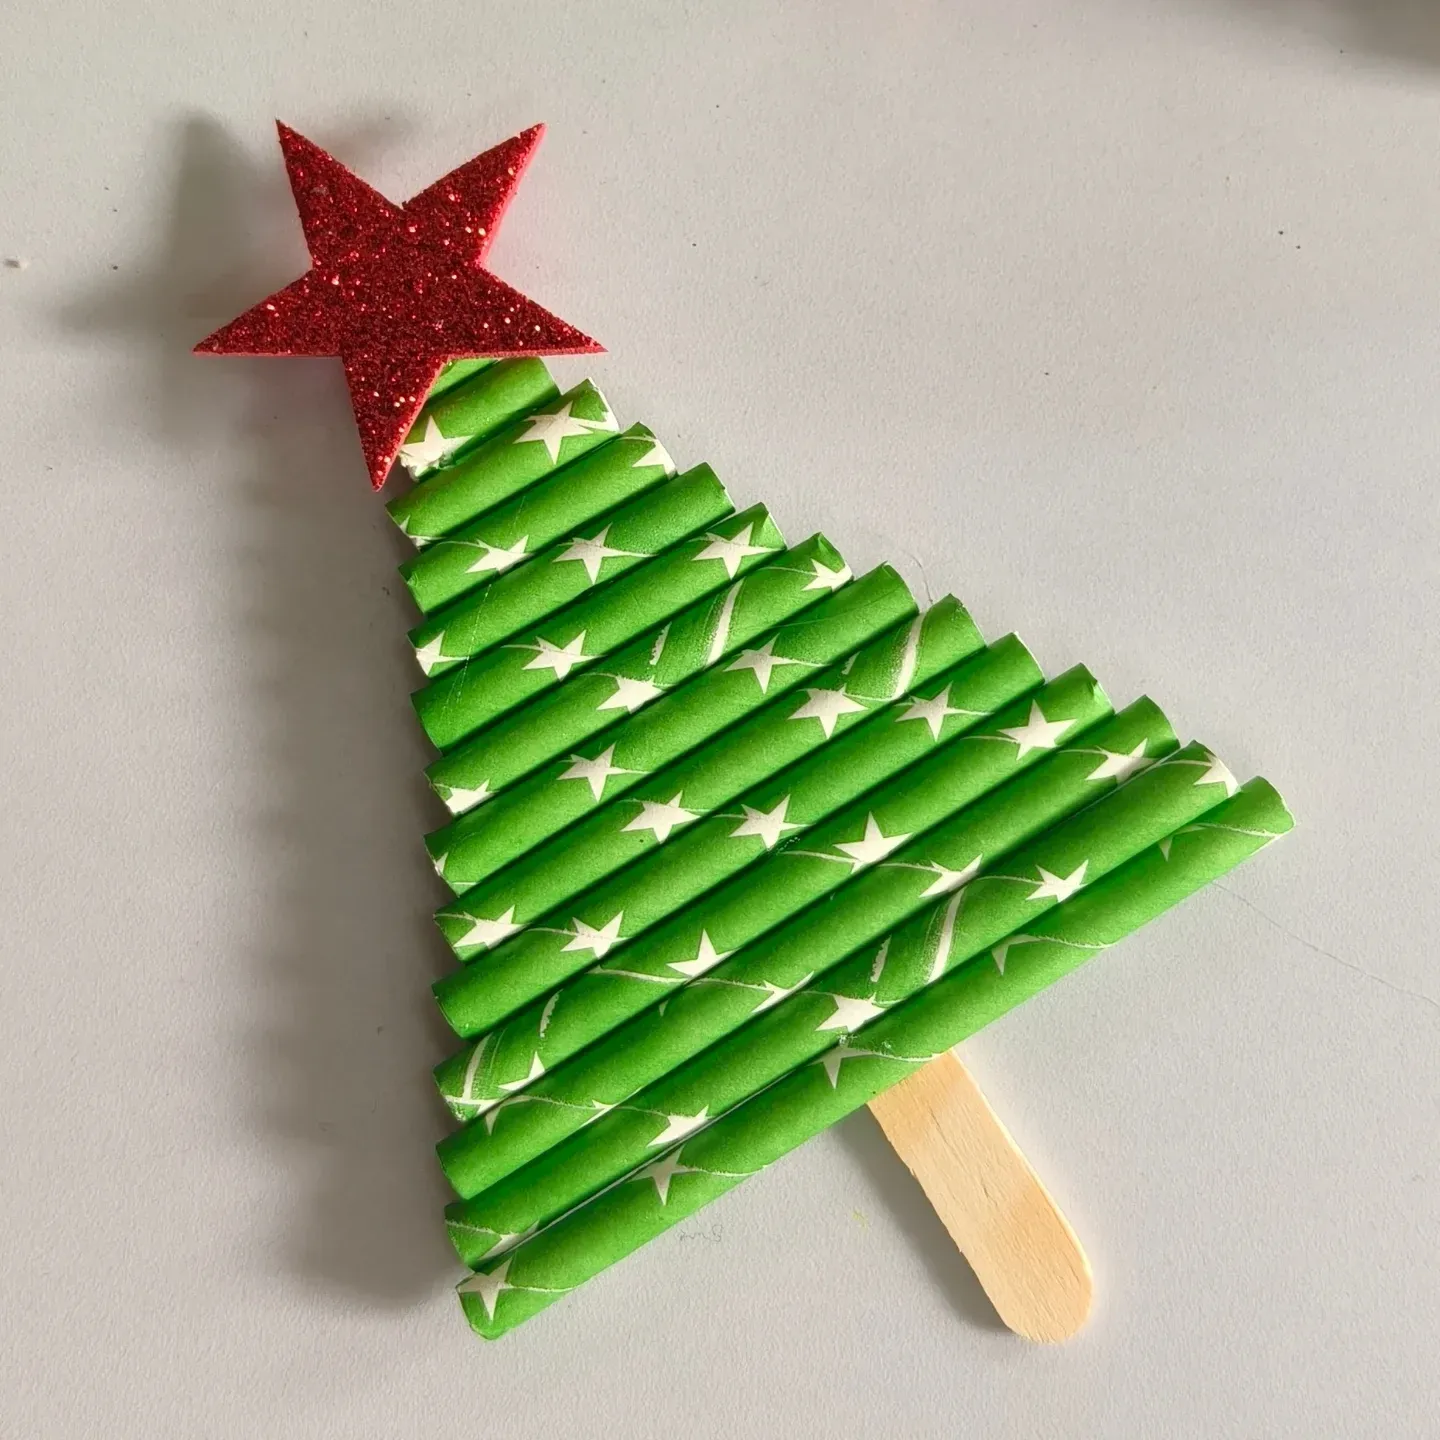
Green patterned paper straws cut to decreasing lengths and topped with a red glitter star form a tree shape over a wooden craft stick.
Preschoolers love making this cute handmade ornament using simple craft supplies from around the house. It adds a cheerful touch of holiday spirit to any classroom wall or mantle display.
Supplies
- 10 green paper straws with white stars
- 1 wooden craft stick
- 1 red glitter foam star
- Craft glue
- Kid safe scissors
- 1 ruler
- 1 clean flat workspace
Instructions
- Cut green paper straws into graduated lengths so they form a triangle tree shape.
- Glue the wooden craft stick vertically onto the back of the straw arrangement as a trunk.
- Attach the red glitter foam star securely to the top point of the straw tree.
- Press all pieces gently together and let the glue dry completely.
- Display your handmade paper straw tree proudly for the holidays.
Paper Gingerbread House Collage Art
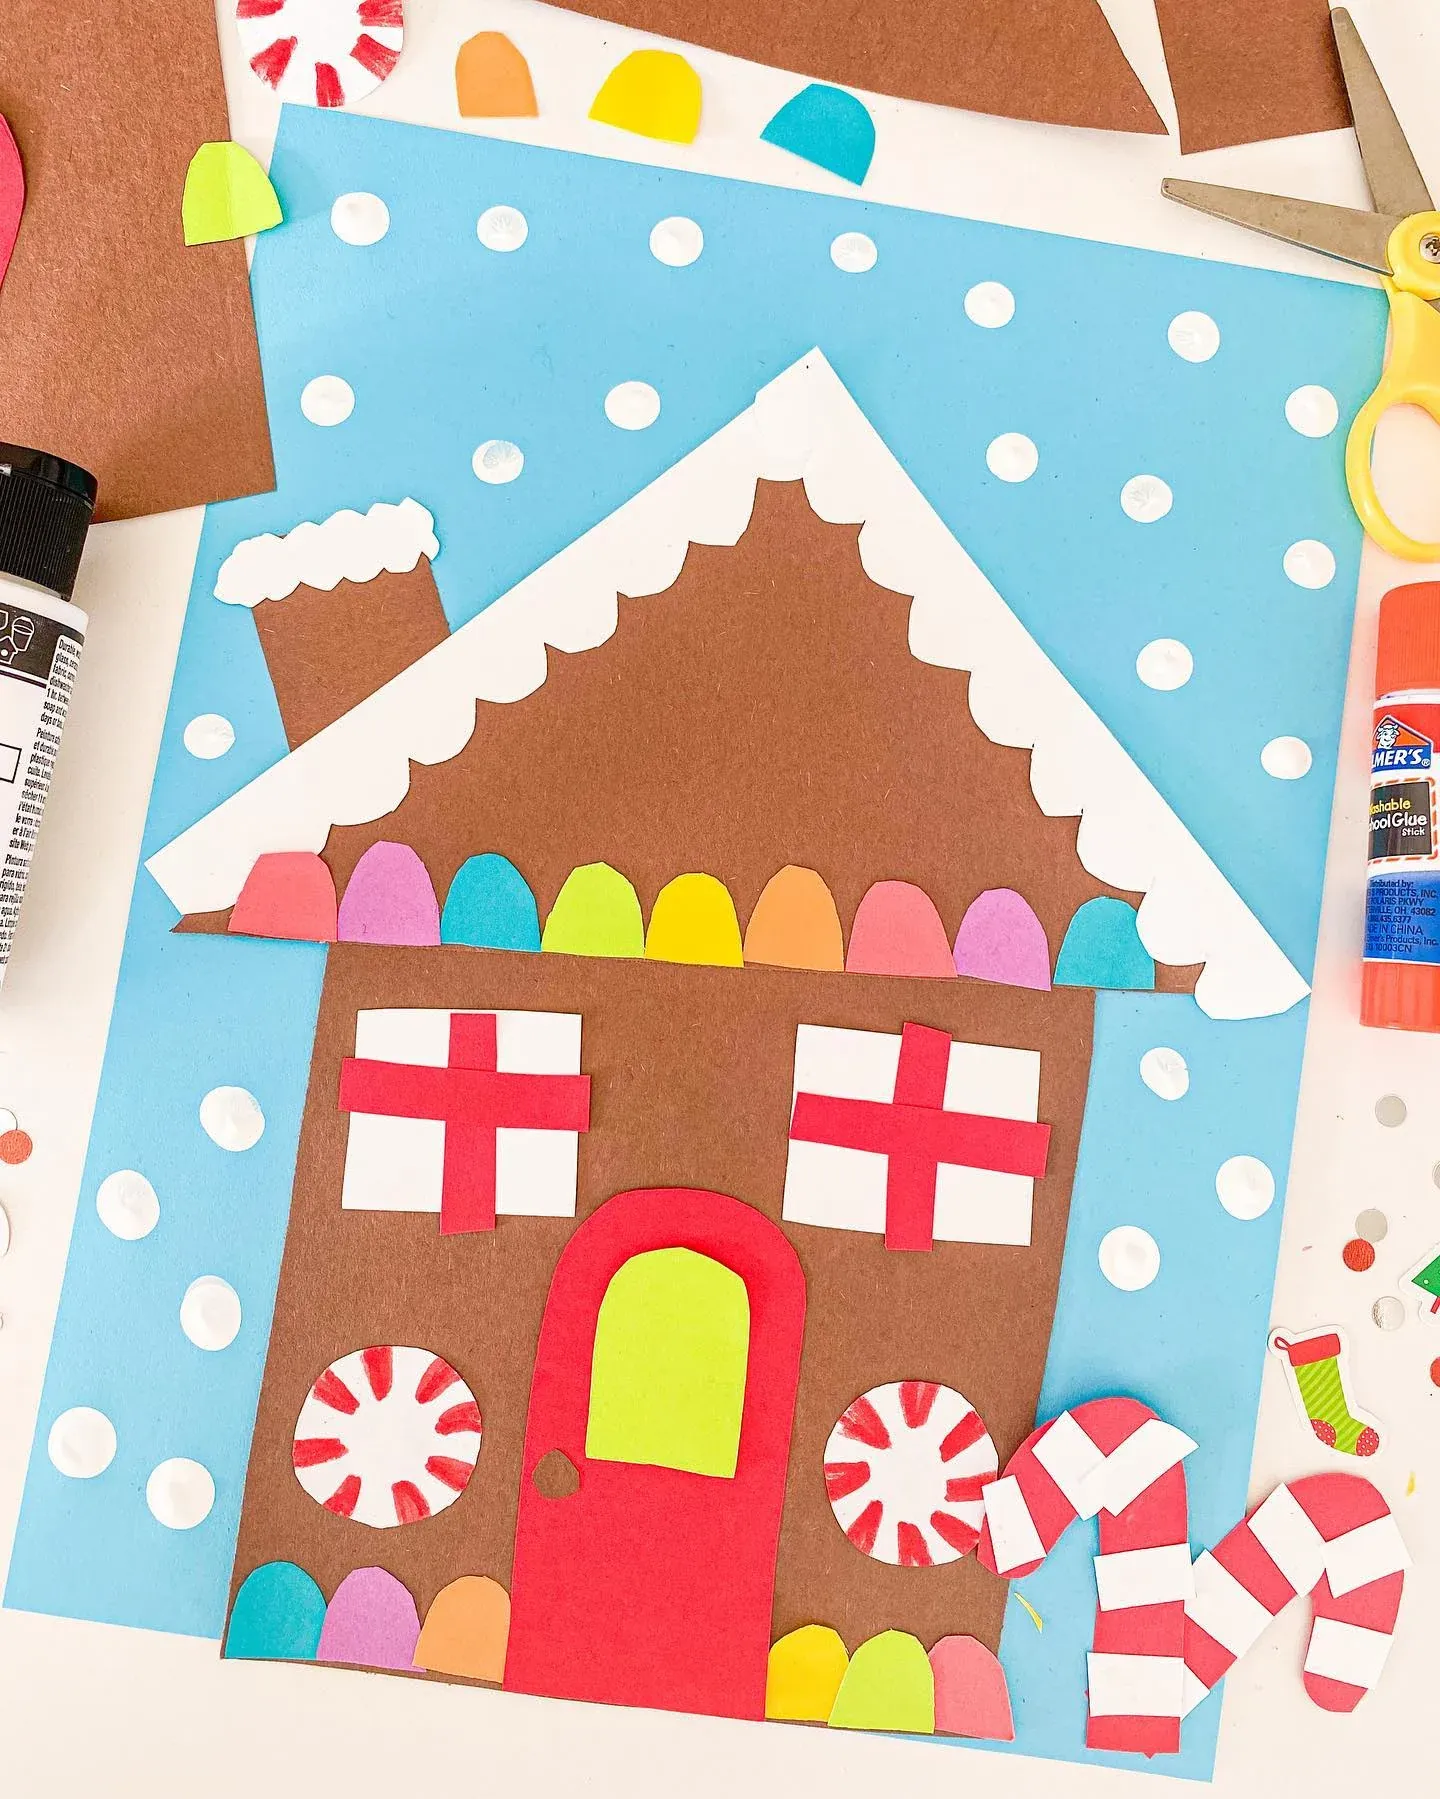
Brown cardstock houses feature white scalloped roofs, bright candy shaped accents, and colorful windows set against a blue snowy background.
Children build imaginative holiday cottages using colorful paper scraps and textured shapes. This fun scissor craft helps young learners develop coordination while creating sweet seasonal artwork.
Supplies
- Blue construction paper sheet
- Brown paper for the house base
- White paper for roof and dots
- Colorful construction paper scraps
- Child safe scissors
- Glue stick
- Fine black marker
Instructions
- Cut a large house shape from brown paper and glue it onto the blue background.
- Cut a snowy roof trim with scalloped edges from white paper and attach it to the top.
- Add colorful window squares and a bright arched door onto the front of the house.
- Glue peppermint circles and candy cane shapes around the yard for holiday treats.
- Dab white paint dots across the blue sky to look like falling snowflakes.
- Set your finished gingerbread collage flat on the table until the glue dries.
Watercolor Stamp Painted Christmas Tree Art
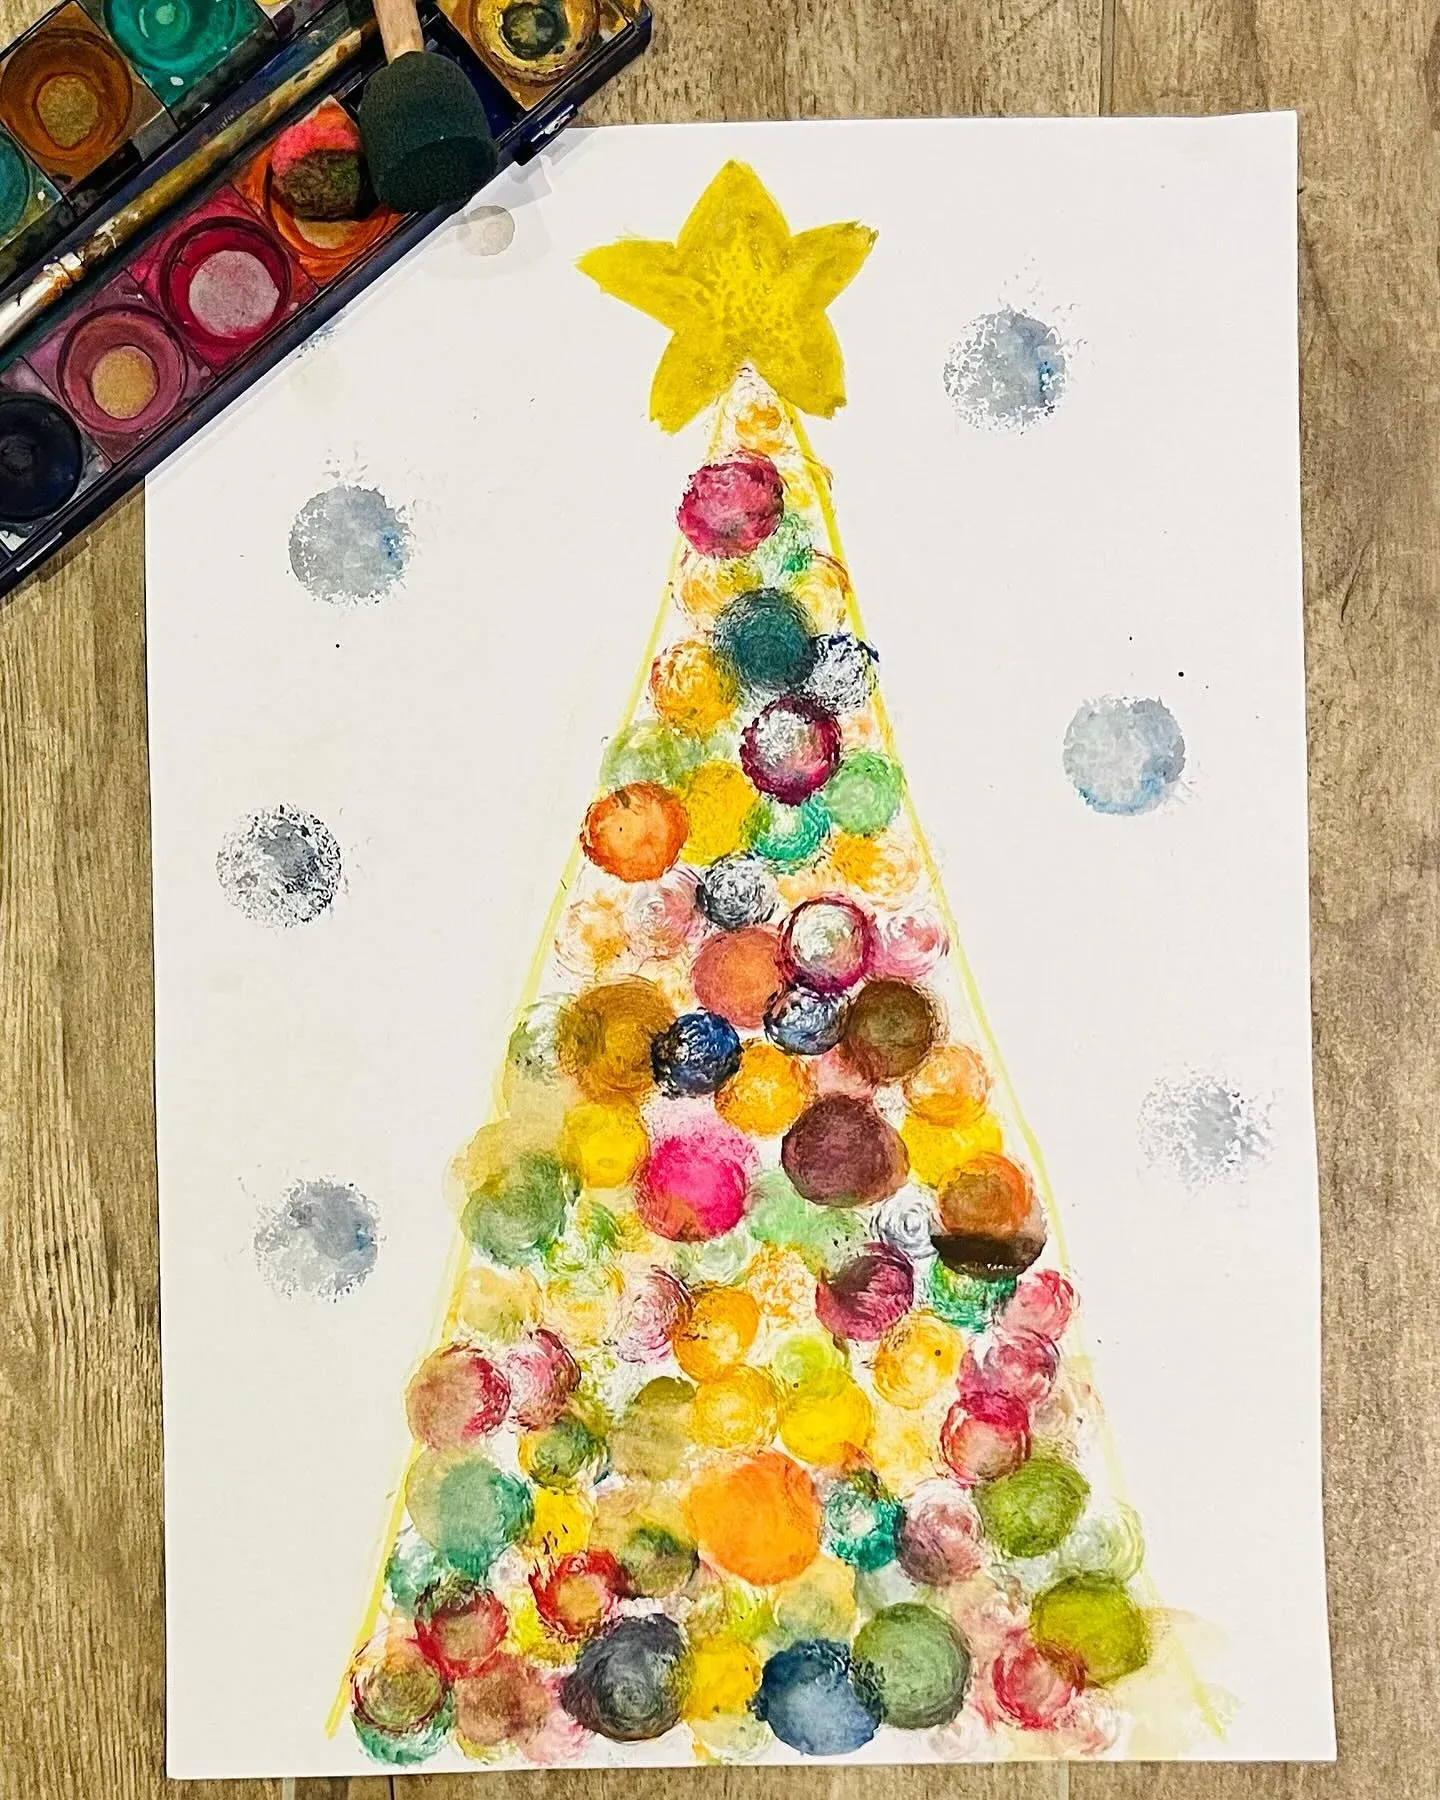
Colorful round sponge prints fill a drawn triangle tree outline topped with a bright yellow star against a white paper background.
Little artists stamp vibrant watercolor dabs inside a traced tree shape to make glowing ornaments. Gray painted dots drift softly around the page like gentle winter snowfall.
Supplies
- Heavy white art paper
- Watercolor paint palette
- Round sponge brush
- Yellow crayon or marker
- Cup of clean water
Instructions
- Draw a large triangle tree outline and a star on white paper with a yellow marker.
- Color in the top star solidly with bright yellow paint or crayons.
- Dip the round sponge brush into water and pick up colorful watercolor paints.
- Stamp colorful circles repeatedly inside the triangle shape to fill the tree branches.
- Stamp soft gray dots around the outside of the tree to resemble snowflakes.
- Leave the watercolor painting flat on your desk until it dries completely.
Popsicle Stick Reindeer Face Ornaments
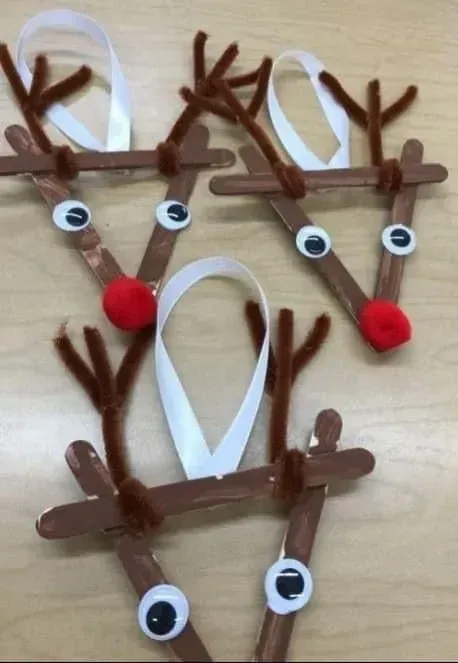
Brown painted craft sticks form a V shape holding googly eyes, fuzzy red pom pom noses, and twisted brown pipe cleaner antlers.
Kids assemble wooden stick shapes to create adorable reindeer faces ready for holiday tree hanging. A white ribbon loop at the top makes it easy to display these cute creations.
Supplies
- 3 wooden craft sticks painted brown
- Brown chenille pipe cleaners
- Large googly eyes
- Fluffy red pom poms
- White ribbon loops
- Craft glue
Instructions
- Glue two brown craft sticks together at the bottom in a V shape to form the face.
- Attach a third horizontal craft stick across the top to secure the structure.
- Wrap brown pipe cleaners around the top corners and bend them into antler shapes.
- Glue two googly eyes onto the upper portion of the wooden V.
- Attach a fluffy red pom pom at the bottom point for a shiny nose.
- Glue a white ribbon loop to the back and let the glue dry.
Frequently Asked Questions
What Are the Easiest Christmas Crafts for Preschoolers?
Paper plate snowmen, finger-painted Christmas trees, and sponge-painted holiday cards are some of the easiest crafts for preschoolers.
These activities use basic supplies and simple steps, so little kids can enjoy creating without needing advanced cutting or painting skills.
What Christmas Crafts Can 3-Year-Olds Make?
Three-year-olds can enjoy handprint Christmas trees, cotton pad decorations, and colorful sponge-painted cards with adult supervision.
Choose washable paint, large paper shapes, and easy-to-hold materials. Avoid small beads, loose buttons, and other choking hazards.
What Supplies Do I Need for Preschool Christmas Crafts?
Most Christmas crafts for preschoolers use construction paper, washable paint, glue sticks, craft sticks, cotton balls, and child-safe scissors.
Keeping a small craft box stocked with these basics makes holiday activities easier to organize at home or in the classroom.
How Can I Make Christmas Crafts Less Messy for Preschoolers?
Start with a washable table covering and give each child a small tray for their supplies.
Glue sticks, pre-cut paper shapes, and washable markers help reduce cleanup. Keep wet wipes nearby and let painted projects dry in a separate area.
What Christmas Crafts Make Good Gifts for Parents?
Handprint Christmas cards, decorated pine cone trees, and popsicle stick ornaments make thoughtful handmade gifts for parents and grandparents.
Adding the child’s name and the year turns a simple holiday project into a keepsake families can enjoy for years.
How Long Should a Preschool Christmas Craft Activity Take?
Most simple Christmas craft activities can fit into a 15 to 30-minute session, depending on the child’s age and attention span.
Choose projects with fewer steps for younger preschoolers. Prepare materials beforehand and allow extra time for painting, drying, and cleanup.
Conclusion
These 29+ Christmas Crafts for Preschoolers bring plenty of creative ideas to holiday afternoons, from colorful paper trees to handmade ornaments and cheerful snowmen.
You don’t need expensive supplies or complicated instructions. A few everyday craft materials and a little imagination can keep small hands happily busy.
Pick a few favorites, gather your supplies, and enjoy making Christmas memories together.
And don’t forget to share these Christmas craft ideas with your friends and family so they can enjoy some holiday crafting with their little ones, too!