Valentine’s Day decorations feel a little more special when you’ve made something yourself.
Store-bought decor is easy to find, but sometimes the colors, details, or designs don’t quite match what you have in mind. And honestly, you don’t need a whole craft room or a pile of expensive supplies to make something you’ll want to keep.
A few simple materials can turn into the sweetest little accents for your home. Think soft yarn hearts, painted wooden pieces, pretty floral wreaths, and handmade gifts that feel thoughtful without being complicated.
Some projects are lovely for a quiet afternoon at home, while others would be fun to make with friends over coffee.
These 27+ Valentine’s Crafts for Adults bring together creative, approachable ideas that add a personal touch to the season.
Acrylic Valentine Keychains with Tassels
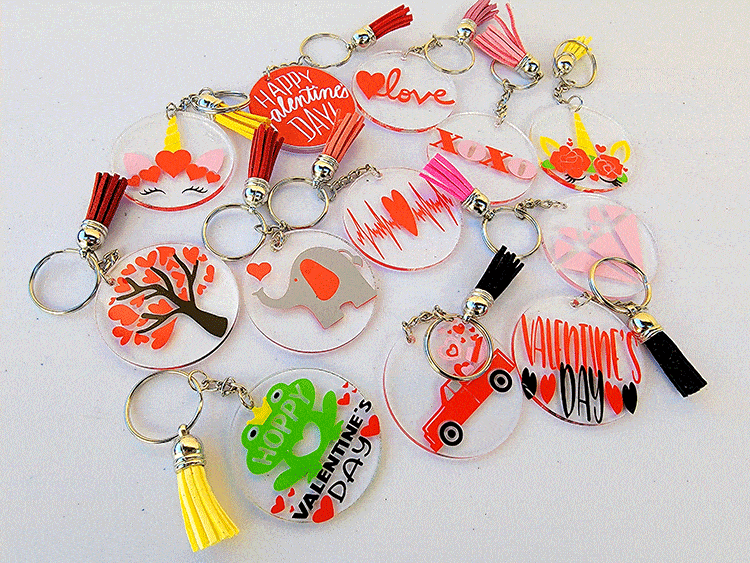
I have a soft spot for little crafts that actually get used, and these acrylic keychains fit right in. The clear discs keep the colorful trucks, animals, and Valentine sayings looking crisp, while the tassels add a fun swing. I’d make a few extra for friends, especially in their favorite colors.
Supplies
- Clear round acrylic blanks
- Adhesive vinyl in red, pink, black, yellow, green, brown, and gray
- Tassels with metal caps in matching colors
- Silver key rings, jump rings, and chain links
- Cutting machine or sharp craft scissors
- Jewelry pliers
Instructions
- Cut hearts, trucks, animals, and letters from vinyl sheets.
- Peel backing paper off each cutout carefully.
- Press designs flat onto one side of every clear disc.
- Open jump rings with pliers to attach chains and tassels.
- Close all rings tightly onto key rings.
Paper Leaf and Rose Heart Wreath
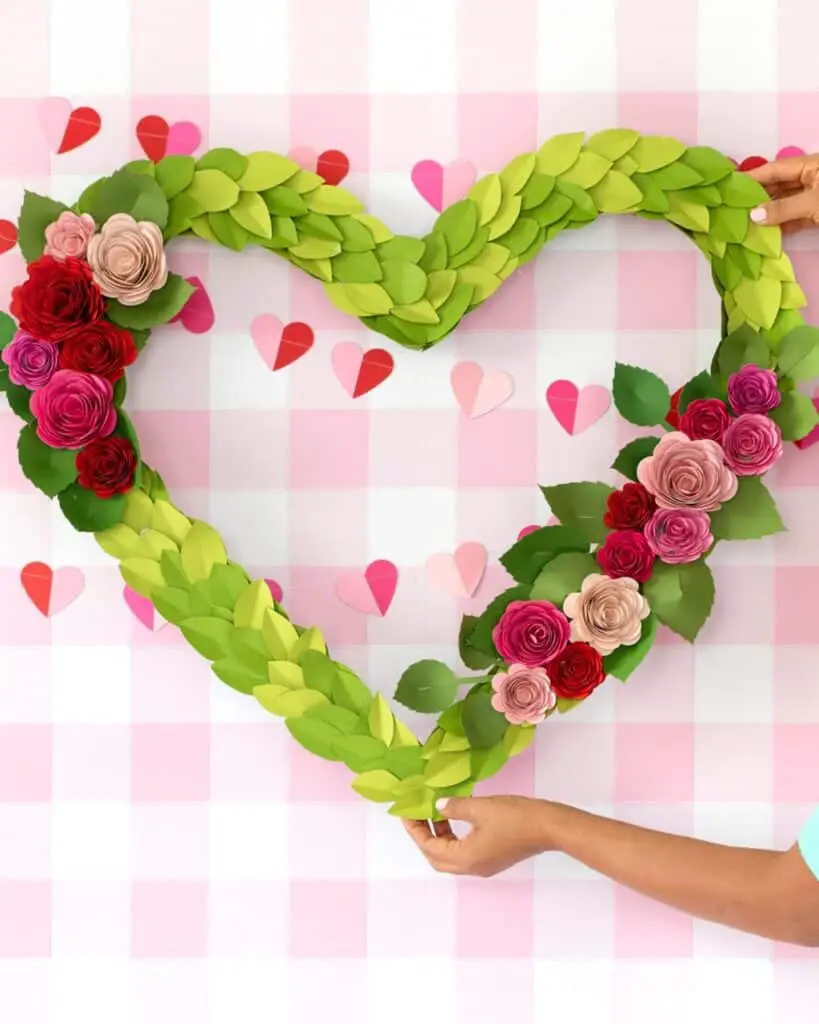
There’s something so pretty about a heart wreath that isn’t covered entirely in pink. All those folded green paper leaves give this one a full, almost garden-like look, and the rolled roses add just enough color. I’d hang it above a console table where the paper details can really be seen.
Supplies
- Light green cardstock
- Cardstock in red, hot pink, blush pink, and leaf green
- Heart shaped wreath base
- Scissors and glue
- Quilling tool or pencil for rolling petals
Instructions
- Cut many leaf shapes from light green cardstock and fold each one down the center.
- Glue folded leaves over the heart base in overlapping rows.
- Roll spiral strips of red and pink paper to form roses, then glue petals around each flower.
- Attach clusters of paper roses and green leaves along the left and right curves.
- Fold small two tone hearts and mount them on the wall around the wreath.
Textured Yarn Heart Wall Hanging
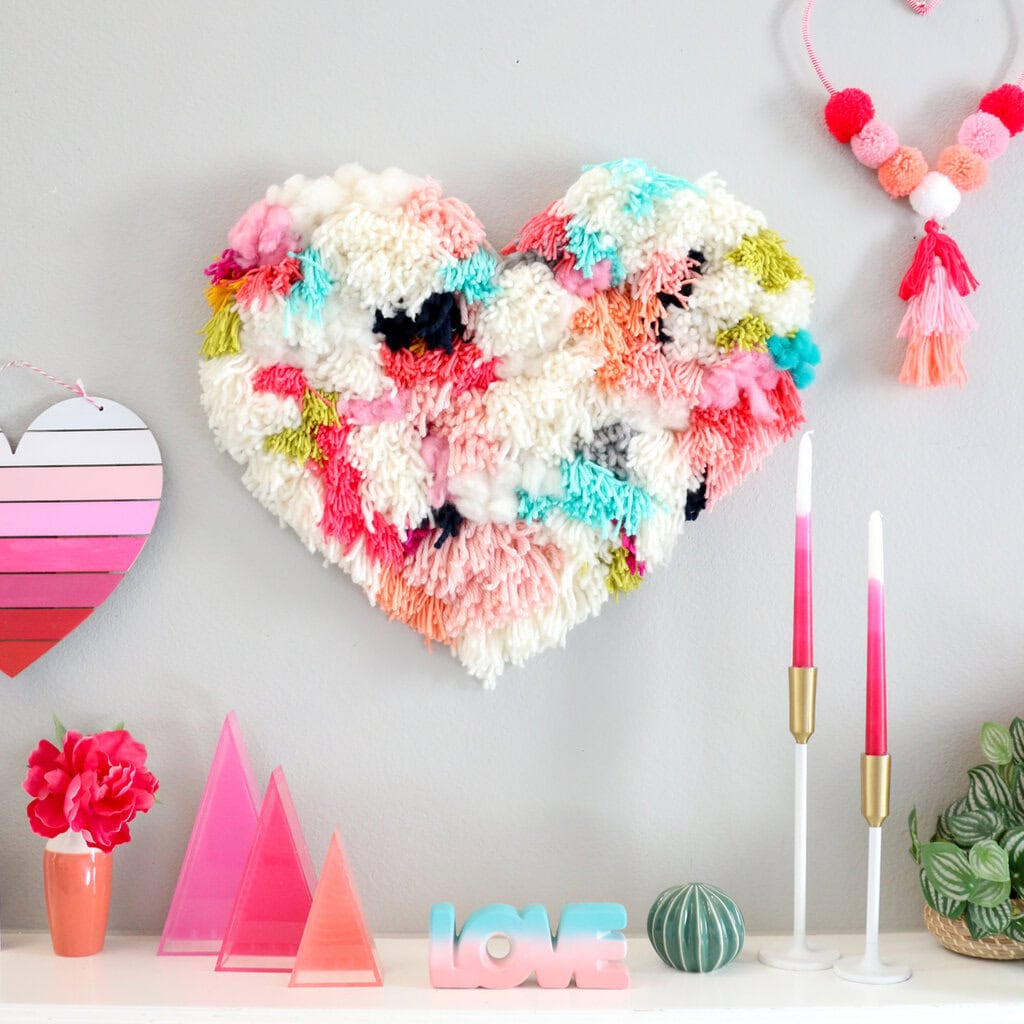
This is the kind of wall hanging you want to reach out and touch. The mix of fluffy yarn tufts, loose fringe, and unexpected teal and olive shades gives the heart a relaxed, handmade feel. It would look especially sweet over a reading chair or tucked into a gallery wall.
Supplies
- Chunky and medium yarn in cream, pink, coral, teal, green, gray, and black
- Heart shaped backing board or cardboard cutout
- Hot glue gun or yarn needle
- Scissors
- Hanging cord or hook
Instructions
- Cut short strands and small loops from your yarn colors.
- Cover the heart base closely with glued tufts and knotted fringe.
- Trim uneven ends so the edges look full and balanced.
- Attach a hanger on the back and mount the heart on the wall.
Conversation Heart Coasters
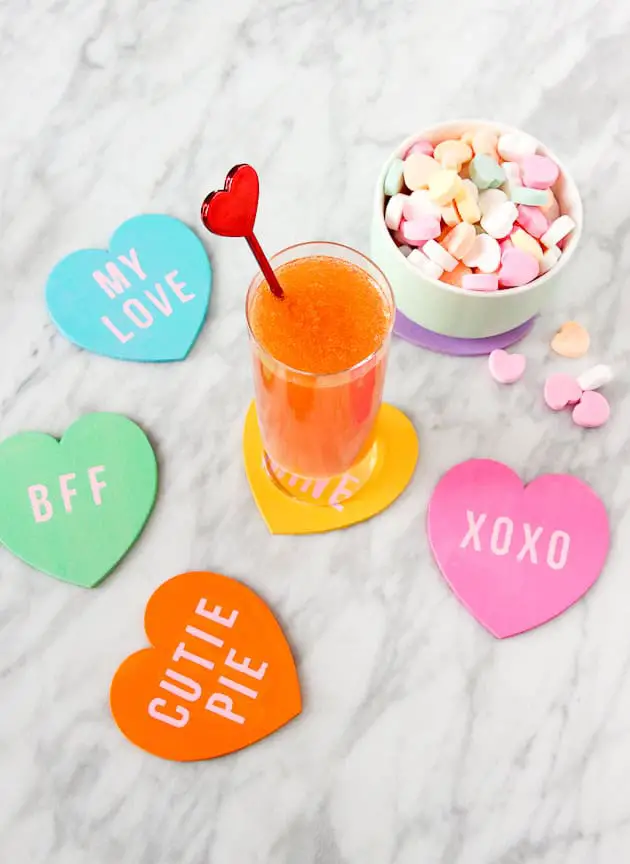
Who wouldn’t smile at a little candy-heart message under their coffee mug? These colorful coasters have that familiar Valentine look, but the bold lettering keeps them playful rather than fussy. I’d make a mixed set so everyone gets a different phrase when friends come over.
Supplies
- Heart shaped cork or foam coasters in blue, green, orange, pink, and yellow
- White acrylic paint or white adhesive vinyl
- Fine paintbrush or vinyl cutter
- Clear sealer spray
Instructions
- Paint or cut your favorite short phrases in crisp block letters.
- Center each phrase cleanly on a heart coaster.
- Let paint dry or press vinyl smooth with zero air bubbles.
- Coat finished coasters with clear sealer so drink rings wipe right off.
Branch Garland with Hanging Hearts
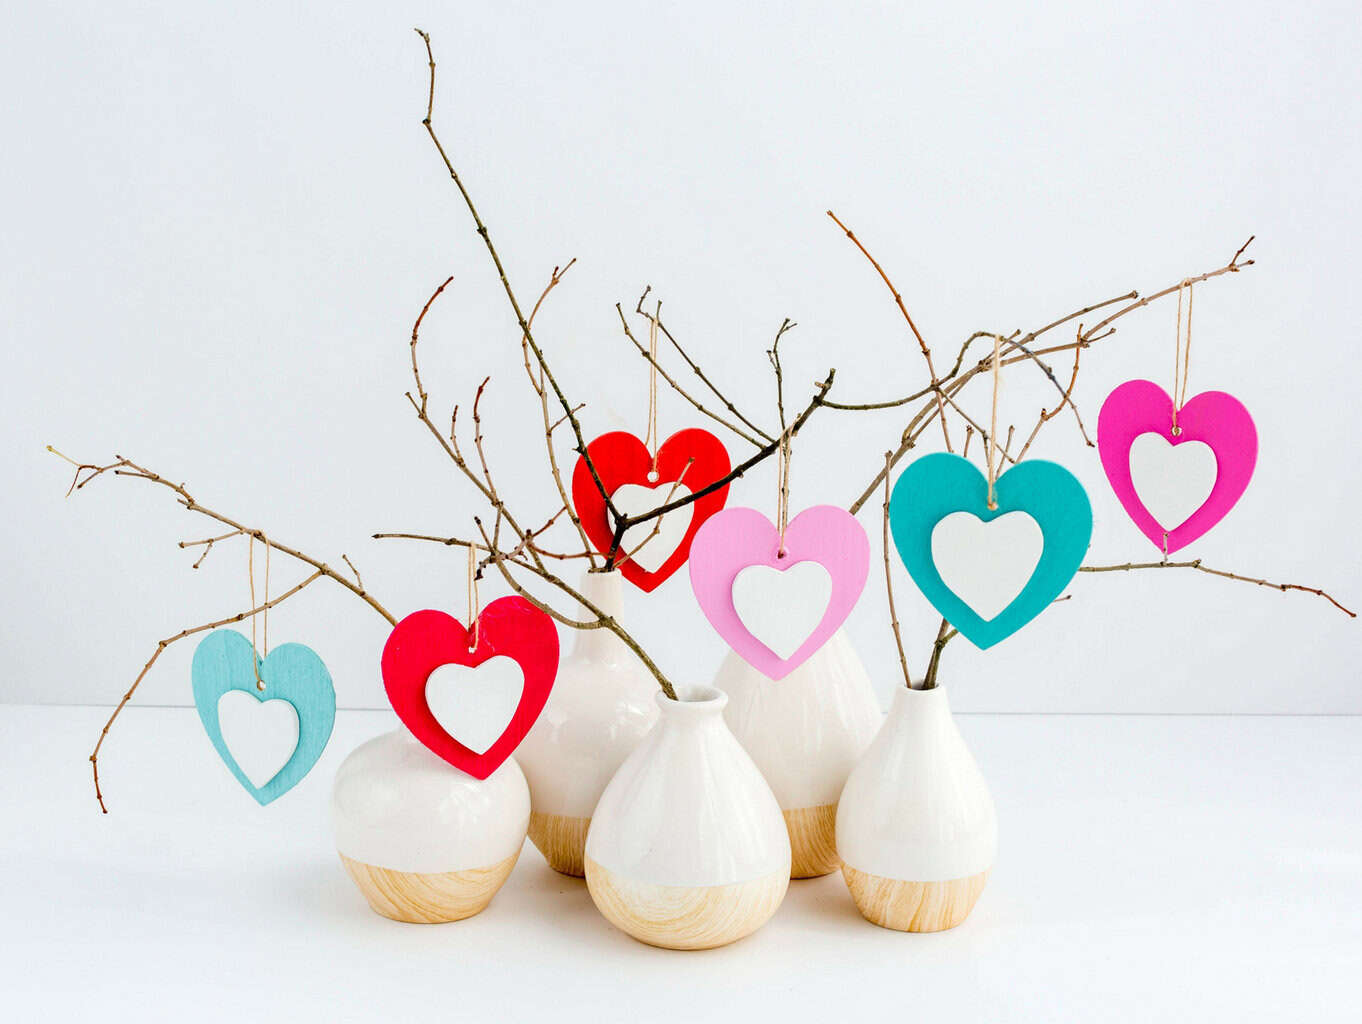
Bare branches can look surprisingly lovely with just a few colorful hearts hanging from them. I like how the red, pink, and aqua cutouts bring color without hiding the natural shape of the twigs. Set the vases in the middle of a dining table and let the hearts hang at different heights.
Supplies
- Wood heart cutouts with inner heart openings
- Craft paint in red, pink, aqua, teal, and white
- Twine or thin cord
- Bare branches or twigs
- Ceramic vases and a small drill or skewer
Instructions
- Paint the front and back of each wooden heart in bright shades.
- Poke a small hole at the top center of every heart.
- Tie twine loops through each hole and hang the hearts from twigs.
- Arrange the branches inside ceramic vases for a clean display.
Candy Filled Glass Goblets
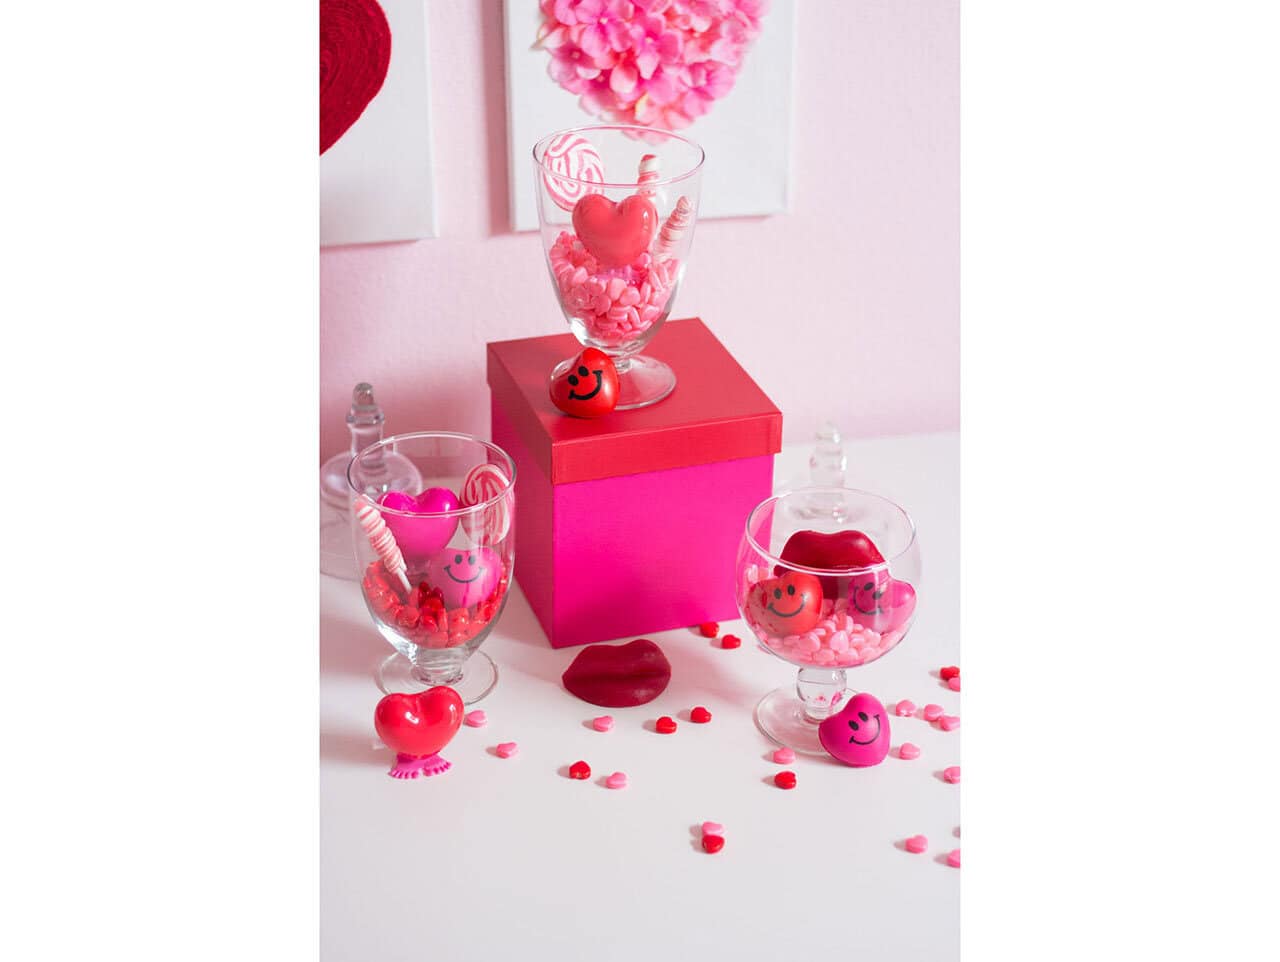
A few clear goblets can turn a handful of Valentine sweets into a really fun table display. The pink candies, striped sticks, and cheeky little lip shapes make each glass feel different. I’d group three together on a tray and keep the treats easy for guests to reach.
Supplies
- Clear glass goblets or stemmed cups
- Pink heart candies, lollipops, and striped candy sticks
- Molded chocolate or candy hearts, lips, and smiley shapes
- Candy molds
Instructions
- Melt candy melts or chocolate and pour into heart and lip molds.
- Chill molds until firm, then pop each shaped piece out gently.
- Pour pink candy bits into the bottom of each clean glass goblet.
- Tuck molded treats and candy sticks inside for a festive centerpiece.
Custom Valentine Shirts and Sweatshirts
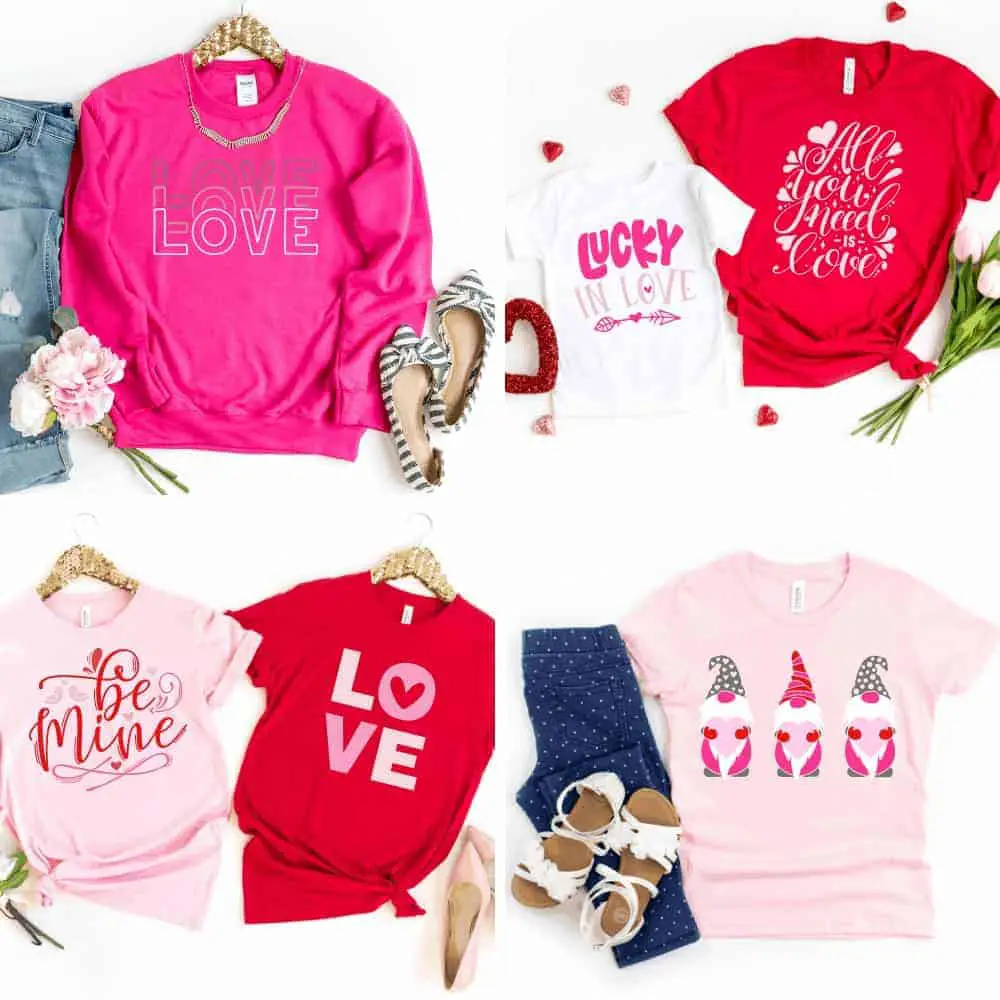
I’d wear one of these long after Valentine’s Day, especially the simpler heart designs. The mix of bold lettering, little arrows, and playful gnomes feels casual on a soft sweatshirt or tee. Try choosing one graphic per shirt so the finished design has room to stand out.
Supplies
- Blank cotton shirts and fleece sweatshirts in pink, red, and white
- Heat transfer vinyl in glitter, white, pink, or red
- Cutting machine and weeding hook
- Heat press or household iron and pressing cloth
Instructions
- Design phrases, hearts, or gnomes and mirror the layout before cutting.
- Weed away excess vinyl so only your design remains.
- Position the design on the shirt front and press with steady heat and pressure.
- Peel the carrier sheet as directed and smooth out the fabric.
Arrow Tassel Wall Hanging
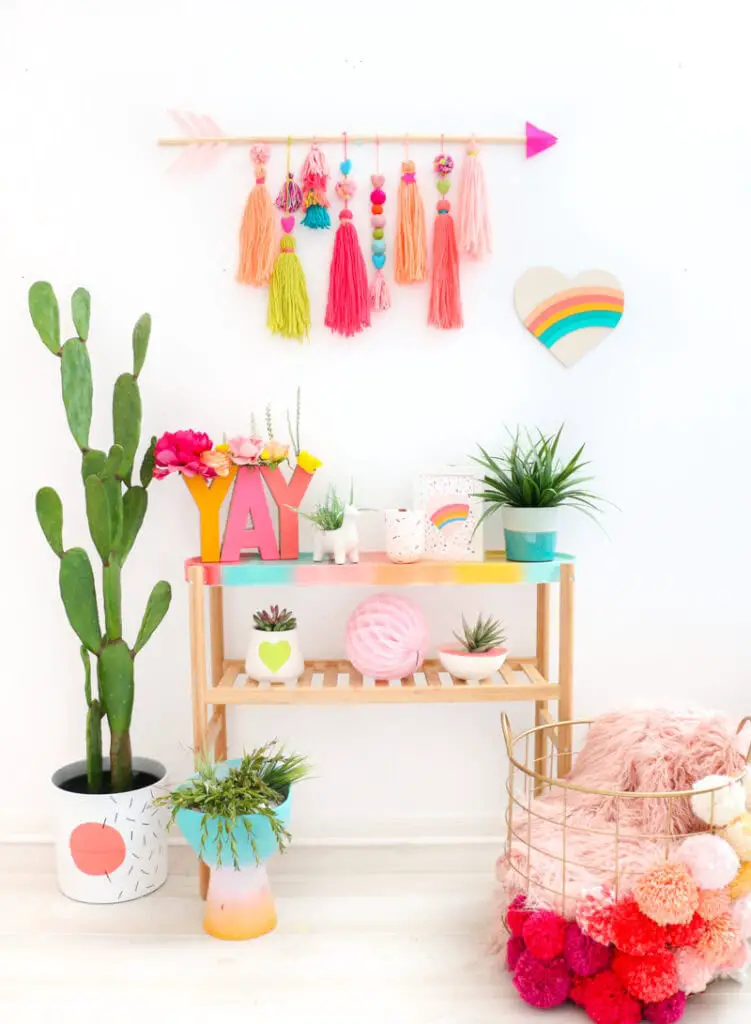
That bright little row of tassels makes such a difference on a plain wall. Coral, aqua, lime, and pink yarn bring plenty of color, while the wooden arrow keeps the whole piece feeling light. I can picture it above a craft desk with a few plants nearby.
Supplies
- Wooden dowel rod
- Cardstock or felt for arrow feathers and arrowhead
- Yarn in coral, pink, lime green, aqua, and cream
- Small pompoms and heart beads
- Glue, scissors, and hanging string
Instructions
- Cut arrow fletching and a pointed tip, then attach them to the wooden dowel.
- Wrap yarn around cardboard to make tassels and tie off the tops.
- Thread pompoms and heart beads onto cords alongside finished tassels.
- Tie every tassel strand evenly along the arrow shaft and hang it up.
Heart Decaled Ceramic Planter
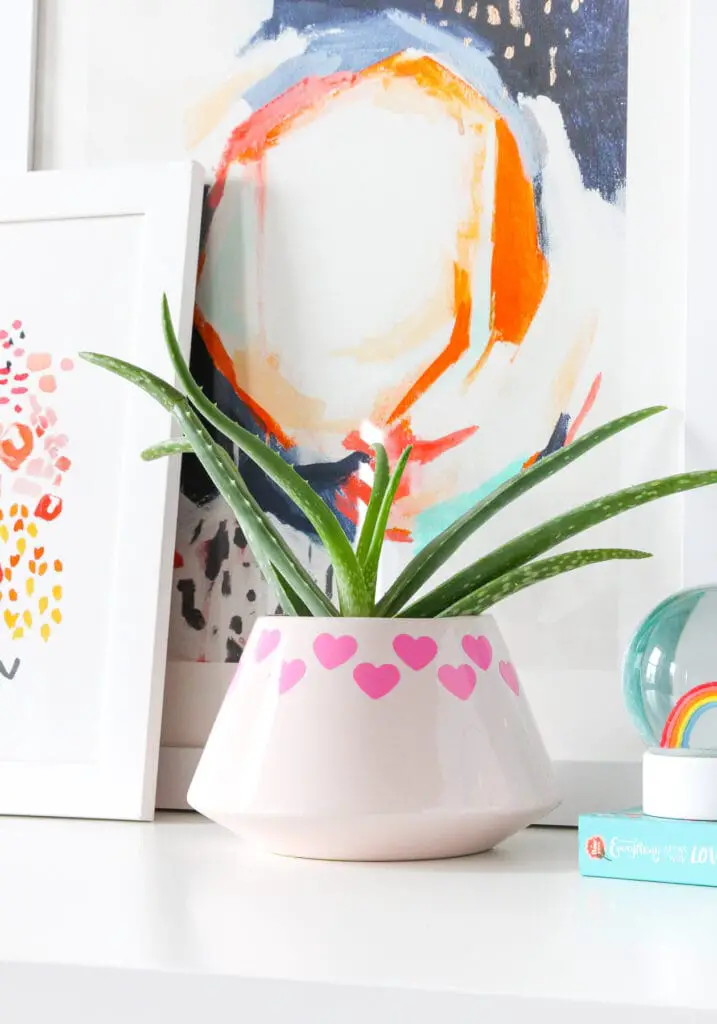
Sometimes a plain plant pot only needs one small detail. Here, the tidy row of pink hearts looks fresh against the pale ceramic, and the aloe leaves add a nice contrast. I’d keep the decals around the upper edge rather than covering the whole pot.
Supplies
- Smooth ceramic planter pot
- Pink adhesive vinyl or permanent vinyl stickers
- Heart punch or cutting machine
- Rubbing alcohol and a soft cloth
- Potted aloe or houseplant
Instructions
- Wipe the outside of the planter with rubbing alcohol and let it dry.
- Punch or cut small hearts from pink vinyl.
- Press hearts in a neat band around the upper rim of the pot.
- Set your plant inside and place the pot on a bright shelf.
Chunky Red Yarn Heart with Wood Love Sign
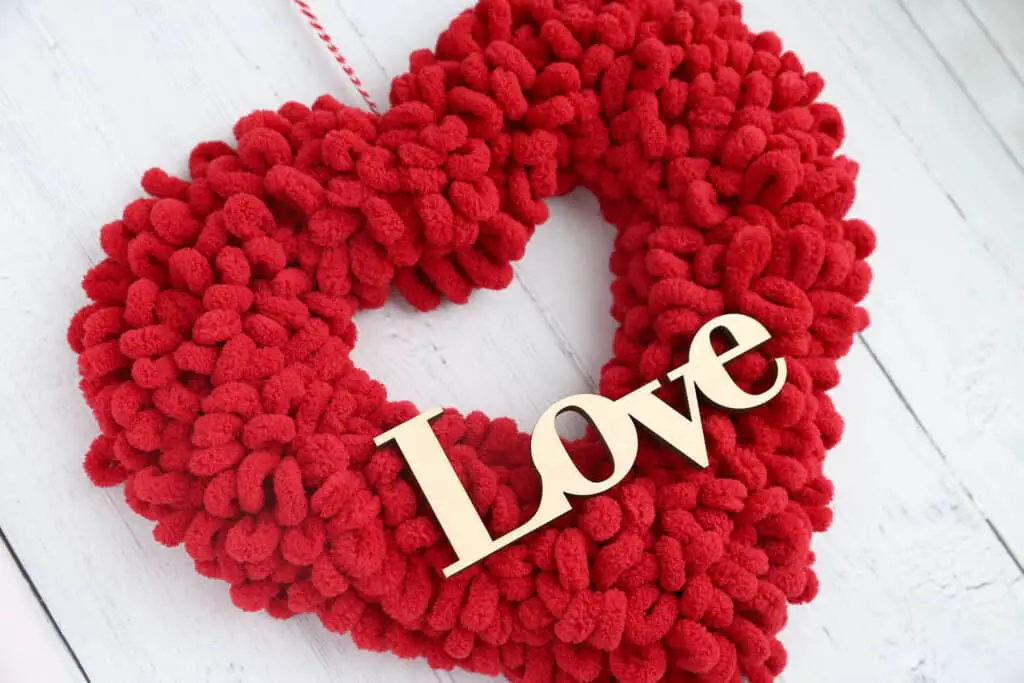
The thick red yarn is what makes this heart feel so inviting. Those soft loops give it plenty of texture, and the natural wood Love sign breaks up the bright color beautifully. Hang it on an interior door or above a small entryway shelf where it won’t get crushed.
Supplies
- Thick red loop yarn or chunky yarn
- Heart wreath form
- Wooden Love cutout sign
- Hot glue and scissors
- Striped twine for hanging
Instructions
- Wrap or glue thick red yarn loops around the heart form until full.
- Fluff loops by hand so the texture looks rich and even.
- Glue the wooden Love sign securely across the front loops.
- Tie a loop of striped twine at the top for hanging.
Glitter Vinyl Mini Canvas Tote Bags
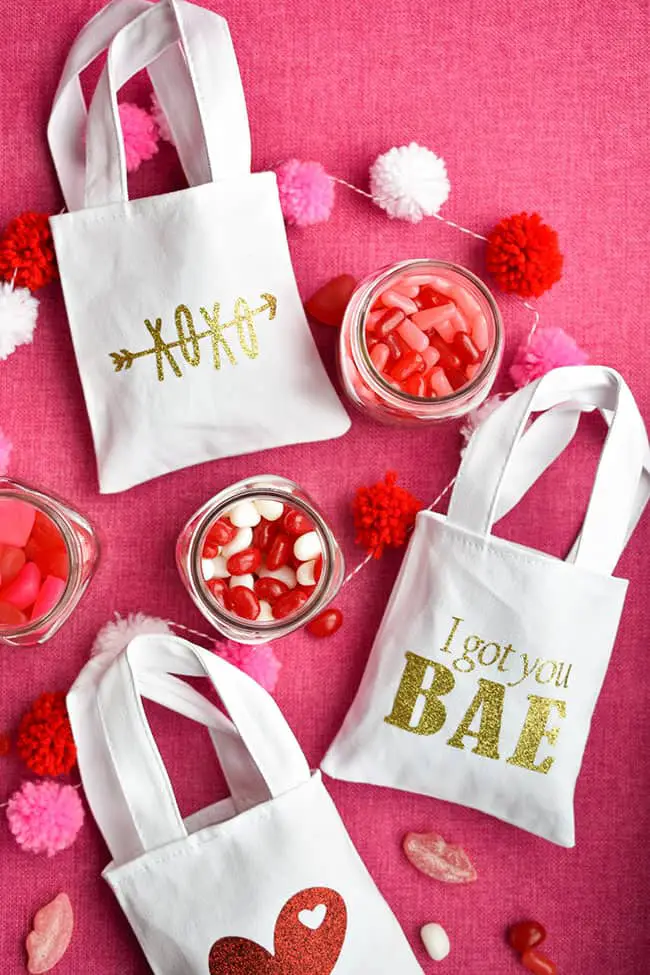
These tiny canvas bags are almost too cute to give away. The glittery XOXO lettering and little heart designs look especially cheerful against the plain white fabric. Fill them with wrapped candies or a small note, and they’re ready for a Valentine get-together.
Supplies
- Mini white canvas tote bags with handles
- Gold and red glitter heat transfer vinyl
- Cutting machine and weeding tool
- Heat press or iron
- Small candies or treats for filling
Instructions
- Cut out your arrow phrase, text, or heart from glitter vinyl and weed excess pieces.
- Place the design flat on a mini canvas tote bag.
- Apply heat and firm pressure until the vinyl bonds to the canvas.
- Fill each finished bag with sweet treats for gifting.
Striped Valentine Gnomes on Wood Slice
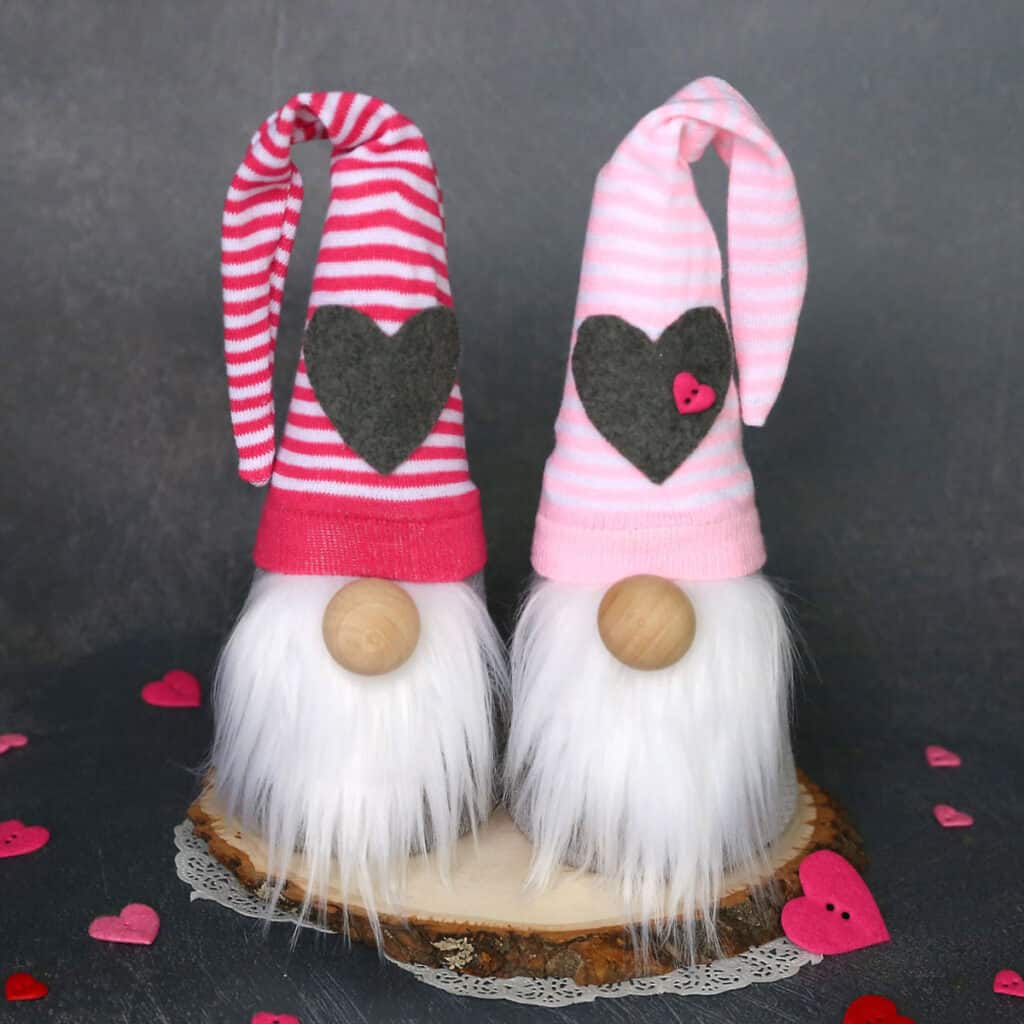
Look at those tall striped hats and fluffy little beards. The two gnomes have so much personality, especially with their wooden noses and tiny heart details. I’d display them together on the wood slice rather than splitting them up, since the different pink and red stripes work so nicely as a pair.
Supplies
- Striped knit fabric in red and white or pink and white
- White faux fur fabric
- Round wooden beads for noses
- Gray felt and a small pink heart button
- Wood slice base and paper lace doily
- Glue gun, scissors, and stuffing
Instructions
- Form cone bodies and fill them lightly so each gnome stands tall.
- Cut white faux fur into beard triangles and glue them onto the front.
- Attach a round wooden nose right over the top edge of each beard.
- Sew or glue striped knit hats over each head, then add gray felt hearts and a pink button.
- Set both gnomes on a wood slice layered over a lace doily.
Lettered Mini Rolling Pins with Ribbons
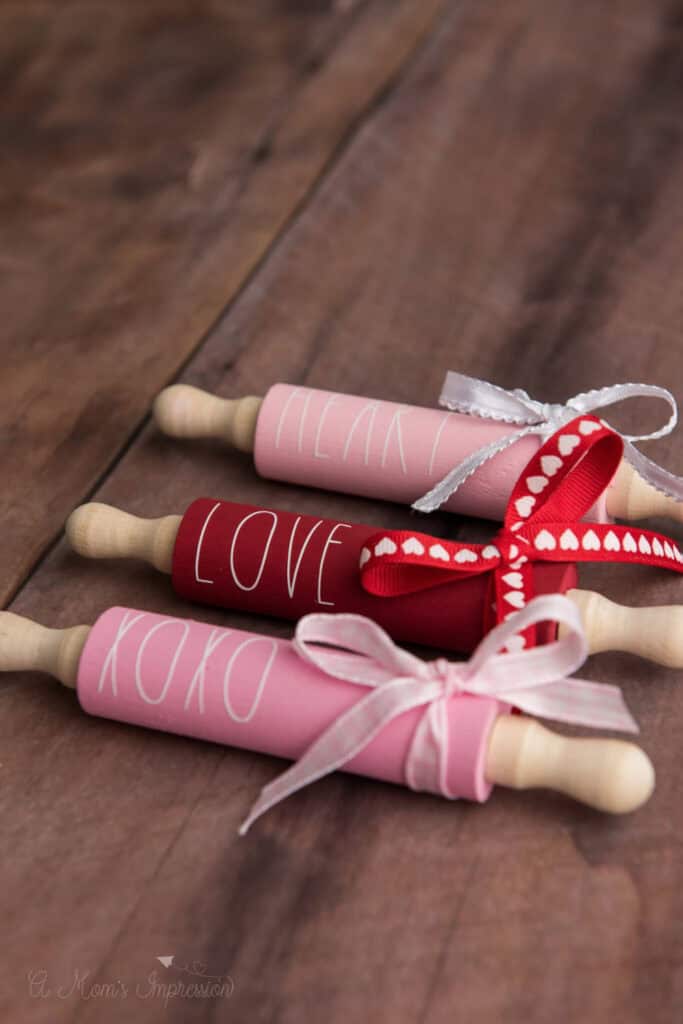
Mini rolling pins might be one of my favorite unexpected Valentine decorations. The pink and red paint gives them a cheerful look, but it’s the lace and patterned ribbon bows that really finish them off. They’d be lovely tucked into a tiered tray or displayed in a kitchen corner.
Supplies
- Mini wooden rolling pins
- Acrylic craft paint in blush pink, soft pink, red, and white
- Fine brush or vinyl lettering stencil
- Decorative ribbons in white, red with hearts, and pink stripe
- Scissors and glue
Instructions
- Paint the rolling barrel of each mini pin in pink or red and let dry completely.
- Add white lettering across the center for words like HEART, LOVE, or KOXO.
- Seal the painted surface if you plan to wipe away dust.
- Tie ribbon bows around the handle ends for gift presentation.
Pink Marble Heart Bath Melts
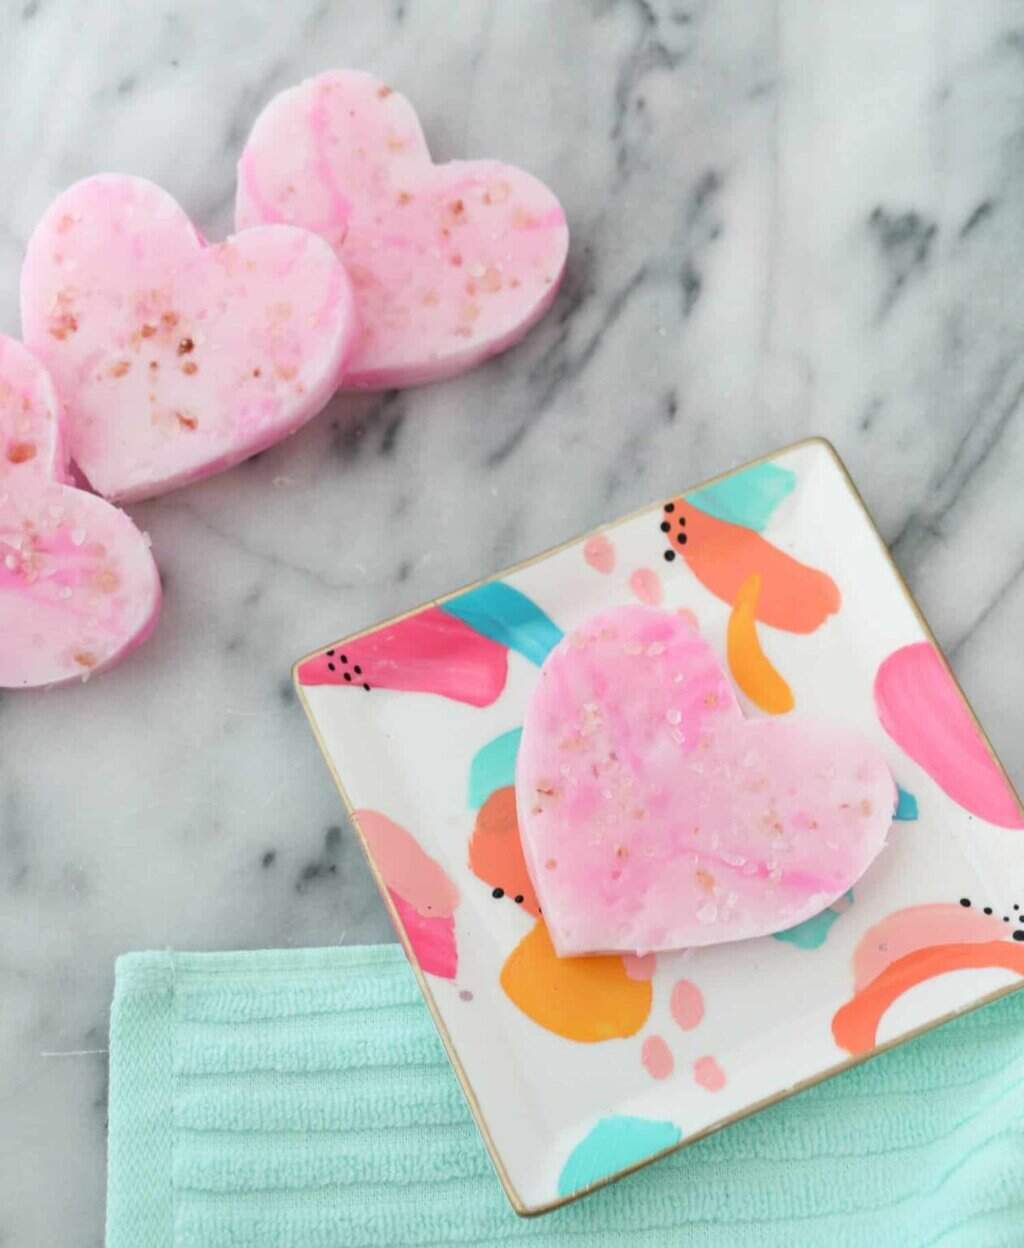
The soft pink swirls make these little hearts look almost like marbled candy. I like the gentle speckled texture, too, especially beside a fresh towel and a pretty dish. Make a small batch for a self-care gift, using a skin-safe recipe suited to the bath product you choose.
Supplies
- Melt and pour soap base or bath melt wax
- Pink cosmetic colorant and skin safe fragrance oil
- Fine sea salt or dried flower sprinkles
- Heart shaped silicone mold
- Microwave safe bowl and stirring spoon
Instructions
- Melt your base gently in short bursts until smooth.
- Stir in a drop of pink colorant and scent without overmixing so swirls stay visible.
- Sprinkle salt or tiny flecks into the bottom of each heart mold.
- Pour the warm mixture into molds and let set until firm before popping out.
Wood Slice XOXO Floral Hoop Wreath
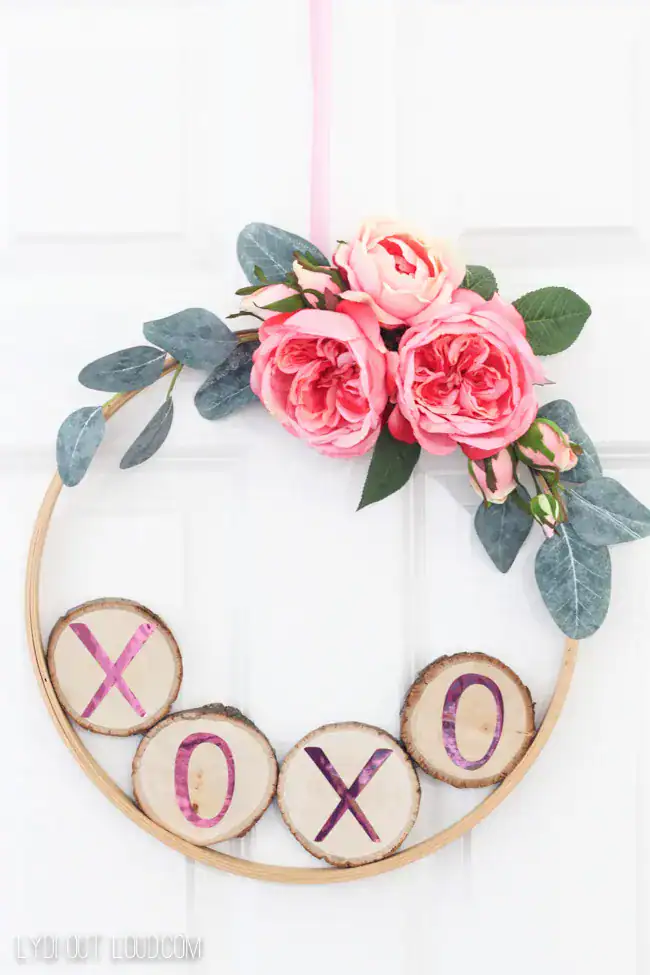
This hoop wreath has a nice balance of rustic wood and soft florals. The shiny pink XOXO letters catch your eye first, then the roses and eucalyptus fill out the upper curve. I’d give it a spot on a light-colored door so the small wood slices don’t disappear into the background.
Supplies
- Large wooden embroidery hoop or metal ring
- Four flat wood slices
- Pink foil vinyl or metallic foil transfer sheet
- Faux pink roses and eucalyptus stems
- Hot glue gun, wire cutters, and hanging ribbon
Instructions
- Apply X, O, X, and O letters in pink foil onto the four wood slices.
- Glue the lettered wood slices along the lower arc of the hoop.
- Trim floral stems and eucalyptus branches with wire cutters.
- Cluster blooms and foliage along the top curve and attach a ribbon at the top.
Heart Pattern Paper Mailbox with Valentines
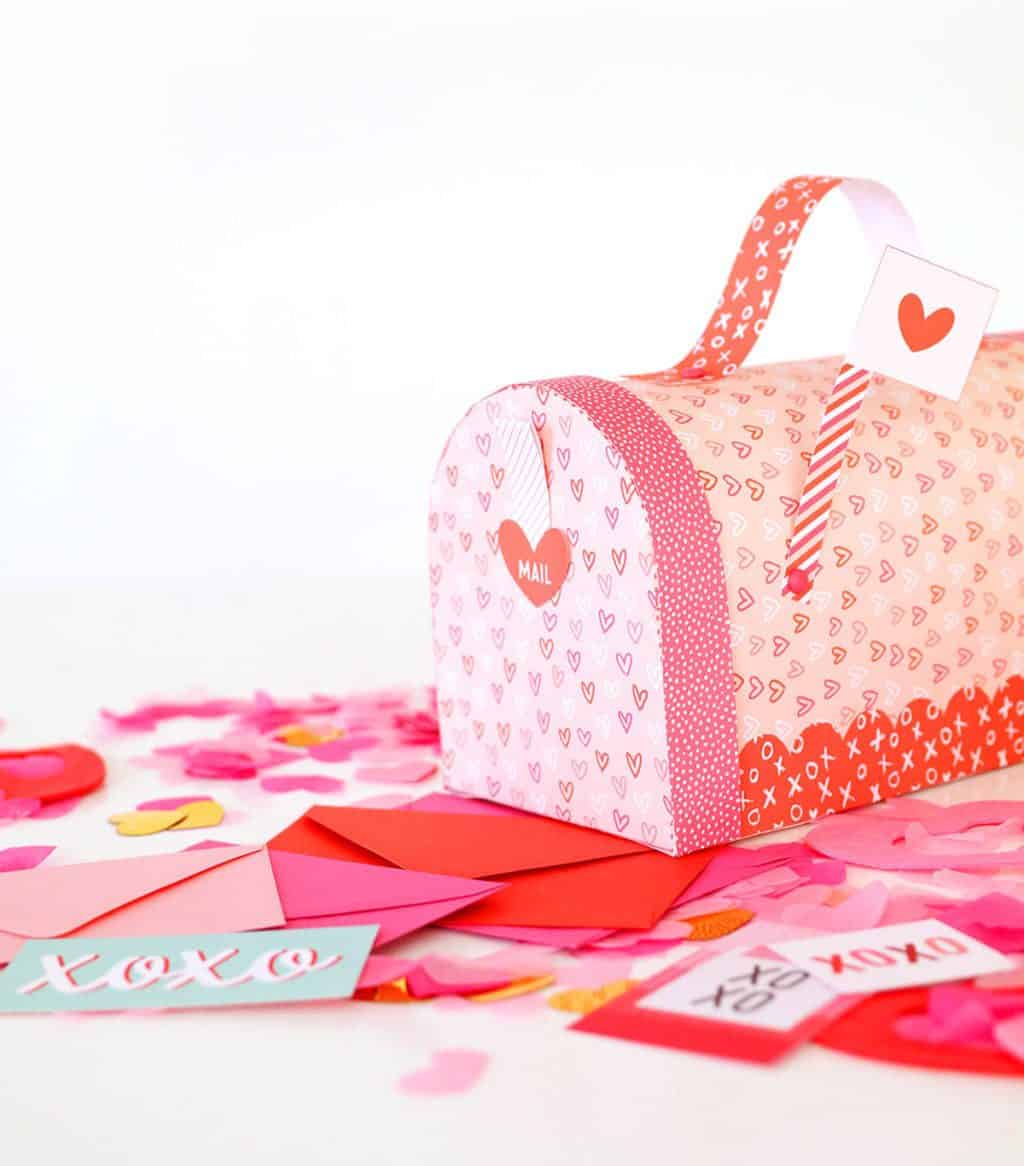
Remember how fun it was to leave little Valentine notes for everyone? This paper mailbox brings back that feeling with its heart prints, striped flag, and tiny envelopes. Set it on a table with blank cards and let family or guests leave messages throughout the day.
Supplies
- Patterned cardstock with hearts, polka dots, and XOXO prints
- White cardstock and red cardstock
- Striped paper straw or dowel for the flag
- Scissors, ruler, craft glue, and double sided tape
Instructions
- Score and fold cardstock into a curved top mailbox body and base.
- Add polka dot trim along the front rim and glue a heart MAIL tag to the door.
- Roll or cut a striped flag post topped with a red heart square.
- Fold small envelopes and cut XOXO cards to place beside the mailbox.
Fabric Wrapped XO Letters and Floral Art
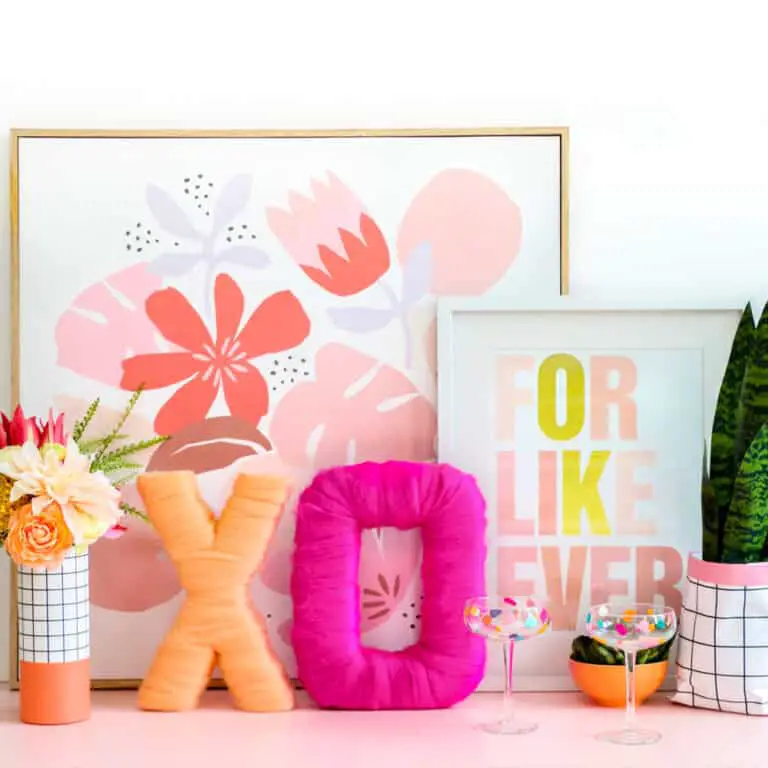
These oversized XO letters make a mantel feel playful without needing a pile of decorations. I like the contrast between the soft peach X and bright pink O, especially against the colorful floral art behind them. A few patterned vases nearby keep the arrangement relaxed and collected.
Supplies
- Large papier mache or cardboard X and O letters
- Stretchy fabric or jersey strips in peach and hot pink
- Hot glue gun and scissors
Instructions
- Wrap peach fabric snugly around the X letter and secure ends with hot glue.
- Wrap hot pink fabric over the O letter, tucking edges cleanly inside the opening.
- Stand both letters upright on a shelf or mantel next to framed art and plants.
Conversation Heart Door Wreath
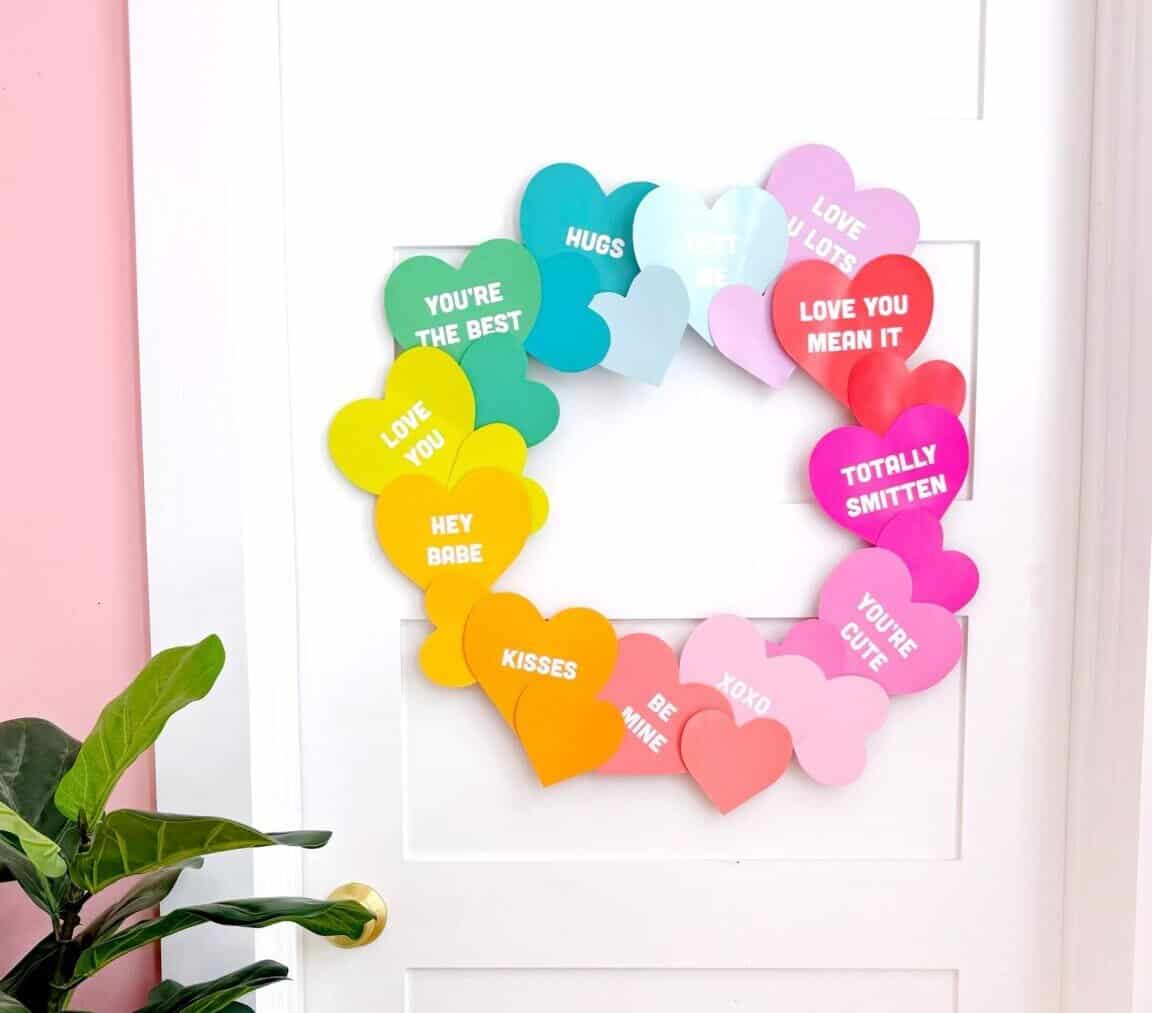
A rainbow of conversation hearts on the front door is such a happy surprise. The overlapping paper shapes make a full circle, while little phrases like HUGS and XOXO give people something to notice up close. I’d use sturdy cardstock and hang it indoors or on a protected door.
Supplies
- Heavy cardstock in teal, mint, yellow, orange, red, pink, and lavender
- White vinyl lettering or white paint pen
- Heart template or cutting machine
- Foam glue dots or double sided tape
Instructions
- Cut plenty of hearts in matching colors and sizes.
- Add short phrases like HUGS, KISSES, LOVE YOU, and XOXO onto selected hearts.
- Arrange hearts in an overlapping ring shape on your door or wreath backing.
- Secure each heart firmly so the circle holds its shape.
Hanging Paper Hearts on White Branches

There’s a quiet charm to these white branches dressed with tiny paper hearts. The red and blush shapes move gently on their threads, and the little birds make the arrangement feel almost storybook-like. A simple pitcher is all you need to keep the display from looking too busy.
Supplies
- White painted branches or twigs
- Pitcher or tall vase
- Cardstock and glitter paper in red, pink, and blush
- Thin thread or twine, scissors, and mini clip birds
Instructions
- Cut pairs of hearts from red, pink, and glitter paper.
- Crease each heart lightly down the center for gentle dimension.
- Tie thin threads to the hearts and hang them at varied heights from the branches.
- Set branches in a pitcher and clip small birds onto select twigs.
Eucalyptus and Rose Hoop with Love Sign
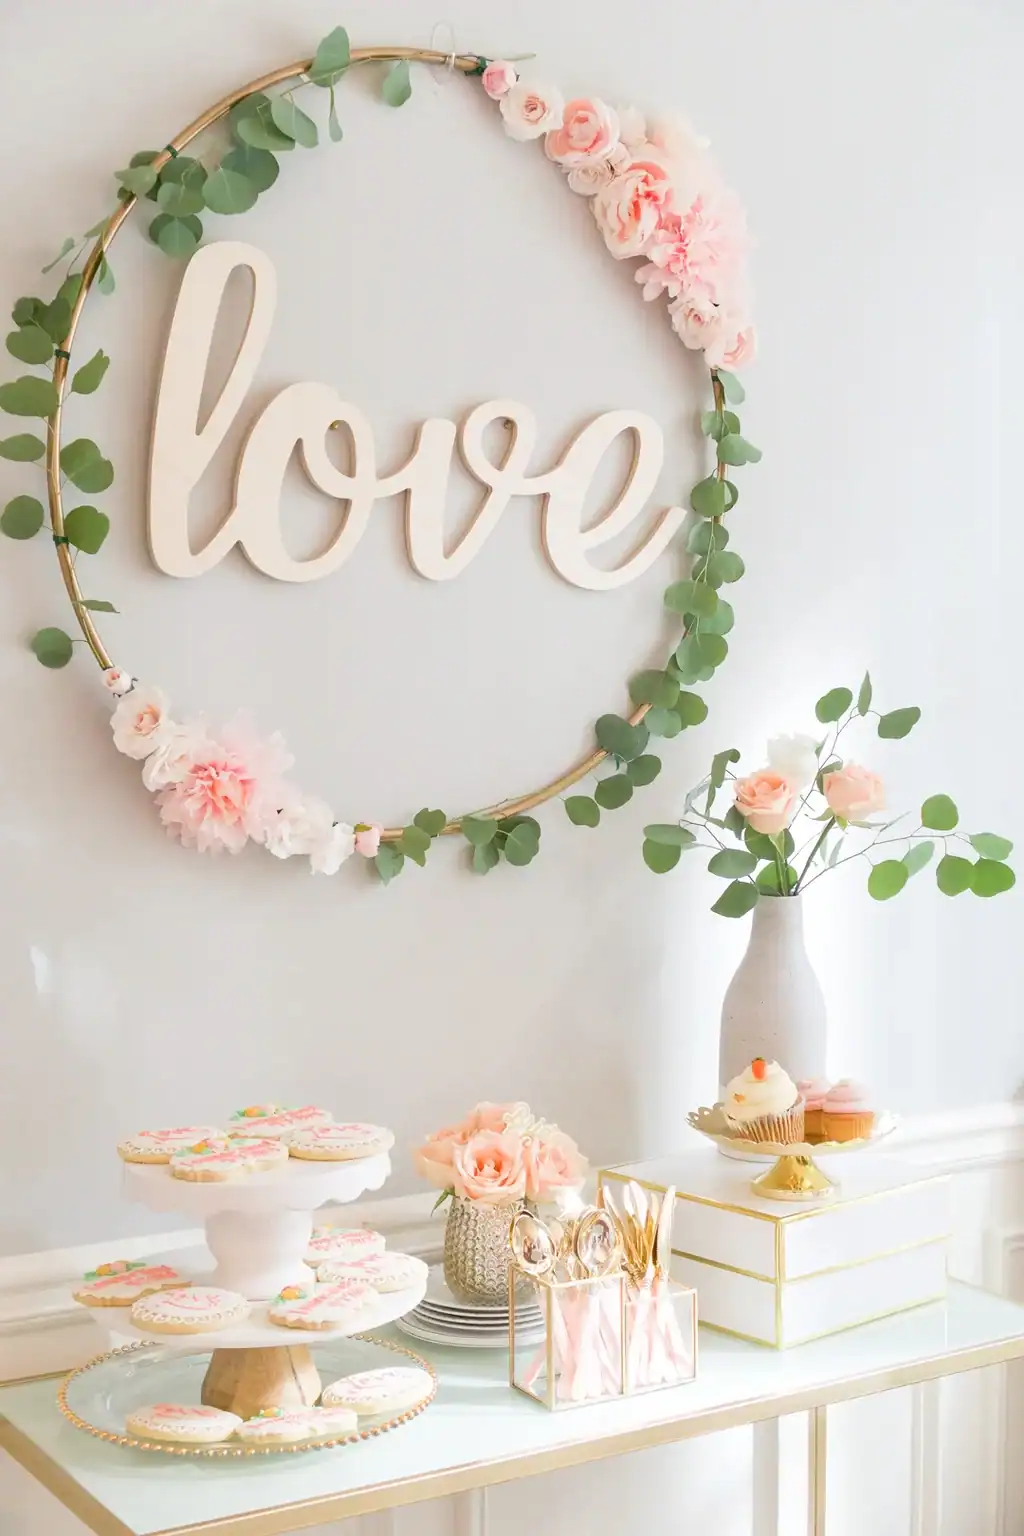
I love how the wooden love lettering stretches across this floral hoop instead of sitting underneath it. Soft roses and eucalyptus frame the word without covering it, giving the whole piece an airy look. It would be lovely above a dessert table or as a simple wall accent for February.
Supplies
- Large wooden or metal hoop
- Large wooden cursive love cutout
- Faux eucalyptus stems and blush or pink roses
- Floral wire, hot glue gun, and scissors
Instructions
- Position the wooden love sign across the center of the hoop and secure it in place.
- Attach eucalyptus stems around sections of the hoop frame.
- Glue blush roses and small blooms into clusters along opposite sides of the ring.
- Hang the finished hoop against a light wall for an eye catching backdrop.
Layered Heart Cone Trees
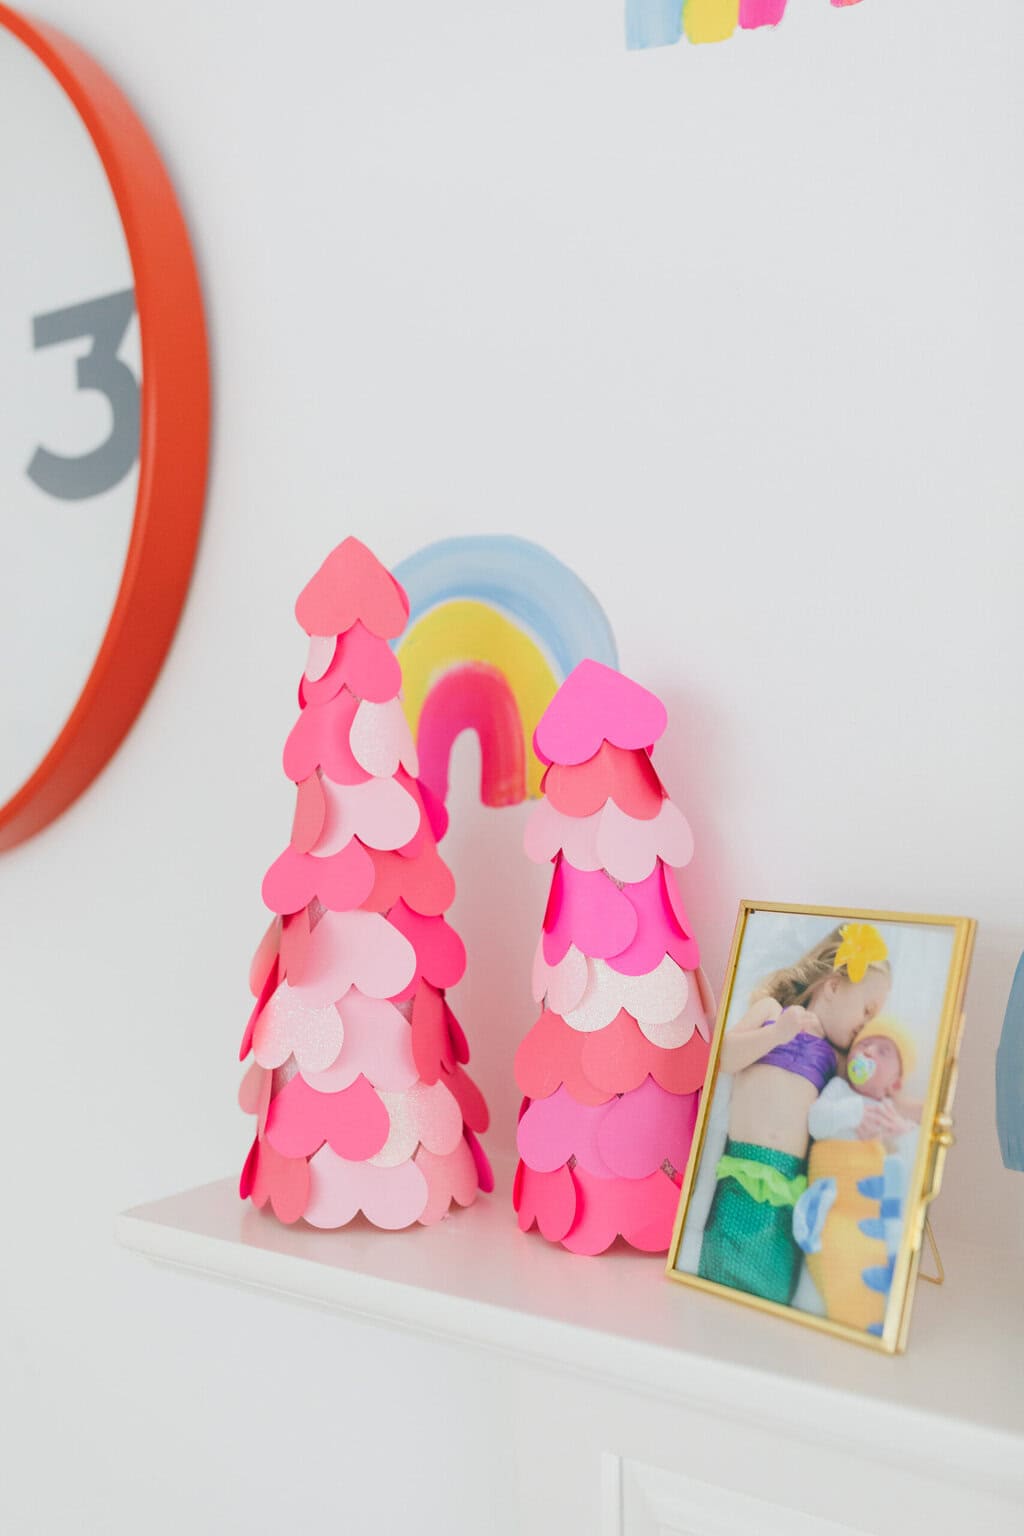
These little heart-covered trees are such a playful change from the usual Valentine wreath. Layering pink and coral paper hearts from bottom to top gives each cone a pretty, scalloped texture. I’d make two in different heights and set them together on a shelf.
Supplies
- Cone forms made from foam or rolled cardstock
- Cardstock and glitter paper in pink, coral, hot pink, and blush
- Heart punch or cutting machine
- Hot glue or craft adhesive
Instructions
- Punch or cut dozens of hearts in varied shades of pink and coral.
- Start at the bottom edge of each cone and glue hearts in overlapping rows.
- Work upward toward the top tip while mixing solid and glittery hearts.
- Finish the crown with a single upright heart at the peak.
Conclusion
There’s something really satisfying about seeing a handmade project find its place in your home, especially when it started with a few simple supplies on the kitchen table.
I love that these Valentine’s crafts don’t all have to be traditional red and pink decorations. You can play with soft colors, natural textures, cheerful patterns, or whatever feels more like your style.
And if one project doesn’t turn out exactly as planned, that’s part of the fun. Sometimes those little handmade details are what make a piece feel special.
Pick a craft that catches your eye, enjoy the process, and don’t worry too much about getting every detail right.
If you found a few ideas worth trying, share this collection with your friends and family. Someone might be looking for a sweet little project to make this Valentine’s Day, too.