
Cleaning a fixed chicken coop takes time. The ground becomes muddy, manure builds up, and the grass disappears. It also creates a better environment for flies and parasites.
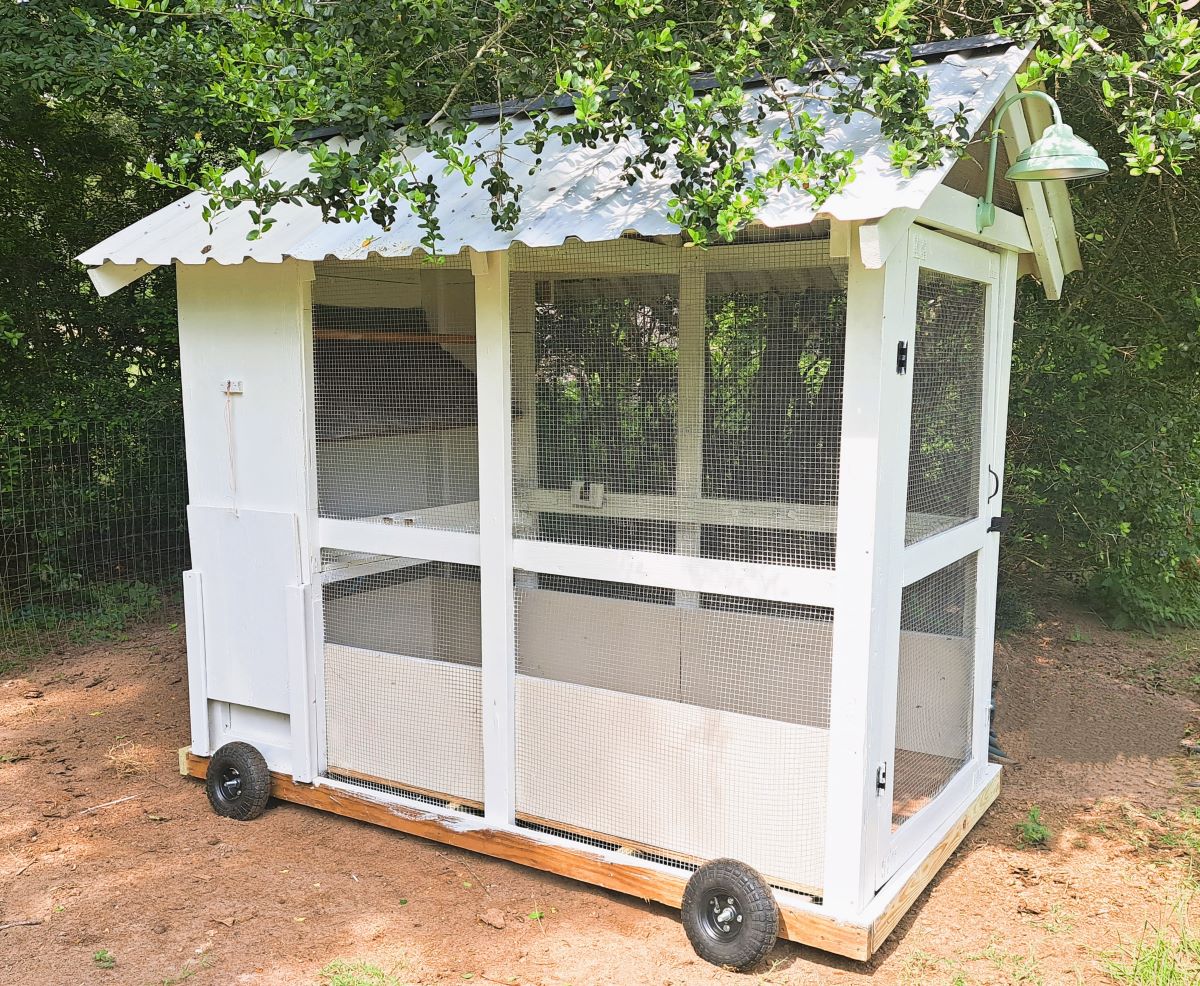
A chicken coop on wheels helps solve these problems. You can move it to fresh grass, spread manure across your yard, and give your flock a cleaner place to forage. Many people call this a mobile chicken coop or chicken tractor.
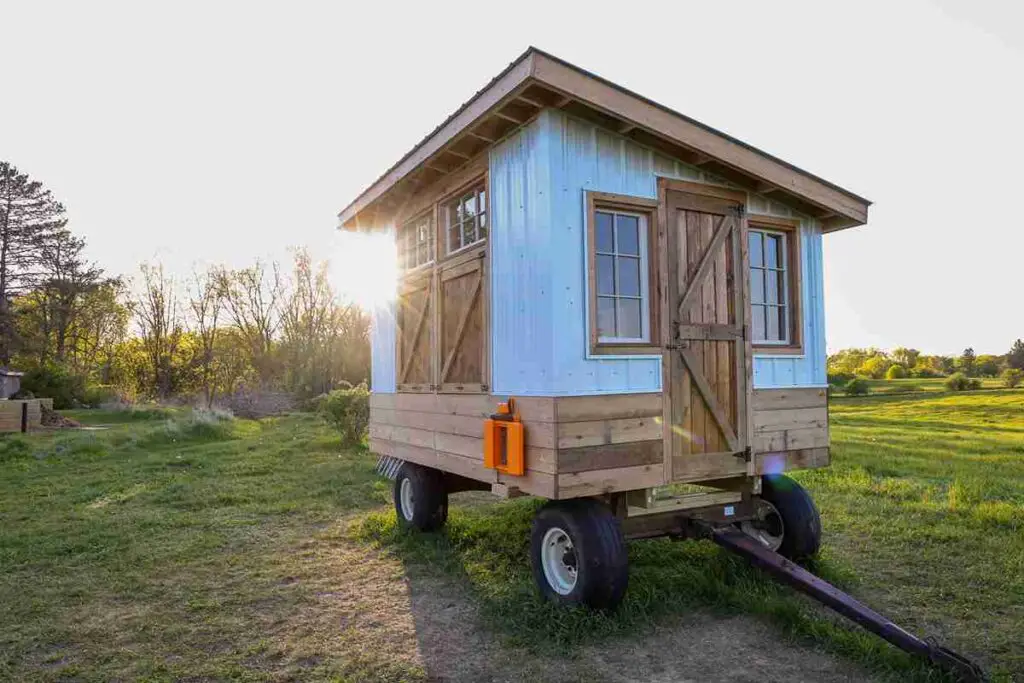
If you want to learn how to build a chicken coop on wheels, this guide walks you through every step. You’ll learn how to choose the right size, select durable materials, build a strong frame, install the best wheels, improve ventilation, protect your flock from predators, and place nesting boxes correctly.
Whether you’re building your first DIY chicken coop on wheels or replacing an old coop, these tips will help you build one that is safe, easy to move, and built to last.
Plan Your Coop Before Buying Materials
A few minutes of planning can prevent expensive mistakes.
Choose Your Flock Size First
Build for the number of chickens you plan to keep, not just the number you have today.
Common flock sizes include:
- 4 chickens
- 6 chickens
- 8 chickens
- 12 chickens
If you expect your flock to grow, leave extra space now instead of rebuilding later.
Give Chickens Enough Space
Crowded chickens become stressed and dirty.
Most university poultry guides recommend 2 to 3.5 square feet of indoor coop space per chicken. Birds also need outdoor space, especially if the coop is not moved every day.
Keep the Coop Light
A heavy coop is difficult to move.
Reduce weight by using:
- Simple framing
- Lightweight roofing
- Compact nesting boxes
- Only the materials you need
Before building, ask yourself one question.
Can one person move this coop without struggling?
Plan the Layout
Sketch the coop before buying lumber.
Include:
- Roost bars
- Nesting boxes
- Chicken door
- Access door
- Vent openings
- Wheels
- Handles
A simple layout helps you avoid design problems during construction.
Leave Room for Future Upgrades
You may want to add features later, such as:
- Automatic door
- Larger wheels
- Solar light
- Extra nesting box
Planning for these upgrades now makes future changes much easier.
Use the Right Chicken Coop Dimensions
Choose the coop size based on your flock.
| Chickens | Indoor Space |
|---|---|
| 4 | 8 to 14 sq ft |
| 6 | 12 to 21 sq ft |
| 8 | 16 to 28 sq ft |
| 12 | 24 to 42 sq ft |
Looking at mobile chicken coop plans can help you compare layouts before building. Pay attention to chicken coop dimensions, wheel placement, and door size.
Materials You’ll Need
Choosing quality materials makes the coop stronger, safer, and easier to move.
Lumber
Use:
- 2×4 lumber for the frame
- Exterior grade plywood
- Pressure-treated skids where chickens cannot touch the wood
- Exterior wood screws
Straight lumber makes building easier and creates a stronger frame.
Hardware
You’ll need:
- Heavy-duty hinges
- Gate latches
- Locking hasps
- Bolts and washers
- Exterior screws
Choose secure latches. Raccoons can open simple hook latches.
Predator Protection
Do not rely on chicken wire.
Chicken wire keeps chickens inside. It does not stop determined predators.
Use ½ inch galvanized hardware cloth for windows, vents, and the run. It provides much better protection against raccoons, foxes, and weasels.
Wheels
Choose wheels that match your yard.
Options include:
- Pneumatic tires for uneven ground
- Solid rubber wheels for low maintenance
- Garden cart wheels for medium sized coops
- Heavy duty axle
Larger wheels roll more easily over grass and bumps.
Roofing
Good roofing keeps the coop dry without adding unnecessary weight.
Popular choices include:
- Corrugated metal panels
- Polycarbonate panels
- Asphalt roofing panels
Choose a material that is durable, weather-resistant, and light enough to keep the coop easy to move.
Tools Required
You do not need a professional workshop to build a mobile coop.
Most builders can complete the project with basic tools.
You’ll need:
- Circular saw
- Drill
- Impact driver
- Tape measure
- Speed square
- Level
- Staple gun
- Tin snips
- Wheel wrench
If you don’t own a circular saw, many home improvement stores cut lumber to size before you take it home. A standard drill can also replace an impact driver for most parts of the build, although it may take a little longer.
Step by Step: How to Build a Chicken Coop on Wheels
Building a mobile coop is easier when you work one step at a time. Measure carefully before cutting lumber, and check that the frame stays square as you build. Small mistakes at the start become harder to fix later.
Step 1: Build the Base Frame
The base frame supports the entire coop, so build it first.
Start by deciding the finished size. A frame around 4 × 8 feet works well for four to six chickens, while larger flocks need a longer frame.
Cut 2 × 4 lumber to size and lay the boards on a flat surface. Join the corners with exterior-grade screws. Then install cross supports every 16 to 24 inches to prevent the floor from sagging.
Before moving on, measure both diagonal corners. If both measurements match, the frame is square. If they do not, adjust the frame until they do.
Finally, attach exterior plywood to create the floor. Leave small gaps around the edges if needed for drainage, but make sure the floor is strong enough to support people during cleaning.
Quick Tip
Keep the design simple. Extra framing adds weight without improving strength.
Step 2: Install the Axle
The axle carries the weight of the coop and helps it move smoothly.
Choose a heavy-duty steel axle that matches your wheel size and expected load. Position it slightly behind the center of the frame instead of placing it directly in the middle. This improves balance and makes the coop easier to lift from the front.
Secure the axle with strong brackets and bolts. Tighten every bolt fully, then check that the axle sits level from one side to the other.
Before adding the wheels, spin the axle by hand to make sure nothing rubs against the frame.
If your design uses two fixed wheels instead of four swivel wheels, the axle becomes even more important because it supports most of the coop’s weight.
Step 3: Attach the Wheels
Choose wheels based on the ground where the coop will be used.
Pneumatic tires work well on uneven lawns and soft soil. Solid rubber wheels need less maintenance and cannot go flat, making them a good choice for level yards.
Slide each wheel onto the axle and secure it with washers and locking pins or axle nuts. Follow the manufacturer’s instructions for the hardware you are using.
Once both wheels are installed, carefully lift the front of the coop and roll it across the yard.
Check for:
- Smooth movement
- Wheel wobble
- Loose hardware
- Uneven balance
If the front feels too heavy, move the axle slightly farther back. If the rear feels too heavy, shift it forward until the weight feels balanced.
The goal is a coop that one person can move without excessive effort.
Step 4: Build the Wall Frame
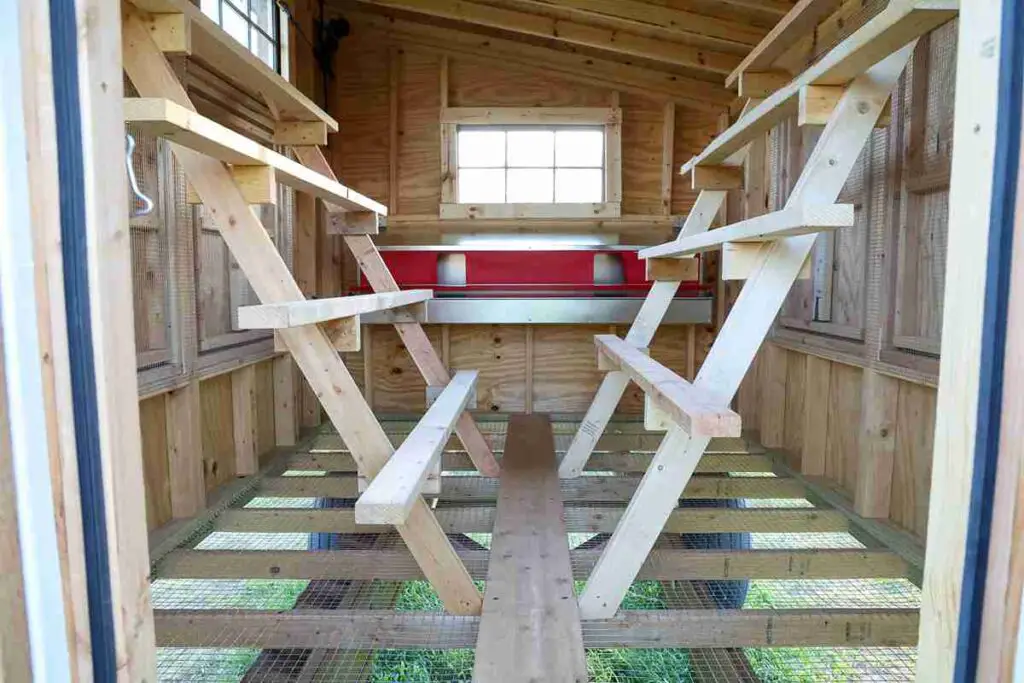
With the base complete, build the wall frames.
Most builders use 2 × 2 or lightweight 2 × 4 lumber to reduce weight. Build each wall separately before attaching it to the floor.
Include openings for:
- Chicken door
- Full-size access door
- Windows
- Ventilation
Place the access door where you can easily reach the nesting boxes and clean the coop.
Keep wall height practical. Around 5 to 6 feet allows enough room for cleaning while keeping the center of gravity lower.
Stand each wall upright and fasten it securely to the floor frame. Use temporary braces if needed until all four walls are connected.
Once assembled, check the structure with a level before tightening every screw.
Step 5: Add the Roof
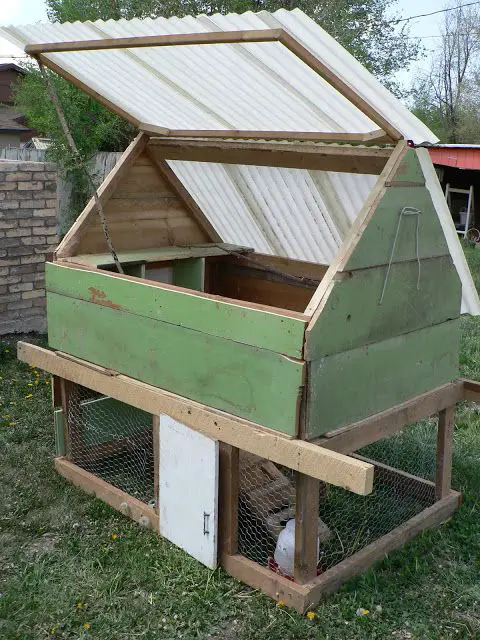
A good roof keeps the coop dry while allowing rainwater to run off quickly.
Choose a simple sloped roof instead of a flat one. A single slope or a basic gable roof both work well.
Build the roof frame using lightweight lumber, then attach your roofing material.
Popular options include:
- Corrugated metal panels
- Polycarbonate panels
- Asphalt roofing panels
Extend the roof a few inches past the walls. This helps keep rain away from vents and doors.
Leave ventilation openings near the top of the walls under the roof overhang. Cover every opening with half-inch galvanized hardware cloth to keep predators out while allowing fresh air to circulate.
When the roof is finished, spray it with a garden hose or wait for the next rainfall to check for leaks. Fix any gaps before adding nesting boxes and interior features.
Before Moving to the Next Step
Your coop should now have:
- A strong base frame
- Secure the axle and wheels
- Balanced weight
- Framed walls
- A weather-resistant roof
With the main structure complete, you’re ready to build the interior by installing nesting boxes, roost bars, and predator protection.
Step 6: Install Nesting Boxes
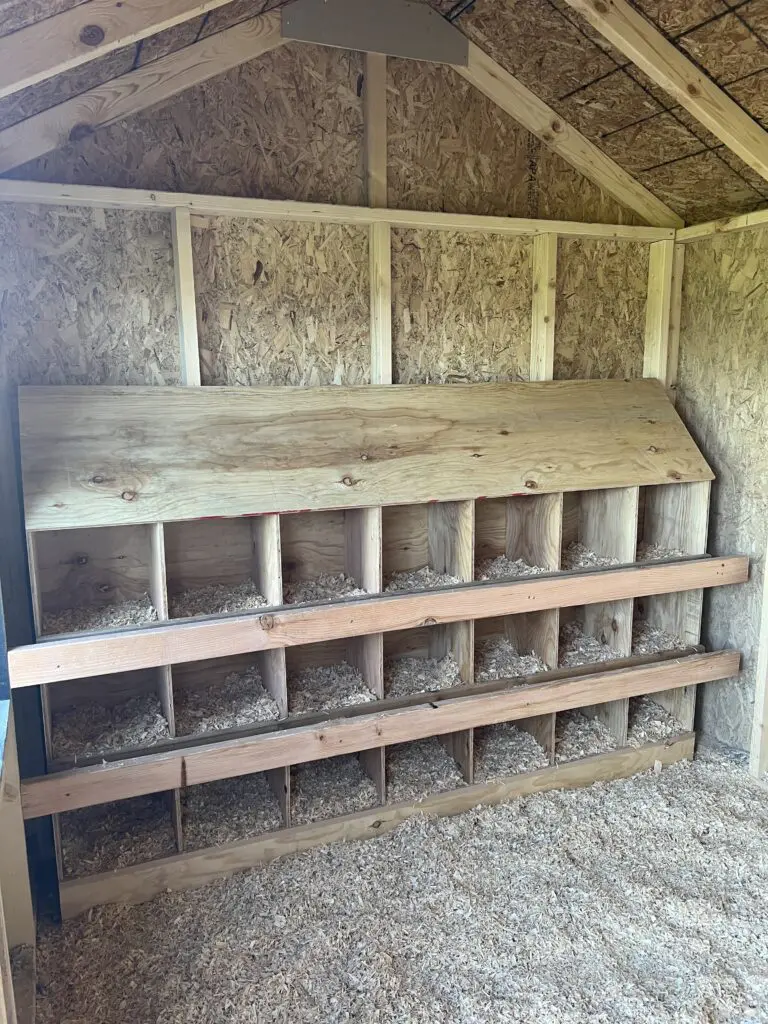
Nesting boxes give hens a quiet place to lay eggs.
A good rule is one nesting box for every four to five hens. Each box should be about 12 × 12 × 12 inches, which is large enough for most standard breeds.
Place the nesting boxes along one side of the coop. Keep them lower than the roost bars so chickens do not sleep inside them at night.
Add a small lip to the front of each box. This helps keep bedding and eggs from falling out.
Fill the boxes with clean straw, pine shavings, or another safe nesting material. Replace dirty bedding often to keep eggs clean.
Quick Tip
If possible, make the nesting boxes accessible from outside the coop. This lets you collect eggs without entering the coop.
Step 7: Add Roost Bars
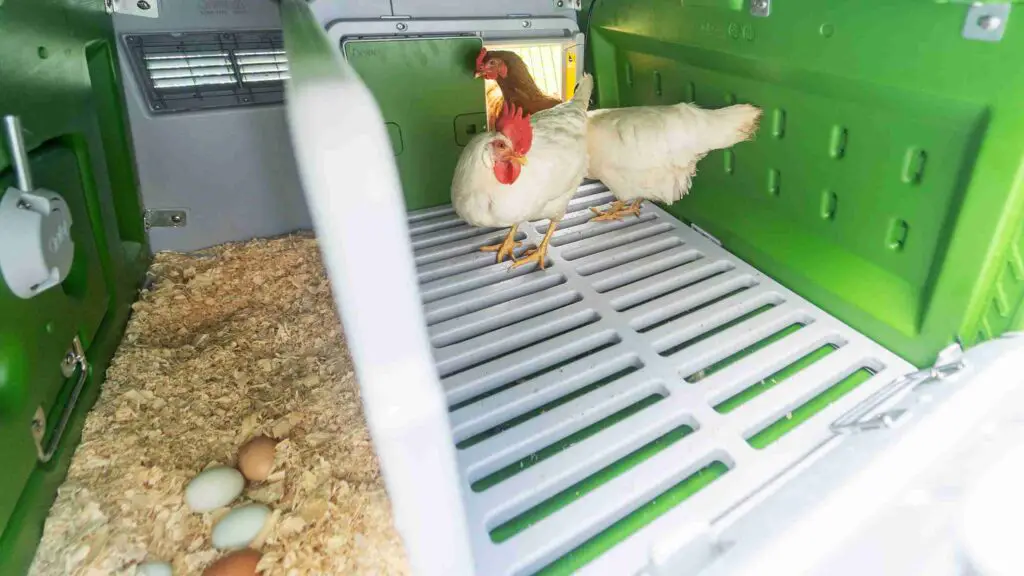
Chickens naturally sleep off the ground. Roost bars give them a safe and comfortable place to rest.
Provide 6 to 7 inches of roost space per chicken. Round the edges of wooden roost bars so they are easier on your chickens’ feet.
Install the bars higher than the nesting boxes. This encourages chickens to sleep on the roost instead of inside the nest boxes.
Leave enough space between bars so birds can move comfortably without crowding each other.
Place a removable dropping board under the roost if you want to make cleaning easier.
Step 8: Install Hardware Cloth
Now it’s time to protect the coop from predators.
Cover every opening with ½ inch galvanized hardware cloth.
This includes:
- Windows
- Vent openings
- The run
- Gaps under the roof
- Any large openings around doors
Attach the hardware cloth with heavy-duty staples or screws and washers. Pull it tight before securing it so there are no loose areas.
Inspect every corner for gaps. Even a small opening can allow predators to reach inside.
Do not use chicken wire for predator protection. It keeps chickens in, but many predators can tear through it or reach between the openings.
Step 9: Paint and Weatherproof
A weather-resistant finish helps your coop last longer.
Use an exterior paint or stain that is safe for outdoor wood. Paint only the outside of the coop and allow it to dry completely before moving chickens inside.
Pay extra attention to:
- Corners
- Cut the ends of the lumber
- Roof edges
- Door frames
These areas are more likely to absorb water.
If you use metal roofing, check that every screw is tight and sealed properly.
Before adding bedding, let the coop air out for several days so paint fumes disappear.
Step 10: Test the Coop
Before introducing your flock, make sure everything works as planned.
Move the coop across your yard.
Check that it rolls smoothly and stays balanced.
Open and close every door.
Test every latch.
Look for sharp edges, loose screws, or exposed nails.
Stand inside the coop if possible. Make sure you can easily reach the nesting boxes, clean the floor, and refill feeders and waterers.
Finally, check ventilation. Fresh air should flow through the coop without creating strong drafts where the chickens sleep.
Making small adjustments now is much easier than fixing problems after the coop is in use.
Final Inspection Checklist
Before your chickens move in, confirm that the coop has:
- A strong and level frame
- Secure wheels and axle
- A leak-free roof
- Well-placed nesting boxes
- Sturdy roost bars
- Hardware cloth on every opening
- Secure predator-resistant latches
- Good airflow
- Smooth movement across the yard
Once everything passes inspection, your DIY chicken tractor is ready for its first trip across fresh grass.
By following these steps, you’ve learned how to build a chicken coop on wheels that is safe, easy to move, and comfortable for your flock. The next step is learning how to keep it balanced, move it with less effort, and protect it from predators throughout the year.
Predator Proof Your Mobile Coop
Moving the coop does not stop predators. Your chickens still need strong protection every day and night.
Use Hardware Cloth Instead of Chicken Wire
Chicken wire is designed to keep chickens inside.
It does not stop raccoons, foxes, or other predators.
Cover all windows, vents, and the run with ½ inch galvanized hardware cloth. It is much stronger and harder to break.
Install Secure Latches
Some predators can open simple hook latches.
Use locking hasps or predator-resistant latches on every door and access panel.
Check that each latch closes tightly before leaving the coop overnight.
Close the Coop Every Night
Most predator attacks happen after dark.
Make it a habit to close and lock the coop each evening. If you are away often, consider adding an automatic chicken door with a timer or light sensor.
Check for Small Gaps
Inspect the coop often for openings around:
- Doors
- Roof edges
- Vent openings
- Wheel mounts
Even a small gap can allow a predator to reach inside.
Know the Common Predators
The animals you need to protect against depend on where you live.
Common predators include:
- Raccoons
- Foxes
- Dogs
- Snakes
- Hawks
- Weasels
Walk around the coop every few weeks and look for signs of digging, chewing, or loose hardware.
Ventilation, Shade, and Weather Protection
Good ventilation keeps chickens healthy in every season.
Without enough airflow, moisture builds up inside the coop. Wet air can lead to poor air quality and unhealthy living conditions.
Create Cross Ventilation
Install vents on opposite sides of the coop.
This allows fresh air to move through the coop while carrying moisture outside.
Place Vents Above the Roost
Position ventilation openings above the roost bars.
Fresh air should move through the coop without blowing directly onto sleeping chickens.
Protect the Coop From Rain
A roof with a slight slope helps rain run off instead of collecting on top.
Extend the roof past the walls to keep water away from doors and ventilation openings.
Provide Shade
During hot weather, move the coop under a tree or use a shade cloth if natural shade is limited.
Chickens are more comfortable when they have protection from direct afternoon sun.
Prepare for Winter
Keep ventilation open during winter, but block strong drafts.
Fresh air is still important, even in cold weather.
Maintenance Checklist
A few minutes of maintenance each week helps your coop last longer.
Weekly Tasks
- Move the coop to fresh ground.
- Replace dirty bedding.
- Inspect the wheels.
- Tighten loose bolts.
- Check for predator damage.
- Refill feeders and waterers.
Monthly Tasks
- Oil hinges.
- Wash feeders and waterers.
- Inspect hardware cloth for damage.
- Check the roof for leaks.
- Touch up paint where needed.
- Look for loose screws or warped wood.
Keeping up with these simple tasks helps prevent bigger repairs later.
Conclusion
Building a chicken coop on wheels starts with good planning. The right size, sturdy wheels, strong framing, proper ventilation, and reliable predator protection all work together to create a coop that is safe and easy to use.
Take your time during the build. Check each step before moving to the next one, and test the finished coop before adding your flock. Small adjustments now can prevent bigger problems later.
Now that you know how to build a chicken coop on wheels, sketch your design, gather your materials, and start with a simple frame. You can always add new features as your flock grows.



![How To Charge A Lawn Mower Battery - [Step-By-Step Guide] 9](https://mowerslab.com/wp-content/uploads/2022/02/How-To-Charge-A-Lawn-Mower-Battery-150x150.webp "How To Charge A Lawn Mower Battery - [Step-By-Step Guide] 10")