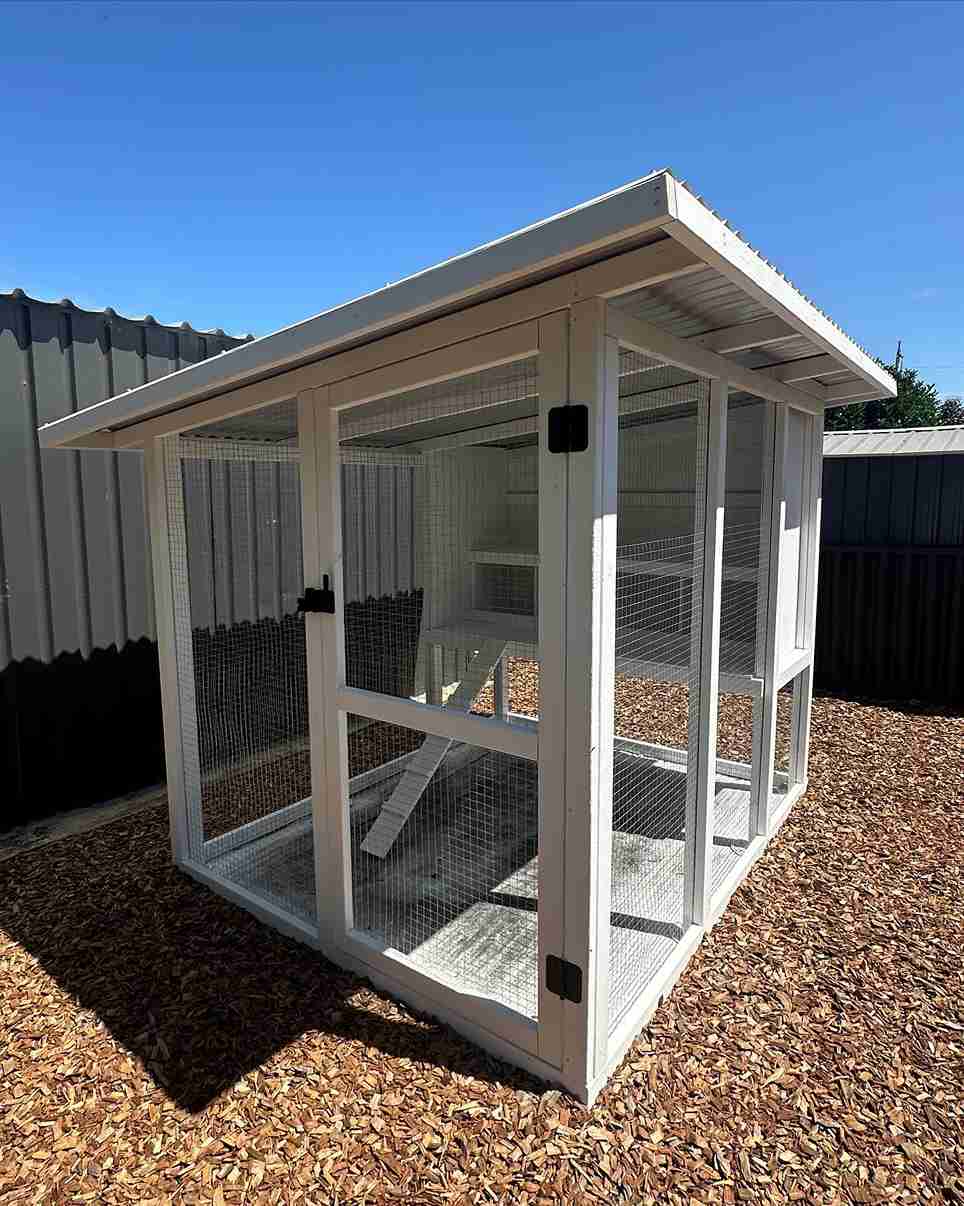

Building your own chicken coop costs less than buying a quality prebuilt one. It also lets you build a coop that fits your flock, backyard, and budget.
Many first-time builders make costly mistakes. A small coop, poor ventilation, or a weak foundation can lead to expensive repairs.
Small gaps also make it easy for predators to get inside. Even a narrow access door can make cleaning harder than it should be.
This step-by-step guide shows you how to choose the right location, buy the right materials, and build your coop in the correct order.
You’ll also learn how to add ventilation, install nesting boxes and roost bars, and protect your flock from predators. By the end, you’ll be ready to build a safe, durable chicken coop that will last for years.
Before You Build: Plan the Right Chicken Coop
A little planning can save time, money, and frustration later. Before buying materials, decide how many chickens you’ll keep, where the coop will go, and what type of coop fits your needs.
Decide Your Flock Size
The number of chickens determines the size of your coop and run. If you think you’ll add more birds later, build slightly larger now.
| Chickens | Minimum Coop Size |
|---|---|
| 4 | 16 sq ft |
| 6 | 24 sq ft |
| 8 | 32 sq ft |
| 10 | 40 sq ft |
For the outdoor run, allow 8 to 10 square feet per bird. This gives chickens enough space to move comfortably and reduces stress.
Tools and Materials You’ll Need
Having the right tools and materials before you begin helps the project go smoothly.
Basic Tools
You’ll need:
- Drill
- Impact driver
- Circular saw
- Speed square
- Tape measure
- Level
- Safety glasses
Materials
Use quality materials for a coop that lasts.
- Pressure-treated lumber for ground contact
- Framing lumber
- Exterior plywood
- Roofing panels or shingles
- Exterior screws
- Roofing screws
- Hinges
- Locking latches
- Hardware cloth
- Exterior paint or wood sealant
How to Build a Chicken Coop Step by Step
Step 1: Build the Foundation
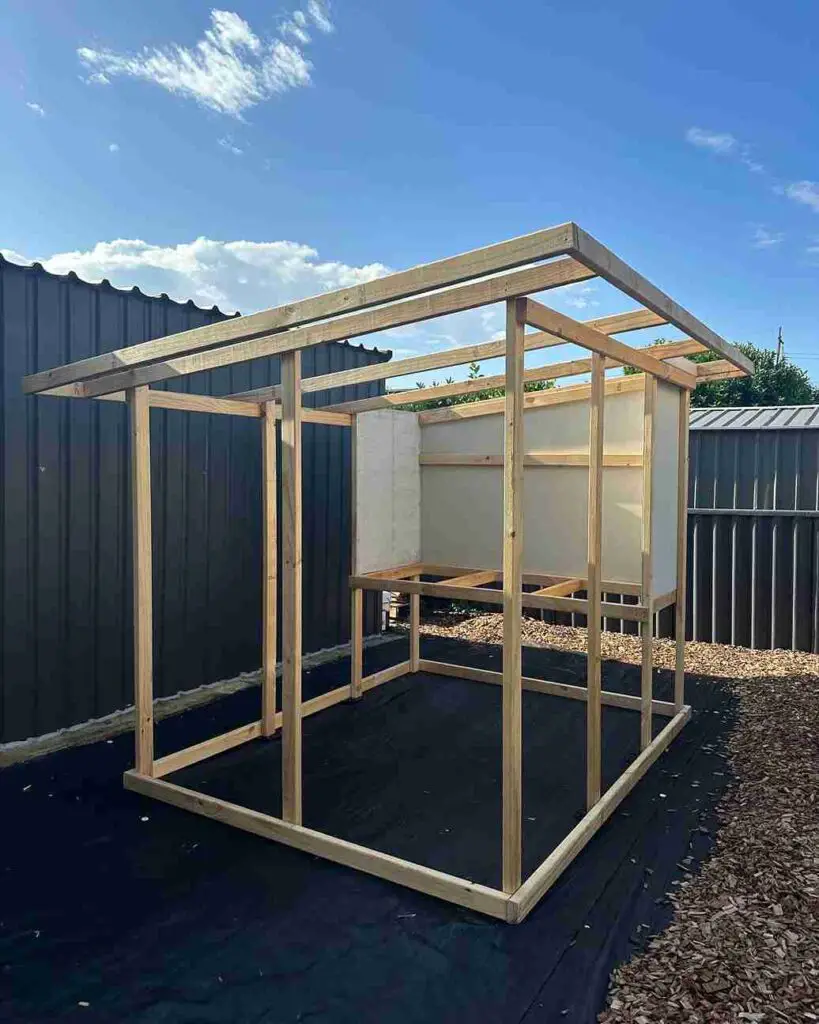
A strong foundation helps your chicken coop stay level, dry, and stable for years. If the base shifts or traps moisture, the entire structure can weaken over time.
Choose a Raised or Ground Foundation
A raised coop is the best option for most backyards. It improves airflow under the floor, keeps the wood dry, and makes it harder for rodents and predators to get inside.
A ground-level coop is easier to build but needs excellent drainage to prevent standing water and wood rot.
Build a Solid Base
Many DIY builders use pressure-treated 4×4 skids or concrete deck blocks to support the coop. Both options create a sturdy base and lift the structure off the ground.
Before securing the frame, use a level to make sure the foundation is flat. A level base makes every step that follows much easier.
Improve Drainage
Avoid placing your coop in low spots where rainwater collects. If needed, spread gravel under the foundation to improve drainage and reduce mud.
Common Beginner Mistakes
- Building directly on wet soil
- Skipping the leveling step
- Using untreated lumber for ground contact
- Choosing a low area that floods after rain
A few extra minutes spent building a strong foundation can add years to the life of your coop.
Step 2: Build the Floor Frame
Once the foundation is ready, build a floor that can support the weight of your chickens, nesting boxes, and anyone cleaning the coop.
Build the Frame
Use 2×4 lumber to build a rectangular frame. Add evenly spaced joists to strengthen the floor and prevent sagging over time.
Check the frame for square before attaching the flooring.
Install the Floor
Cover the frame with exterior-grade plywood. A thickness of 3/4 inch is a better choice than thinner sheets because it resists moisture, supports more weight, and lasts longer.
Secure the plywood with exterior screws instead of nails for a stronger hold.
Protect Against Moisture
Seal the floor edges and keep the coop raised above the ground to reduce moisture damage. This simple step helps extend the life of your chicken coop floor.
With the floor complete, you have a strong platform for building the walls.
Step 3: Build the Wall Frames
The walls give your coop its shape and support the roof. Measure carefully before cutting each piece to keep everything square.
Frame the Walls
Build each wall separately using 2×4 lumber, then stand and secure them to the floor frame.
Most backyard coops use studs spaced about 16 to 24 inches apart, depending on the size of the structure.
Plan Doors and Windows
Leave openings for:
- A pop door for chickens
- One or more windows for light and airflow
- A full-size access door for cleaning
A wider access door makes removing bedding and cleaning much easier. A width of 30 to 36 inches is a practical choice for most backyard coops.
Check Everything Before Moving On
Before installing the roof, confirm that:
- Walls are level
- Corners are square
- Doors open properly
- Window openings are the correct size
Taking time to fix small issues now is much easier than making adjustments after the roof is installed. With the walls complete, you’re ready to build the roof that will protect your flock in every season.
Step 4: Install the Roof
The roof protects your chickens from rain, snow, and direct sunlight. A well-built roof also helps keep the inside of the coop dry and improves ventilation.
Choose the Right Roof Style
The two most common options are:
Shed Roof
- Easy to build
- Uses fewer materials
- Good for small backyard coops
Gable Roof
- Better water runoff
- Creates more headroom
- Provides extra ventilation space
Choose the style that matches your budget and skill level.
Add the Roof Frame
Install rafters evenly across the top of the walls. Make sure they are securely fastened before adding roof sheathing.
Allow the roof to extend several inches past each wall. These overhangs help keep rain away from the siding and reduce water damage.
Install Roofing
Cover the roof with exterior sheathing, followed by roofing felt if needed, then your roofing material.
Metal roofing lasts longer than asphalt shingles and requires less maintenance, although it usually costs more upfront. Asphalt shingles are more affordable and work well for many backyard coops.
Once the roof is complete, check for any gaps where rain could enter.
Step 5: Add Ventilation Without Drafts
Fresh air is one of the most important parts of a healthy chicken coop. Without proper ventilation, moisture and ammonia build up quickly, leading to poor air quality and respiratory problems.
Understand the Difference
Ventilation allows fresh air to move through the coop and removes heat, moisture, and ammonia.
Drafts blow directly onto roosting chickens and can make them uncomfortable, especially during cold weather.
The goal is good airflow without creating a constant breeze where the birds sleep.
Place Vents Correctly
Install vents near the top of the walls or under the roofline. Warm, moist air naturally rises and escapes through these openings.
Cover every vent with hardware cloth to keep predators out while allowing air to circulate.
Good Vent Placement
- High on opposite walls
- Under roof overhangs
- Protected with hardware cloth
Poor Vent Placement
- At chicken height
- Directly behind roost bars
- Large uncovered openings
Good chicken coop ventilation keeps the coop dry, reduces odors, and creates a healthier environment throughout the year.
Step 6: Install Roost Bars and Nesting Boxes
With the structure complete, it’s time to build a comfortable space for your chickens.
Install Roost Bars
Roost bars give chickens a safe place to sleep at night.
Use smooth 2×4 boards with the wide side facing up. This gives chickens better balance and keeps their feet warmer during cooler weather.
Allow about 8 inches of roost space per bird so they can rest comfortably.
Position roost bars higher than the nesting boxes to encourage chickens to sleep on the perches instead of inside the nests.
Build Nesting Boxes
Most backyard flocks need one nesting box for every three to four hens.
A typical nesting box measures about 12 inches wide, 12 inches deep, and 12 inches high, which works well for standard-sized laying hens.
Place nesting boxes in a quiet, shaded area of the coop. Keep them slightly lower than the roost bars to reduce sleeping inside the boxes.
Add Bedding
Fill each nesting box with clean bedding such as:
- Pine shavings
- Straw
- Hemp bedding
Replace wet or dirty bedding regularly to keep eggs clean and reduce odors.
With the roost bars and nesting boxes installed, your coop is ready for its final and most important step, protecting your flock from predators.
Step 7: Predator-Proof the Coop
Building a sturdy coop is important, but keeping predators out is even more important. A single weak spot can put your entire flock at risk. Spend extra time on this step because it’s much easier to prevent problems than deal with them later.
Use Hardware Cloth Everywhere
Cover all windows, vents, and the outdoor run with hardware cloth. Unlike chicken wire, hardware cloth is made from strong welded steel mesh that is much harder for predators to tear or bend.
Secure it with heavy-duty staples or screws and washers instead of staples alone.
Protect the Perimeter
Many predators dig under fences to reach chickens.
To stop this, bury hardware cloth about 12 inches around the outside of the coop and run, or extend it outward in an apron around the perimeter and cover it with soil or gravel. This creates a barrier that makes digging much harder.
Install Secure Latches
Simple hook latches are easy for raccoons to open.
Choose locking latches, barrel bolts, or carabiner-style locks for every access door, nesting box lid, and run gate.
Secure the Roof and Run
Predators don’t always attack from the ground. Hawks and climbing animals can enter through the top if it’s left open.
Cover the run with hardware cloth or a solid roof, depending on your climate. Check that roofing panels are securely fastened and that there are no gaps along the edges.
Check Every Opening
Walk around the coop before adding your chickens.
Look for:
- Gaps larger than half an inch
- Loose hardware cloth
- Doors that don’t close tightly
- Spaces around pipes or vents
Small openings are enough for weasels, snakes, and rodents to enter.
Common Predators
Depending on where you live, your flock may face:
- Raccoons
- Foxes
- Dogs
- Weasels
- Snakes
- Hawks
Inspect your coop every few weeks. Tighten loose screws, repair damaged mesh, and replace worn latches before they become a problem.
Step 8: Paint, Finish, and Weatherproof
A few finishing touches will help your coop last longer and reduce future maintenance.
Paint the Exterior
Apply a high-quality exterior paint or stain to protect the wood from rain and sunlight.
Avoid painting the inside of the coop where chickens may peck at fresh coatings.
Seal Gaps
Use an exterior grade sealant around windows, doors, and roof joints to keep water out.
Check corners carefully, as these areas are more likely to leak.
Install Roof Flashing
Roof flashing helps direct water away from joints where leaks often begin.
Adding flashing around roof edges and openings can greatly increase the life of your coop.
Prepare for Winter
If you live in a cold climate:
- Check for roof leaks.
- Seal large gaps without blocking ventilation.
- Replace damaged weather stripping around doors.
- Keep vents open to reduce moisture buildup.
A weatherproof coop stays drier, lasts longer, and provides a healthier home for your flock.
Step 9: Add Bedding, Feeders, and Waterers
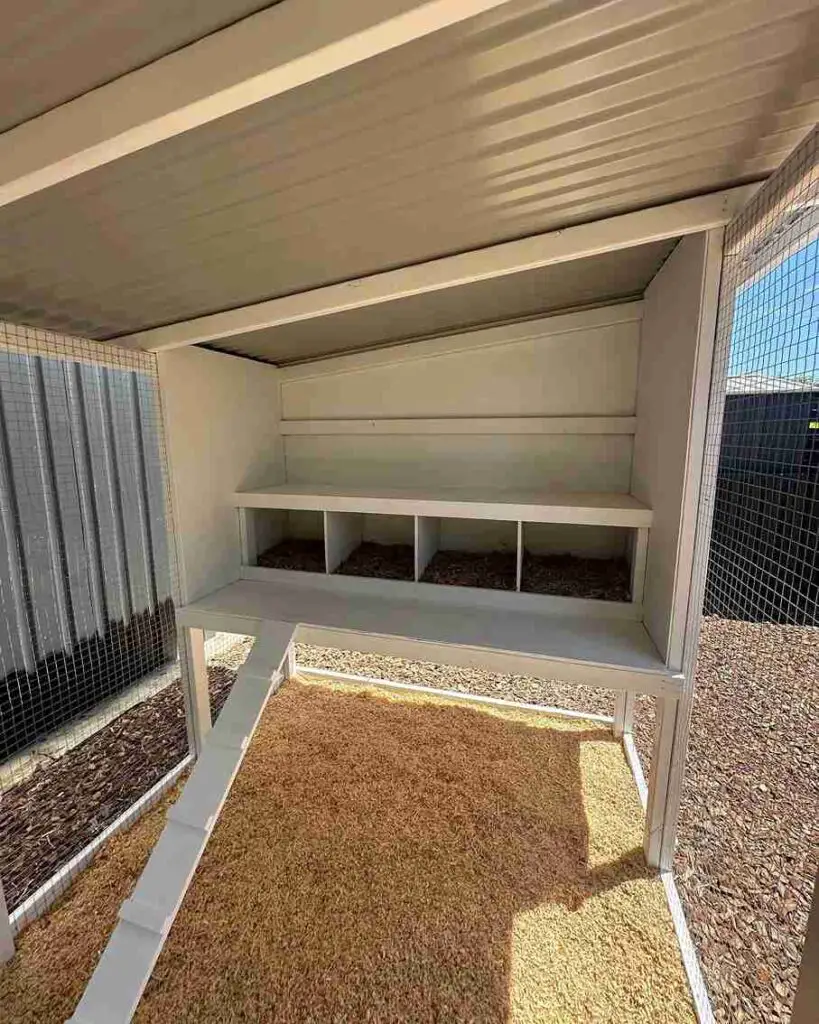
Your coop is almost complete. Now it’s time to make it comfortable for your chickens.
Choose the Right Bedding
Popular options include:
- Pine shavings
- Hemp bedding
- Straw
Pine shavings are one of the most common choices because they absorb moisture well and are easy to replace.
Place Feeders Correctly
Keep feeders off the floor to reduce wasted feed and help keep it clean.
Place them where all chickens can eat without crowding.
Position Waterers
Fresh water should always be available.
Keep waterers level and slightly raised to reduce dirt and bedding from getting inside. In freezing climates, consider using a heated waterer during winter.
Create a Dust Bath Area
Chickens naturally clean themselves by dust bathing.
Provide a dry container filled with a mix of sand, loose soil, and a small amount of wood ash if available. This helps control mites and keeps feathers in good condition.
Before bringing your chickens into their new home, do one final inspection. Make sure the doors lock securely, feeders and waterers are easy to reach, and there are no sharp edges or exposed screws that could injure your flock.
Chicken Coop Maintenance Checklist
A well-built coop still needs regular care. Small maintenance tasks keep your chickens healthy and help the coop last for many years.
Daily
- Refill feeders and waterers.
- Collect eggs.
- Check doors and latches.
- Remove wet bedding if needed.
Weekly
- Clean nesting boxes.
- Replace dirty bedding.
- Wipe feeders and waterers.
- Check for signs of pests or predators.
Monthly
- Inspect hardware cloth for damage.
- Tighten loose screws and hinges.
- Look for roof leaks.
- Clean dust and cobwebs from vents.
Seasonal
Spring
- Deep clean the coop.
- Inspect the foundation.
- Repair winter damage.
Summer
- Check ventilation.
- Add extra shade if needed.
- Watch for mites and flies.
Fall
- Seal small gaps.
- Clean gutters if installed.
- Replace worn bedding.
Winter
- Keep vents open.
- Remove snow around entrances.
- Check water frequently to prevent freezing.
Following this checklist only takes a little time but helps prevent expensive repairs and keeps your flock comfortable all year.
Conclusion
Learning how to build a chicken coop step by step is easier when you follow the right order. Start with a solid plan, choose quality materials, build a strong foundation, and pay close attention to ventilation and predator protection.
Finish the coop with comfortable nesting boxes, sturdy roost bars, and regular maintenance to keep your flock healthy.
A well-built coop can serve your chickens for many years while making daily care much easier.
Save this guide for future reference, download your favorite chicken coop plans, and start building your coop this weekend with confidence.