
Cold weather can turn a dry chicken coop into a damp, drafty space faster than you might expect. If you’re wondering how to prepare chicken coop for winter, the first thing to check is whether your chickens have a dry, safe place to sleep.
Chickens can handle cold temperatures better than many people think. But wet bedding, frozen drinking water, and poor airflow can cause serious problems. Even a small roof leak can leave your flock sleeping in damp conditions.
You don’t need to rebuild the entire coop to get it ready. A few repairs, clean bedding, proper ventilation, and a reliable water supply can make a real difference. The goal is to protect your chickens from wind and moisture while allowing fresh air to move through their shelter.
There are several ways to winterize a chicken coop, depending on your climate, flock size, and current setup.
These ten chicken coop winter preparation steps will help you spot problems early and get everything ready before freezing weather arrives.
Is Your Chicken Coop Ready for Winter?
Answer 8 quick questions to get your winter readiness score, roost space estimate, and personal improvement checklist.
🐔 Your Roost Space Estimate
📋 Your Winter Action Plan
Inspect Your Chicken Coop Before Winter
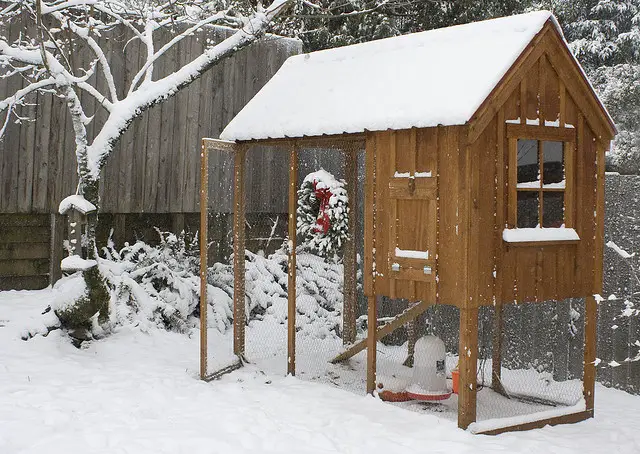
A small roof leak might not seem like a big deal in summer. But once winter arrives, that same leak can soak the bedding and make the coop harder to keep dry.
Start by checking the roof for missing shingles, cracks, and loose panels. Look inside after a rainy day. If you notice wet spots on the ceiling or floor, find the source and repair it before freezing weather begins.
Next, inspect the walls, windows, and doors. Make sure everything closes properly and that strong winds cannot blow directly onto your chickens while they sleep.
Pay attention to these areas:
- Roof: Repair leaks and replace damaged roofing materials.
- Walls: Check for cracks, loose boards, and unwanted openings.
- Doors: Tighten hinges and replace broken latches.
- Floor: Look for damp wood, soft spots, and signs of rot.
- Fencing: Repair damaged wire and check for predator entry points.
Don’t forget to inspect the coop’s foundation. Mice and rats can enter through surprisingly small gaps, especially when searching for warmth and food.
Once repairs are finished, check that ventilation openings remain clear. You want to stop unwanted drafts without trapping damp air inside.
Improve Ventilation Without Creating Drafts
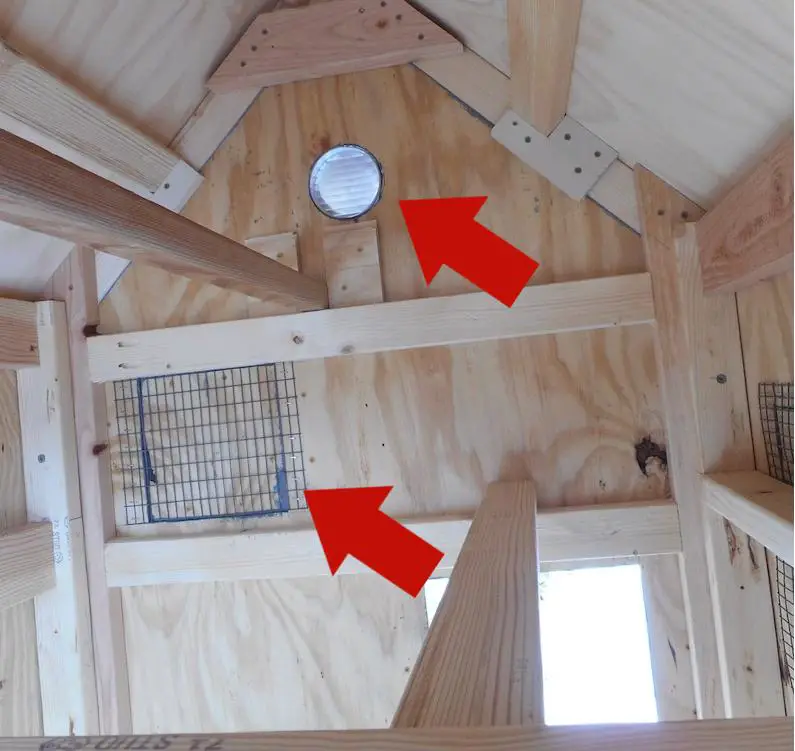
Closing every opening might seem like the easiest way to keep chickens warm. Unfortunately, that can create another problem.
Chickens release moisture when they breathe. Their droppings also add moisture to the coop. Without enough airflow, damp air collects around the walls, windows, and ceiling.
That moisture can increase the risk of frostbite and poor air quality.
The solution is to allow fresh air to move through the coop without blowing directly across your chickens.
Start by checking ventilation openings near the roof. These higher openings help moist air escape while keeping sleeping birds away from direct wind.
Here’s what to check:
- Keep ventilation openings above the roosting area when possible.
- Cover openings with secure, predator resistant wire mesh.
- Remove cobwebs, dust, and debris that block airflow.
- Check windows and walls for moisture each morning.
- Notice any strong ammonia smell when entering the coop.
According to the University of Minnesota Extension, good ventilation helps remove excess moisture and ammonia from chicken housing.
If you notice condensation on the windows, inspect the bedding and improve airflow.
A healthy winter coop should have fresh air without cold wind blowing directly onto the birds.
Seal Drafts and Insulate the Coop Where Needed
Not every chicken coop needs insulation. But every winter coop should protect chickens from direct wind.
Start by checking for gaps around doors, windows, and wall joints. These openings can let cold air blow across chickens while they’re resting.
You can seal unwanted gaps with suitable exterior caulk, wood strips, or replacement boards. Make sure the materials are safe and cannot be pecked or swallowed.
However, don’t cover the ventilation openings you need for fresh air.
If you live somewhere with long periods of severe cold, insulation may help reduce sudden temperature changes inside the coop.
Consider these areas:
- Walls: Add insulation inside protected wall spaces when needed.
- Roof: Check whether the ceiling allows excessive heat loss.
- Doors: Repair gaps around door frames.
- Windows: Make sure they close securely.
- Floor: Replace damaged boards and keep the surface dry.
Any insulation should be covered with solid material so chickens cannot reach it. Rodents should also be kept out of wall spaces.
The University of New Hampshire Extension explains that many chickens can manage cold weather without an insulated coop when they have proper shelter.
Focus on stopping drafts and keeping the interior dry before spending money on insulation.
Add Dry Bedding and Manage Winter Moisture
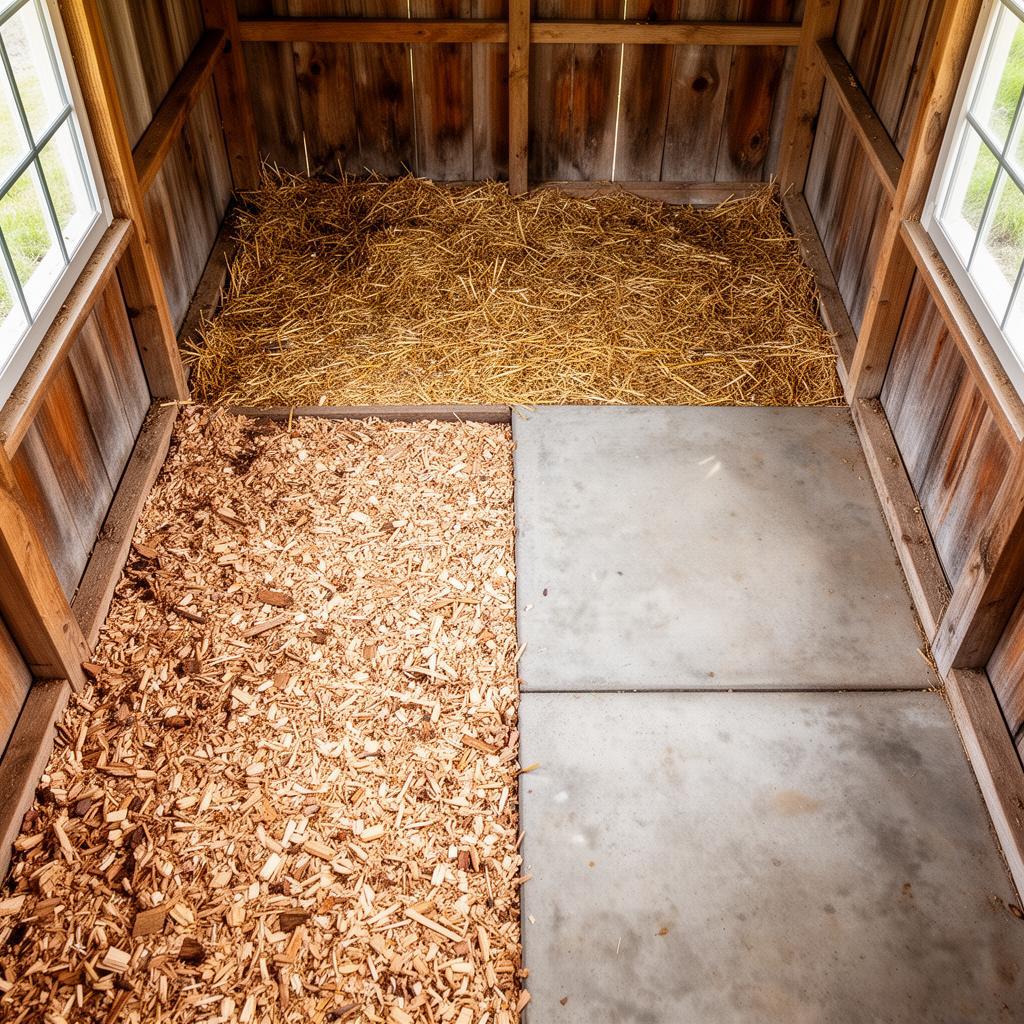
Wet bedding is one of the first things you should fix before winter.
When chickens walk and sleep on damp material, their feathers and feet can become wet. Cold weather makes those conditions harder to manage.
Begin by removing soaked bedding, old droppings, and any material showing signs of mold.
Once the floor is clean and dry, add fresh bedding.
Pine shavings are a common choice because they absorb moisture and are easy to replace. Straw can also work, but it needs regular checking because damp patches may remain hidden underneath.
You have two main bedding options.
Regular bedding changes: Remove dirty or wet material often and replace it with clean bedding. This approach makes it easier to spot moisture problems.
Deep litter method: Maintain a deeper bedding layer while managing droppings and moisture. This method requires careful attention to airflow and bedding conditions. It should never be used as an excuse to leave wet or moldy material inside.
The University of Minnesota Extension describes a bedding depth of around 4 to 6 inches for a deep bedding system.
Check beneath the roosting bars and around water containers every day. These areas often become dirty or damp first.
If the bedding feels wet or smells strongly of ammonia, remove the affected material and find the cause.
Prepare Safe Roosting Bars for Cold Nights
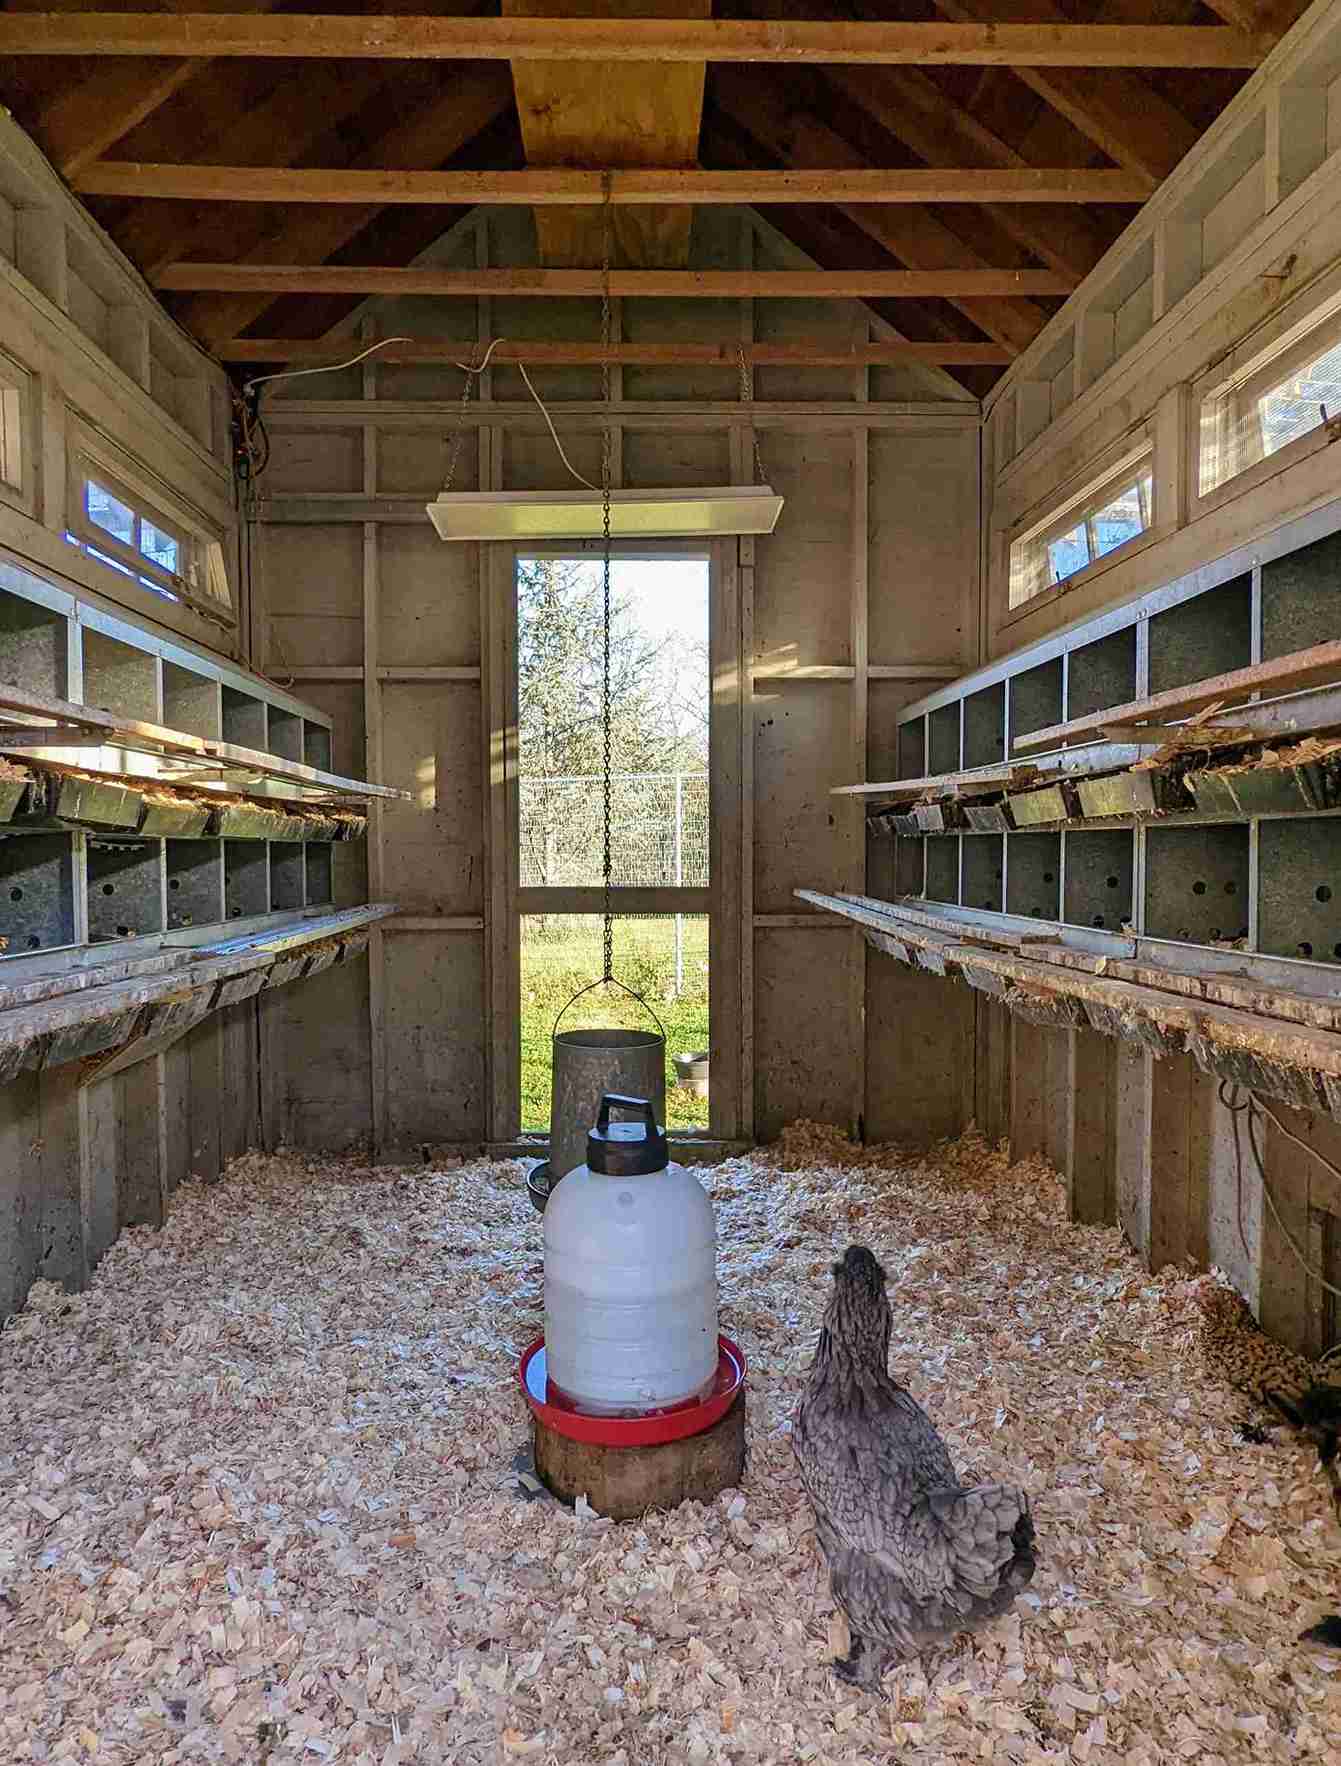
Chickens naturally prefer sleeping on raised roosting bars. A suitable roost helps them rest above the bedding and settle together at night.
Before winter, inspect every bar for loose screws, sharp edges, and damaged wood.
Wooden roosts are usually a practical choice. They provide a stable surface and avoid the cold contact that metal bars can create.
Make sure each chicken has enough room to settle without being pushed off.
The University of Minnesota Extension recommends approximately 9 inches of roosting space per chicken.
For example, a flock of six chickens would need around 54 inches of total roost space using that guideline.
You should also:
- Keep roosting bars away from direct drafts.
- Make sure the bars are firmly attached.
- Avoid placing them directly beneath leaking roofs.
- Provide safe access for smaller or older chickens.
- Keep enough space between birds and nearby walls.
Check the roosting area after dark. If chickens are crowded into corners or sleeping on the floor, inspect the setup and make adjustments.
A stable, dry sleeping area is more useful than adding extra decorations or unnecessary equipment.
Keep Chicken Drinking Water From Freezing
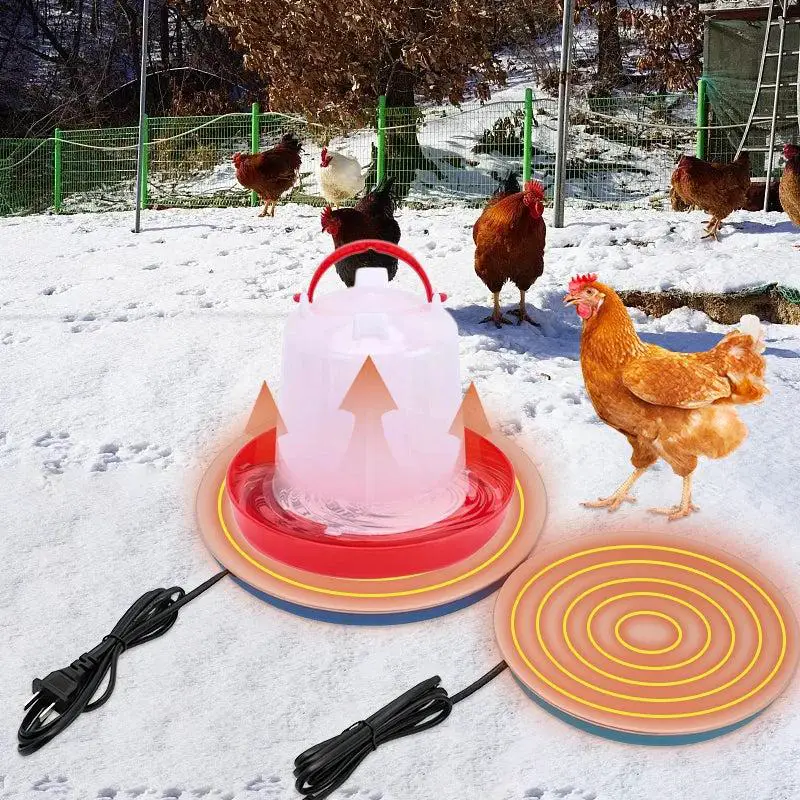
Finding a frozen water container on a cold morning is frustrating. But for your chickens, it can quickly become a health problem.
Chickens need fresh drinking water every day, even when temperatures drop below freezing. Without enough water, they may eat less and become dehydrated.
A heated poultry waterer is one option if your coop has a safe electrical supply. These containers are designed to help prevent water from freezing during cold weather.
If you don’t have electricity, you can use regular containers and replace frozen water throughout the day.
Here are a few things that help:
- Check water often: Inspect containers several times daily during freezing weather.
- Keep a spare waterer: Swap frozen containers with clean ones.
- Reduce spills: Place waterers on stable stands away from loose bedding.
- Protect electrical cords: Keep cables away from water, birds, and bedding.
- Clean containers: Remove dirt and droppings before refilling.
Never pour boiling water into a container that could crack from sudden temperature changes.
The University of Minnesota Extension recommends keeping a second waterer available in case the first freezes or stops working.
If you use a heated waterer, follow the manufacturer’s instructions. Have a qualified electrician install a suitable power supply rather than relying on permanent extension cords.
Decide Whether Your Chicken Coop Needs Heat
Does your chicken coop really need a heater during winter?
The answer depends on your climate, the condition of your coop, and the chickens you keep.
Healthy adult chickens that are used to cold weather can often stay comfortable in an unheated shelter. Their feathers help trap warmth close to their bodies.
However, young chicks, sick chickens, older birds, and some smaller breeds may need additional protection.
Expert recommendations also differ.
The University of Minnesota Extension recommends supplemental heat when coop temperatures fall below 35°F.
The University of New Hampshire Extension generally advises against heating most backyard coops because of fire risks. It notes that some vulnerable birds may need extra warmth.
That means you shouldn’t rely on one temperature to make every heating decision.
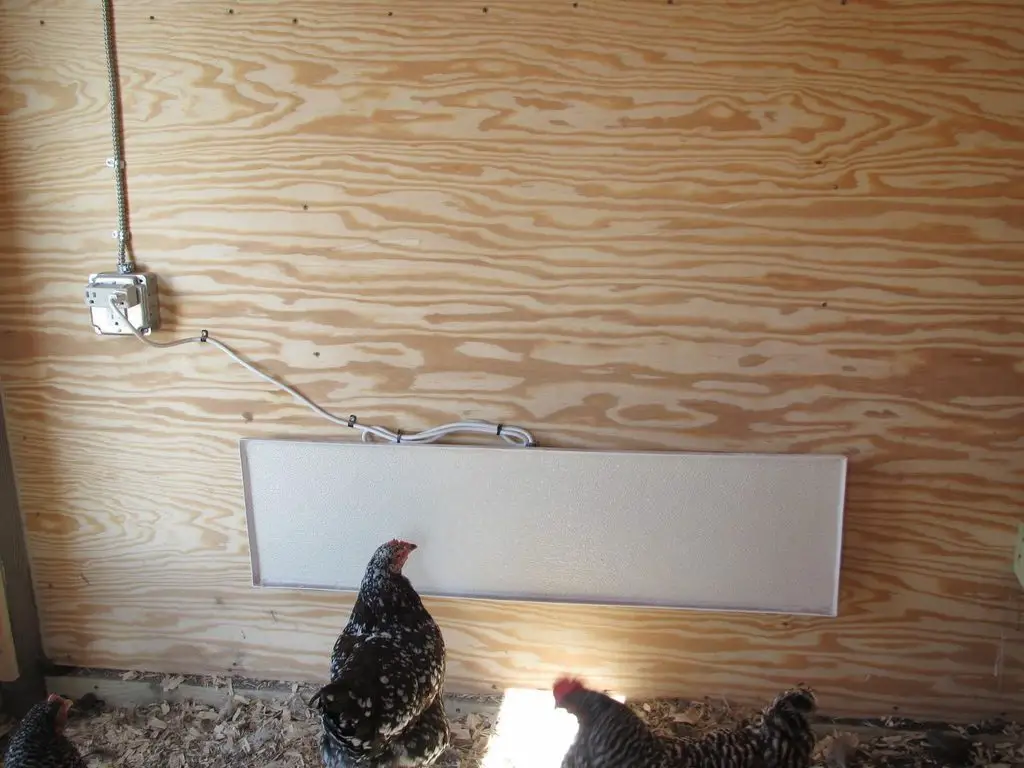
If supplemental heat is necessary, choose equipment designed for poultry housing. A properly installed radiant heating panel may be an option.
Avoid unsecured heat lamps. Hot bulbs, loose wires, and dry bedding can create serious fire hazards.
Before adding heat, check whether your chickens have dry bedding, enough food, unfrozen water, and protection from wind.
If a bird appears weak, unusually cold, or sick, contact a veterinarian rather than simply raising the coop temperature.
Protect the Chicken Run From Snow and Wind
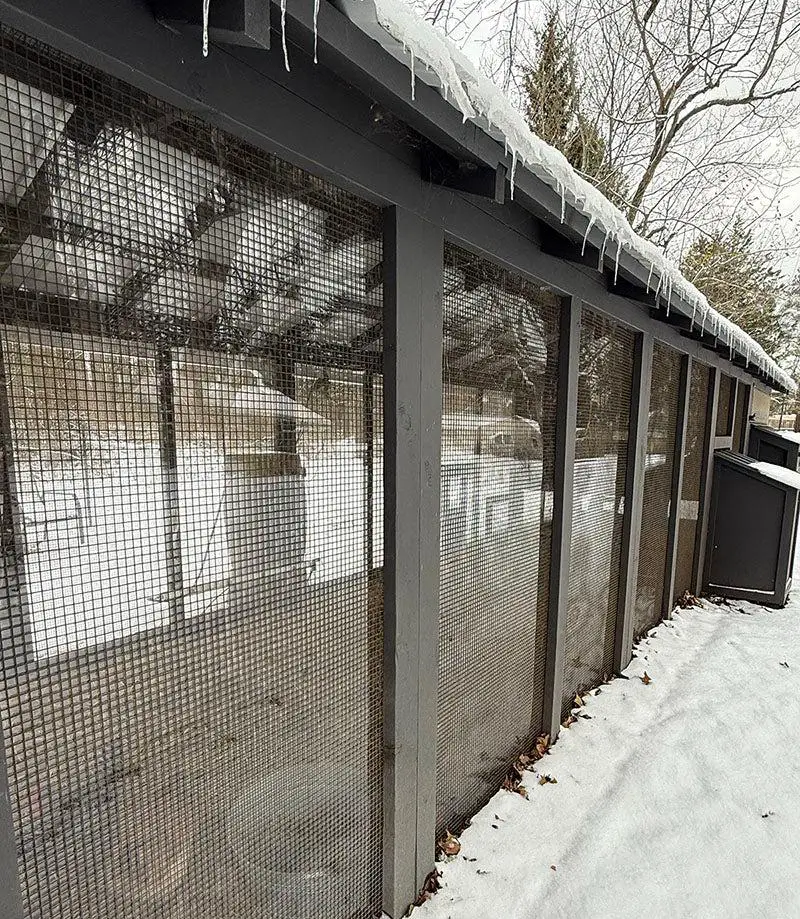
Some chickens will happily step onto a little snow. Others refuse to leave the coop once the ground turns white.
A sheltered outdoor run gives your flock somewhere to move, scratch, and explore during winter.
Start by checking whether snow and rain collect inside the run. If the ground stays wet, consider adding a properly supported roof over part of the space.
You can also install windbreaks along exposed sides. Secure outdoor panels firmly so they don’t come loose during storms.
A few useful improvements include:
- Add a covered section where chickens can escape rain and snow.
- Clear safe walking paths after heavy snowfall.
- Spread suitable dry bedding over muddy areas when needed.
- Check fencing and gates for storm damage.
- Remove ice from areas where chickens regularly walk.
Make sure any roof can safely support the snow loads expected in your area.
Wild birds are another concern. They can contaminate food, water, and outdoor spaces.
The USDA’s September 2026 guidance recommends repairing damaged screens, reducing standing water, and keeping wildlife away from poultry areas to lower disease risks.
Keep feed covered and use netting or secure roofing where appropriate.
A winter run should give chickens shelter and fresh air without exposing them to unnecessary weather or disease risks.
Adjust Feeding and Egg Collection for Winter
Your chickens may eat more when temperatures drop. Their bodies need energy to maintain warmth, especially during long, cold nights.
According to the University of New Hampshire Extension, chickens may consume up to 25% more feed during cold weather. That doesn’t mean every flock needs 25% more food, but it gives you a reason to watch how quickly feeders empty.
Continue offering a complete feed suited to your chickens’ age and purpose.
You can give small amounts of appropriate treats, but they shouldn’t replace balanced feed.
Check these feeding habits throughout winter:
- Keep enough regular feed available.
- Watch for birds losing weight or struggling to eat.
- Store feed in dry containers that rodents cannot enter.
- Provide grit when chickens cannot find suitable small stones outdoors.
- Remove spilled feed that could attract pests.
Egg collection also needs extra attention.
Fresh eggs can freeze when left in nesting boxes for too long. Frozen eggs may crack, allowing bacteria to enter.
Collect eggs more often during freezing weather, especially after your hens usually finish laying.
Discard eggs with cracked shells.
Shorter winter days can also reduce egg production. This is normal for many laying hens.
Some keepers use supplemental lighting, but it isn’t required for basic winter care. If you choose to add lighting, use safe equipment and allow your chickens a regular period of darkness.
Create a Daily Winter Chicken Coop Checklist
Winter coop care doesn’t end after you’ve finished repairs.
A waterer can freeze overnight. Bedding can become wet after a storm. A loose door can suddenly let cold wind into the sleeping area.
That’s why a short daily routine matters.
You don’t need to spend hours checking the coop. Focus on the things that affect your chickens most.
Morning Checks
- Replace frozen water and clean dirty containers.
- Check that every chicken is moving and behaving normally.
- Look for condensation or strong ammonia odors.
- Remove wet bedding and visible manure buildup.
- Inspect doors, windows, and ventilation openings.
Afternoon Checks
- Check drinking water again during freezing weather.
- Make sure feeders contain enough food.
- Collect eggs before they freeze.
- Clear dangerous ice or heavy snow from access areas.
- Watch for birds that seem unusually weak or inactive.
Evening Checks
- Confirm that all chickens have returned to the coop.
- Make sure roosting bars are safe and accessible.
- Check that water is available.
- Secure doors and predator resistant latches.
- Inspect heating equipment if your coop uses it.
Keep a flashlight, spare water container, clean bedding, and basic repair supplies nearby.
After heavy snow or strong winds, inspect the roof and fencing before allowing chickens into any damaged area.
If you notice blackened comb tips, swollen feet, breathing problems, or unusual weakness, contact a veterinarian.
Common Winter Chicken Coop Mistakes to Avoid
Even a well built coop can develop problems when winter weather changes.
The biggest mistakes usually involve moisture, ventilation, and water access. Fortunately, most are easy to spot during daily checks.
| Common Mistake | Why It Matters | What to Do Instead |
|---|---|---|
| Closing every ventilation opening | Traps moisture and ammonia | Maintain protected airflow above roosting birds |
| Leaving wet bedding | Increases dampness and poor air quality | Remove wet material and fix the source |
| Using unsecured heat lamps | Creates a fire hazard | Avoid routine heating and use properly installed poultry equipment if needed |
| Forgetting frozen water | Prevents chickens from drinking | Check water several times during freezing weather |
| Ignoring roof leaks | Allows moisture to enter the coop | Repair damaged roofing before winter |
| Overcrowding the coop | Reduces roost space and adds moisture | Provide enough room for every chicken |
| Leaving feed exposed outdoors | Attracts rodents and wild birds | Use protected feeders and secure storage |
One mistake worth watching is sealing the coop too tightly.
Cold air isn’t the only concern. Damp air can make winter conditions much harder on your flock.
Winter Chicken Coop Preparation Checklist
Before the first hard freeze, walk around your coop and check each item below.
Your winter coop checklist
0/12 completed
Frequently Asked Questions
How Cold Is Too Cold for Chickens in a Coop?
There isn’t one temperature that is unsafe for every chicken. Cold tolerance depends on breed, age, health, feather condition, and how well the birds have adjusted to winter. Larger, healthy adult chickens often handle cold weather better than chicks or sick birds.
Watch for unusual huddling, weakness, or birds repeatedly lifting their feet. Keep the coop dry, protect roosts from drafts, and maintain drinking water. Contact a veterinarian if a chicken shows signs of cold injury.
Should I Insulate My Chicken Coop for Winter?
Insulation can help reduce heat loss, especially in areas with long periods of severe cold. However, many backyard coops don’t need insulation if they provide dry bedding, good airflow, and protection from wind.
If you add insulation, cover it with solid panels so chickens cannot peck at it. Also make sure rodents cannot reach the material.
Don’t block ventilation openings. Moisture must still escape, even when the outside temperature drops below freezing.
Do Chickens Need a Heat Lamp in Winter?
Most healthy adult chickens that are used to cold weather don’t automatically need a heat lamp. A dry coop with suitable roosts and protection from wind may be enough.
Heat lamps can create fire hazards when they fall, touch bedding, or have damaged electrical connections.
Some chicks and vulnerable adult birds may need supplemental heat. Use equipment designed for poultry and follow safety instructions. If you’re unsure, ask a poultry veterinarian or local extension specialist before installing a heater.
What Is the Best Bedding for a Chicken Coop in Winter?
Dry pine shavings are a practical choice for many backyard coops because they absorb moisture and are easy to remove. Straw can also work, although you need to check it carefully for damp patches.
Some chicken keepers use a managed deep litter system during winter. This requires proper ventilation and regular attention to bedding conditions.
Whatever material you choose, remove wet spots, watch for mold, and keep the floor dry. Clean bedding matters more than using one particular material.
Can Chickens Stay Outside in Snow?
Yes, many healthy adult chickens can spend time outside in snowy weather when they have safe shelter and a dry place to return to.
Some birds avoid snow, while others walk across it without much concern. Don’t force chickens to remain outdoors during severe weather.
Keep part of the run protected from wind and heavy snow. Clear dangerous ice, check their feet, and make sure they can return to the coop whenever they need shelter.
How Often Should I Clean a Chicken Coop in Winter?
Check the coop every day for wet bedding, manure buildup, and spilled water. Remove dirty material whenever you find it, especially beneath roosting bars and around water containers.
The frequency of larger cleanings depends on flock size, bedding type, ventilation, and how quickly the coop becomes dirty.
If you notice strong ammonia odors or condensation, clean the affected areas and improve airflow. A deep litter system also needs regular management rather than being left untouched throughout winter.
Conclusion
Preparing your chicken coop for winter doesn’t have to mean expensive upgrades or complicated equipment.
Start with the basics. Repair leaks, stop direct drafts, maintain ventilation, and give your chickens clean, dry bedding. Make sure they have safe roosting bars and fresh drinking water that won’t stay frozen.
Check the coop daily, especially after heavy snow, strong winds, or sudden temperature changes. Small problems are much easier to fix before they affect your flock.
The best time to prepare your chicken coop for winter is before the first hard freeze. That gives you time to make repairs and see what works for your chickens.
If you found this guide helpful, share it with friends and family who keep backyard chickens. It may help them avoid a few common winter mistakes, too.